
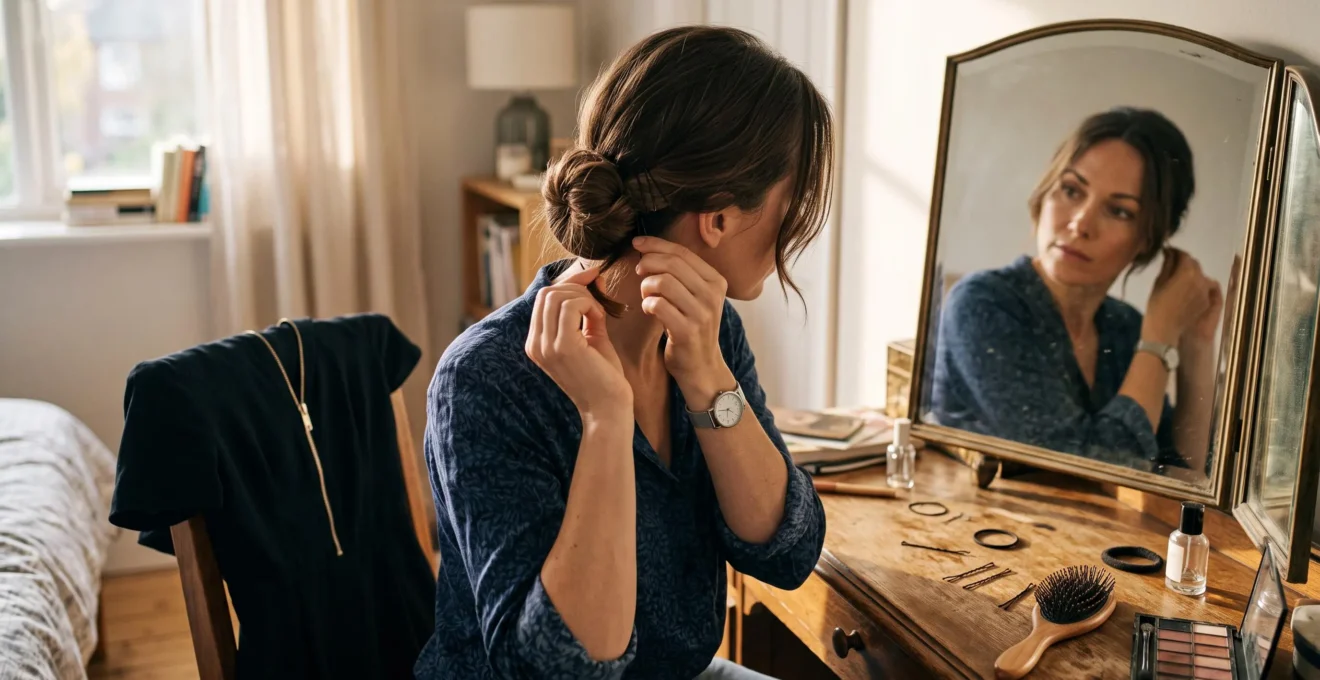
A softly gathered low chignon is one of the most reliable choices for an expensive-looking hairstyle that takes less than 20 minutes. It keeps the neckline clear, works with many occasion outfits and looks considered without demanding perfectly styled hair from root to tip. A sleek low ponytail offers an equally practical alternative, particularly for professional events.
The difference between elegant and overdone rarely comes down to how many minutes you spend styling. It comes down to proportion, controlled texture, flattering face framing and whether your hairstyle makes sense alongside your clothes.
For a work dinner, wedding reception or formal evening, the smartest approach is to finish the most visible areas, build a secure but comfortable shape and stop before unnecessary details make the result look stiff. These techniques are designed around ordinary tools and realistic preparation, rather than salon-level expertise.
Elegant hair in less than 20 minutes: the essentials
- Choose a low chignon for understated occasion elegance, a sleek low ponytail for professional polish or soft waves when you want a gentler finish.
- Spend more time on the crown, hairline and face-framing pieces than on sections concealed inside the finished style.
- Match accessories to your outfit, finish your hair after changing and use pins suited to your hair’s thickness and texture.
- Why Does an « Elegant » Hairstyle Sometimes Look Like Too Much for the Occasion?
- How Do You Create an Elegant Look With One Tool and 3 Pins?
- Sleek Low Pony or Soft Waves: Which Looks More Polished for a Work Dinner?
- The Accessory Clash Mistake That Makes Hair Look Less Elegant Instantly
- When Should You Do Your Hair on Event Day So It Doesn’t Pick Up Frizz From Changing Clothes?
- Bobby Pins or U-Pins: Which One Holds Better in Thick Hair?
- How Do You Build a 5-Minute Polished Routine Around One « Anchor Feature »?
- How Do You Make Hair and Makeup Last Through a Formal Occasion Without Touch-Ups Every Hour?
Why Does an « Elegant » Hairstyle Sometimes Look Like Too Much for the Occasion?
An elegant hairstyle can look excessive when its structure, shine or decoration feels more formal than the event itself. Perfectly sculpted curls and tightly polished updos demand attention, which may be appropriate at a black-tie occasion but distracting at a relaxed work dinner. The aim is to look considered, not conspicuously styled.
There is a useful distinction between visible effort and perceived effort. A hairstyle can require careful preparation yet appear effortless because its shape remains relaxed. Conversely, a heavily sprayed bun may announce every minute spent constructing it.
A simple mirror test helps: look at your full outfit from a few steps away. If the hair is the first thing you notice, ask whether that emphasis is intentional. At a formal celebration, it might be. At an understated professional gathering, reducing volume or ornamentation may improve the balance.
Rather than prescribing a single hairstyle for each occasion, adjust its finishing level.
| Occasion | Appropriate finish | What to avoid |
|---|---|---|
| Professional dinner | Smooth crown, controlled low pony or relaxed low bun | Elaborate sculpting or competing decorative details |
| Wedding as a guest | Softly structured chignon, gentle movement and flattering face framing | Unnecessary rigidity or a style that overwhelms the outfit |
| Black-tie event | More defined structure, carefully controlled shine and intentional accessories | Loose sections that look accidental rather than deliberate |
Personal familiarity also matters. Someone who regularly wears sculpted updos may carry a formal hairstyle naturally, while the same look could feel unfamiliar on someone who usually wears loose hair. This is a styling consideration, not a universal rule about how other people judge appearance.
Face framing is often the simplest adjustment. A little volume at the crown or a few softly arranged strands around the cheeks can make a formal updo feel less severe. The purpose is to complement your features, not force every face shape into the same formula.
Professional stylists discussing textured buns and low chignons in Allure‘s hairstylist advice on updos for thick hair describe ways to retain natural fullness while softening the finish with face-framing strands. That guidance is particularly useful for thick hair, although the ideal level of structure remains a matter of individual style.
Once the level of polish matches the occasion, the next challenge is achieving it with the fewest possible tools and movements.
How Do You Create an Elegant Look With One Tool and 3 Pins?
A low rolled chignon can be created with one smoothing tool and three well-placed pins when your hair’s length, weight and texture allow it. Concentrate on smoothing the crown and face-framing sections, then gather, twist and secure the remaining hair at the nape. The three-pin method is a minimalist starting point, not a universal guarantee of hold.
The most practical tool is whichever you already handle confidently: a smoothing brush, or a heated tool if your hair genuinely needs one. A brush is generally the simpler option when speed and reduced heat exposure matter. Keep a hair tie available if your chosen construction needs a secure base.
For a target of 20 minutes, use the following sequence:
- Minutes 0–4: Brush through dry hair, decide on your parting and smooth the crown and visible front sections.
- Minutes 4–8: Gather the hair low at the nape, leaving any desired face-framing pieces outside the gathered section.
- Minutes 8–13: Twist the lengths into a loose roll or compact chignon. Secure the structure with suitable pins, catching small sections near the base.
- Minutes 13–17: Check the shape from the front and sides, soften the hairline and adjust any uneven areas.
- Minutes 17–20: Test the hold, apply a little targeted hairspray if needed and inspect the result in natural or neutral light.
The sequence matters. Smoothing before gathering creates a more controlled silhouette because the visible hair is already arranged before tension is introduced. Gathering first and then tidying the surface often preserves more natural movement, particularly when you want a softer chignon.
The main mistake is spending most of the available time rebuilding the bun while neglecting the visible finish. A neat hairline and balanced silhouette can make a relatively simple construction appear much more intentional.
Three pins may be sufficient for lighter or shorter hair, but heavy, dense or slippery hair often needs larger pins, additional support or an elastic underneath. Never preserve an arbitrary pin count at the expense of comfort or security.
If the chignon collapses twice, switch to a simpler low twist. Gather the lengths together, roll them upwards once, tuck the ends inward and secure the twist where it meets the hair underneath. If necessary, add suitable pins rather than repeatedly rebuilding an unstable style.
Minimising unnecessary tension and heat is worthwhile. Gloucestershire Hospitals NHS hair-care advice explains that heat, friction and tightly pulled hairstyles can damage hair. A refined finish should not require painful pulling or repeated high-heat passes.
Your five-step, 20-minute chignon checklist
- Choose your parting and smooth the crown; confirm the parting looks balanced in the mirror.
- Set aside any face-framing pieces; check that both sides look intentional.
- Gather and roll the hair at the nape; confirm the bun sits comfortably against your head.
- Insert suitable pins and test the hold; the bun should remain secure during gentle head movement.
- Check the back with a second mirror or phone photo; finish with a balanced shape and no uncomfortable tension.
A quick chignon is valuable because it offers a defined shape without requiring perfect lengths. But if your evening involves work rather than a formal celebration, a ponytail may be an even better choice.
Sleek Low Pony or Soft Waves: Which Looks More Polished for a Work Dinner?
A sleek low ponytail is usually the more practical choice for a work dinner when you want controlled, understated hair that remains tidy through conversation and movement. Soft waves suit a warmer, more relaxed impression, particularly when your natural texture already supports them. Choose according to your hair, the dress code and how much maintenance you can tolerate.
The distinction is less about one style being inherently more professional and more about the visual impression each creates. A tidy low pony highlights clean lines, while soft waves introduce movement around the face and shoulders. Neither impression is scientifically fixed or appropriate for every workplace.
Consider three questions before deciding:
- What is your natural texture? Naturally straight hair may be quicker to gather into a smooth pony. Hair that already forms waves may be faster to refine than to straighten completely.
- How long must the hairstyle remain presentable? A well-secured pony generally requires less reshaping than loose waves exposed to wind, humidity or repeated movement.
- How formal is the setting? A corporate dinner with senior colleagues may favour a restrained finish, while a creative-industry reception may accommodate more texture and volume.
| Decision factor | Sleek low ponytail | Soft waves |
|---|---|---|
| Visual character | Controlled, minimal and structured | Relaxed, fluid and softly styled |
| Best starting point | Hair that brushes smoothly into place | Hair with natural bend or existing waves |
| Likely maintenance | Occasional smoothing at the hairline | Possible reshaping of flattened sections |
| Outfit pairing | Tailoring, higher necklines and statement earrings | Softer fabrics and outfits with simpler necklines |
Both styles have a point at which polishing becomes counterproductive. A perfectly rigid centre part and excessively tight ponytail can create a severe effect. Waves can look less intentional if different sections lose their shape and separate unevenly.
For a two-minute ponytail refresh, smooth the surface with your hands or brush and adjust the face-framing pieces without tightening the base. For waves, lightly rearrange the most visible front sections with your fingers and use a modest amount of appropriate finishing product if needed.
There is also a useful compromise: a loose, low half-up style that leaves some natural waves visible. It can keep the front sections away from the face while preserving the softness of loose hair. This works particularly well when the invitation gives little guidance beyond smart evening dress.
Whichever option you choose, accessories should reinforce the result rather than introduce a second competing focal point.
The Accessory Clash Mistake That Makes Hair Look Less Elegant Instantly
Hair accessories can make an elegant hairstyle appear less cohesive when their colour, material or visual weight competes with the rest of the outfit. A bold gold clip beside prominent silver jewellery, for example, may feel disconnected unless the mixed metals are deliberate. The simplest solution is to choose one dominant focal point and coordinate its finish with the clothing.
The mistake is not wearing different metals or combining textures. Mixed materials can look sophisticated when there is a clear relationship between them. Problems arise when several unrelated details demand equal attention within a small area around the face.
Imagine a hypothetical work dinner outfit: a charcoal dress, silver earrings and a metallic gold hair barrette. Each element may be attractive independently, but the barrette becomes a new visual emphasis. Replacing it with discreet pins or a smaller silver-toned accessory would create a quieter overall effect.
A useful styling rule is one prominent feature near the face. If your earrings are substantial, let the hairstyle remain relatively simple. If you want a decorative hair clip to be the centrepiece, consider less conspicuous earrings.
Pay attention to necklines. A high-necked blouse, embellished collar or intricately embroidered dress already creates detail near the hair. A low, unadorned updo often provides the visual space those garments need.
Even ordinary bobby pins can become decorative when their placement looks deliberate. Instead of leaving an isolated pin partly exposed, arrange suitable pins in a small, consistent fan or geometric pattern on a smooth section. Keep the placement comfortable and make sure decorative positioning does not weaken the style’s support.
For a more understated finish, tuck pins beneath the surface of the bun so the accessory serves only a structural purpose. This is particularly effective when the outfit includes jewellery, embroidery or a distinctive collar.
A cohesive appearance needs little extra decoration. Once the outfit and hairstyle agree visually, keeping the finish intact through dressing becomes the next priority.
When Should You Do Your Hair on Event Day So It Doesn’t Pick Up Frizz From Changing Clothes?
Finish your hairstyle after putting on clothes that must pass over your head, particularly when wearing fitted necklines or structured fabrics. Dressing after styling can disturb smoothed strands through contact and friction. If the hairstyle needs preparation time, complete the early stages beforehand and save the final arrangement and fixing for after you are dressed.
Friction is a sensible concern, although there is no established universal rule that every garment change will cause visible frizz. Its effect depends on your hair texture, the fabric, moisture and how much contact occurs.
For a typical evening occasion, an efficient sequence is:
- Complete skincare and allow products to settle before applying makeup.
- Apply makeup while your hair is clipped away from your face where necessary.
- Put on your outfit, taking care around the neckline and any fastenings.
- Arrange and secure the final hairstyle.
- Add earrings or delicate accessories, then carry out a final mirror check.
The order can change when your hair needs time to cool after heat styling. In that case, you could prepare the waves earlier, let them cool fully and keep them loosely protected during dressing. Release and finish them once your clothes are on.
If you must dress after styling, choose a garment that opens fully where possible. A front-fastening shirt or wrap-style layer is generally easier to remove without disturbing the hair than something pulled over a completed updo.
For items that cannot be avoided, move slowly and minimise contact between the neckline and the styled sections. Do not pull a garment through a hairstyle that is firmly anchored or likely to snag.
Timing matters as much as order. Hair finished many hours before an evening event may encounter humidity, cooking steam, travel and repeated handling. Schedule your final smoothing and fixing reasonably close to departure rather than automatically styling at the first available moment.
Hair that naturally responds to humidity may benefit from a familiar anti-frizz product, but adding unfamiliar products immediately before an important event introduces unnecessary uncertainty. Work with techniques you have already tested.
Even careful preparation cannot compensate for the wrong type of pin, especially when the hair is thick or slippery. Choosing the correct fastening method makes the final style more dependable.
Bobby Pins or U-Pins: Which One Holds Better in Thick Hair?
U-pins are often useful for supporting larger, fuller sections of thick hair, while traditional bobby pins are better suited to gripping smaller sections close to the scalp. Neither type universally holds better. A secure thick-hair updo may use both: larger pins for its shape and closed bobby pins for controlling shorter sections and reinforcing the base.
The difference comes from their construction. Traditional bobby pins are generally closed at the tips and have a ridged side, allowing them to grip a relatively small amount of hair. U-shaped hairpins have open ends and can be worked through a larger section to support a more voluminous shape.
Trying to force too much hair into a small bobby pin usually produces weaker placement. The pin may slide out, open excessively or fail to catch enough supporting hair beneath the styled section.
For thick hair, choose the fastening method according to what the pin actually needs to do.
| Task | Useful pin | Placement principle |
|---|---|---|
| Support a voluminous bun | Larger U-pin or sturdy hairpin | Catch part of the bun and anchor it into hair near the base |
| Control a short section | Traditional bobby pin | Grip a manageable amount of hair close to the scalp |
| Reinforce a small attachment point | Two bobby pins | Cross the pins where additional support is needed |
| Secure particularly heavy hair | Stronger, appropriately sized pins | Distribute support rather than overcrowding one area |
According to Allure’s hairstylist instructions for using bobby pins, closed bobby pins and open-ended hairpins have different styling applications. The interviewed professionals also recommend stronger pins for thick hair and describe crossing bobby pins as a way of increasing support.
That does not prove crossing pins doubles their holding strength. Grip depends on the thickness of the section, the pin’s construction and how well it catches the underlying hair. Small adjustments in placement can matter more than adding another pin to an overcrowded area.
Slippery hair presents another challenge. Freshly straightened lengths or exceptionally smooth hair may offer less grip, regardless of the pin type. A small amount of dry shampoo or texture spray at the anchoring area can help create a workable surface, provided the product suits your hair and is used sparingly.
Once the style is assembled, perform a gentle hold test. Tilt your head forwards and to each side, then make two small, controlled head movements. The bun should feel stable without pulling at the scalp. If it shifts, reinforce its base rather than tightening every section.
Remember that pin strength and comfort are separate considerations. Heavy hair needs distributed support, not extreme tension concentrated in one attachment point.
With the fastening method sorted, there is an even faster fallback for occasions when a complete updo is unnecessary: polishing just one defining feature.
How Do You Build a 5-Minute Polished Routine Around One « Anchor Feature »?
A five-minute polished hairstyle starts by choosing one anchor feature: a clean parting, a smooth hairline, gentle root volume or deliberate face-framing strands. Give that feature most of your attention, then arrange the rest of your hair into a simple, familiar shape. One well-finished detail often looks more intentional than several sections styled in a hurry.
The anchor is the visual element that communicates neatness most clearly. It does not need to be elaborate, and its suitability depends on your natural texture, personal preferences and how you normally wear your hair.
Choose the anchor according to the effect you want:
- Clean parting: Useful when you prefer minimal, structured hair and want the overall shape to look deliberate.
- Smooth hairline: A practical choice for a ponytail or bun when stray sections distract from the silhouette.
- Gentle root volume: Helpful when completely flat roots make your preferred style feel less balanced.
- Face-framing strands: Suitable when you want a softer transition between the hairstyle and your features.
Your own photographs can be a useful guide. Look at images where you felt your hairstyle suited you, especially those taken in lighting other than your bathroom. Notice which details tend to make you feel most comfortable and recognisable.
Then divide five minutes into small, manageable tasks:
- Two minutes: Refine the chosen anchor feature.
- One minute: Gather the remaining hair into a low pony, minimal twist or another familiar arrangement.
- One minute: Secure the structure and apply light finishing product if necessary.
- One minute: Check the shape in different lighting and correct the most noticeable imbalance.
This is particularly effective as an emergency alternative. If an elaborate hairstyle is not working, stop attempting to rebuild it. Release the unsuccessful sections, return to your anchor feature and secure the rest in the simplest shape you can manage comfortably.
The approach also prevents overworking. Repeatedly brushing, heating and readjusting hair can add friction without necessarily improving the result. A defined stopping point helps you preserve both time and texture.
A polished appearance ultimately depends on more than its first few minutes. The final consideration is how to maintain hair and makeup through an entire evening without constant correction.
Key takeaways before your event
- Prepare hair and skin according to their actual needs; a secure, comfortable foundation is more useful than excessive finishing product.
- Protect the areas most likely to move or fade, particularly the hairline, bun base, complexion and lip colour.
- Carry a few targeted essentials rather than planning to rebuild your hairstyle or makeup during the evening.
How Do You Make Hair and Makeup Last Through a Formal Occasion Without Touch-Ups Every Hour?
Long-lasting event hair and makeup depend primarily on preparation, secure construction and products applied where they are needed. Start with hair that holds your chosen style comfortably and skin prepared for makeup, then use light, appropriate fixing products. Plan for one or two targeted corrections rather than assuming everything will remain flawless throughout a long evening.
The preparation stage matters because hair and skin behave differently from person to person. Some hairstyles hold better on freshly washed hair, while others benefit from a little natural texture. Fine, slippery hair may need added grip, whereas dry or textured hair may benefit from a more conditioning-focused approach.
For makeup, start with skincare suited to your skin type and allow it to settle before applying complexion products. Too much product underneath foundation can sometimes interfere with the finish, while insufficient moisturising may leave dry areas more noticeable.
Makeup artists interviewed in Allure’s guidance on long-lasting makeup recommend allowing skincare to absorb, using controlled layers and applying setting products selectively. Primer is not automatically necessary for everyone; its value depends on the skin, product combination and desired finish.
A practical distinction is to think of product application in three stages:
| Stage | Hair | Makeup |
|---|---|---|
| Before styling | Conditioning or grip-building products appropriate to texture | Suitable skincare and optional targeted primer |
| During styling | Secure pins and restrained setting where needed | Thin, controlled layers and selective setting |
| Final finish | Light hold around the hairline and attachment points | Appropriate powder or setting product on areas prone to movement |
Formal occasions present challenges that everyday routines do not always encounter. A warm venue can increase perspiration, affecting the hairline and complexion. Greetings and close contact may disturb loose sections. Eating and drinking can reduce the appearance of lip colour, while dancing or repeated movement may reveal a weak bun base.
Instead of applying more product everywhere, identify the specific area at risk. Reinforce the bun’s anchoring points before leaving, check whether the front sections move comfortably and set makeup selectively where it tends to fade.
Overloading either hair or makeup can create a different problem. Excessive hairspray may leave movement looking rigid, while repeated powder application can emphasise texture rather than restore a fresh finish.
A compact event kit usually needs only three kinds of essentials:
- Blotting paper for managing visible shine without repeatedly layering powder.
- Your chosen lip colour for refreshing it after eating or drinking.
- A few suitable spare hairpins for securing a section that becomes loose.
These items are conveniences, not guaranteed solutions to every situation. If an entire hairstyle is unstable before departure, it is better to simplify or reconstruct the base than rely on spare pins throughout the evening.
Similarly, even carefully prepared lipstick may need refreshing after a meal. The goal is not absolute resistance to every circumstance, but a comfortable result that remains presentable with minimal intervention.
One final practical test is to wear the completed look for a short period at home before an important event. Move naturally, turn your head and check that the pins do not pull. Notice whether your makeup feels comfortable rather than focusing only on how it appears immediately after application.
Before your next occasion, choose one hairstyle that already works with your hair, test its hold and prepare a minimal finishing kit. A comfortable, balanced style that suits your outfit is more useful than a complicated look that needs constant attention.
What is the easiest elegant hairstyle for a complete beginner?
A low ponytail is often the easiest starting point because it needs only basic brushing, gathering and securing. Choose a comfortable tension, smooth the visible sections and position the ponytail at the nape. Once you can create a secure ponytail consistently, a loosely twisted low bun becomes a natural next step.
Can short hair look elegant without extensions?
Yes. Short hair can look polished through a controlled parting, carefully arranged natural texture or a smooth outline around the face. A small tuck behind the ears or restrained styling at the crown may be sufficient. Extensions are unnecessary unless additional length or volume is part of the specific look you want.
Should an elegant hairstyle have a middle part or a side part?
Neither is inherently more elegant. A middle part can create a balanced, symmetrical appearance, while a side part may introduce softer movement or asymmetry. Choose according to your hair growth pattern, preferred face framing and the way the parting works with your hairstyle rather than following a rigid face-shape rule.
How can you make an elegant hairstyle look natural instead of stiff?
Keep the main structure secure but avoid pulling every visible section perfectly flat. Preserve a little natural texture, use fixing products sparingly and soften the hairline where appropriate. The style should hold its intended shape without feeling painful or preventing normal movement.
Is it better to practise an occasion hairstyle before the event?
Practising is particularly useful for unfamiliar updos, thick hair or styles involving several pins. A trial helps you determine whether the construction feels comfortable, how many pins your hair actually requires and whether the result fits your available preparation time. For an important event, a familiar and reliable style is generally preferable to experimenting immediately before departure.