
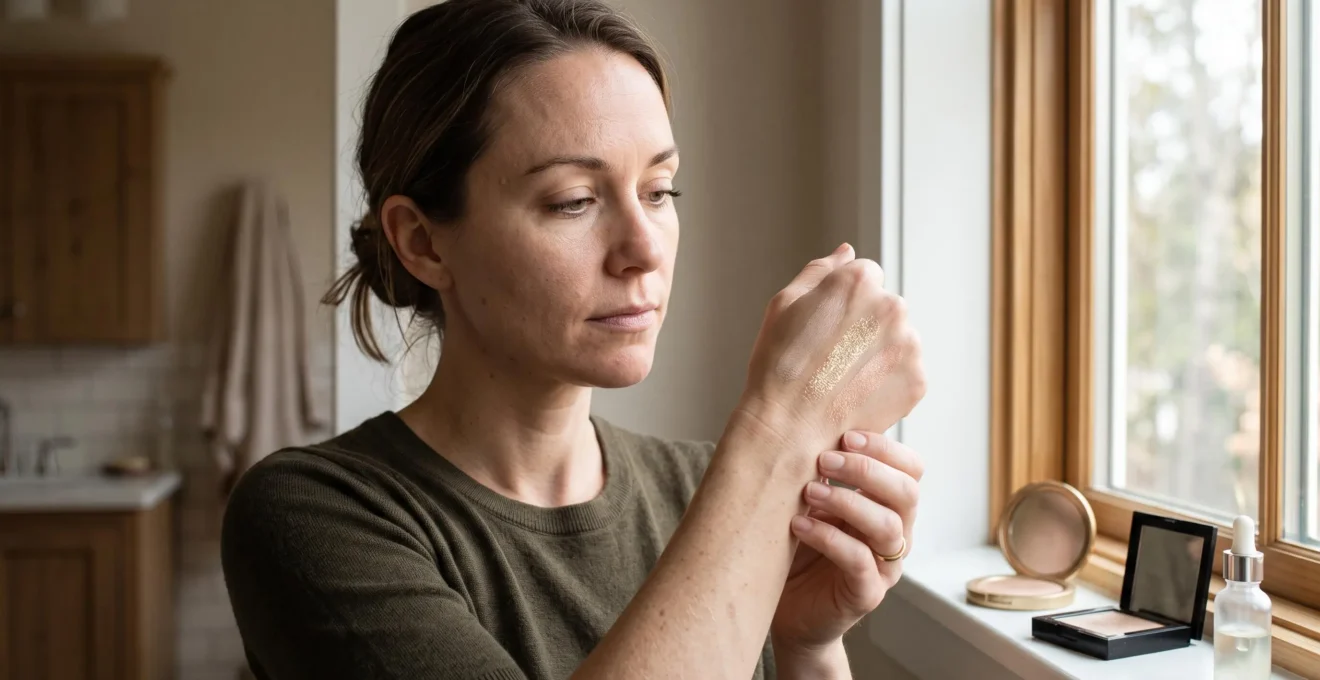
The most flattering highlighter for textured skin is usually one that creates a soft, diffused sheen rather than obvious sparkle. Look for finely milled satin powders, lightweight cream highlighters or sheer liquids with no visible glitter particles. The aim is to catch light on the cheekbones without drawing attention to pores, acne texture or fine lines.
Formula matters, but placement matters just as much. Even a beautifully formulated highlighter can make uneven skin look more pronounced if it is applied too heavily or carried across the inner cheeks. Conversely, a carefully placed cream or soft-focus powder can give skin a polished glow without making its natural texture the centre of attention.
For UK readers dealing with changing daylight, warm commutes and combination skin, the best choice is not necessarily the brightest product in the shop. It is the one that still looks like skin beside a window, under office lighting and at the end of the day.
The quick guide to smooth, non-glittery highlighter
- Choose satin, soft-focus or finely pearlescent finishes rather than products containing visible glitter flakes.
- Place a small amount on the upper cheekbones, keeping it away from prominent pores and textured inner cheeks.
- Match the formula to your skin type: creams and liquids often suit drier skin, while finely milled powders can work well on oilier areas.
- Why Does Highlighter Make Skin Texture Look More Noticeable in Daylight?
- How Do You Apply Highlighter So It Looks Like Skin, Not a Stripe?
- Liquid or Powder Highlighter: Which Looks Better if You Have Fine Lines?
- The Highlight Zone Mistake That Makes Pores Look Deeper
- When Should You Apply Highlighter if You Use Setting Spray at the End?
- Why Does Radiant Makeup Turn Greasy After 3 Hours on Combination Skin?
- Why Does Your Face Look Flat on Camera Even When It Looks Fine in the Mirror?
- How Do You Get a Radiant Finish Without Looking Shiny on the Train Home?
Why Does Highlighter Make Skin Texture Look More Noticeable in Daylight?
Highlighter can make skin texture more noticeable in daylight because reflective pigments catch light differently across pores, fine lines and uneven patches. Larger shimmer particles produce distinct points of sparkle, while finer pigments create a more continuous sheen. Directional daylight makes these differences easier to see, especially when light reaches the face from the side.
Highlighter does not physically deepen pores or create wrinkles. It changes how existing texture appears. Raised areas may reflect more light, while small depressions remain comparatively shaded. When obvious sparkle sits across this uneven surface, the contrast can make texture more apparent.
That is why a highlighter can look beautifully smooth beneath a softly lit bathroom mirror and unexpectedly grainy when you step outside. Indoor lighting often provides relatively even illumination, whereas daylight entering from one direction can emphasise subtle surface irregularities.
Fine luminosity and visible glitter are not the same finish. A finely pearlescent formula creates a relatively even reflective effect. A glitter-heavy formula produces individual flashes of light. Neither is inherently poor quality, but the second is usually less forgiving when the goal is natural-looking skin.
When comparing products, use this practical daylight test:
- Apply a small swatch to the back of your hand.
- Move beside a window with indirect natural light.
- Angle your hand slowly until the product catches the light.
- Check whether you see one smooth sheen or distinct sparkling particles.
- Blend out the edge and look for visible residue or scattered shimmer.
The back of the hand is useful for assessing particle visibility, although it cannot reliably predict how a formula will behave on facial pores, lines or foundation. Test a small area of the cheek if a sample is available.
Preparation also changes the result. Heavy powdering or baking may leave dry patches looking more obvious, particularly when a reflective product is layered over them. In that situation, the highlighter may be drawing attention to an already uneven base rather than creating the problem itself.
The professional application and formula distinctions discussed in Allure’s highlighter comparison and application advice support choosing finishes according to skin type and gradually building product rather than applying a thick layer immediately.
Once the finish passes that test, application becomes the next priority. A smooth formula still needs a light hand and controlled placement to look convincingly like skin.
How Do You Apply Highlighter So It Looks Like Skin, Not a Stripe?
To make highlighter look like skin rather than a visible stripe, apply a tiny amount to the highest part of the cheekbone and press it gently into your base. Keep the application narrow, soften its edges and build luminosity gradually. The finished result should appear only when light catches the face, not as an obvious band of product.
The difference between pressing and swiping is particularly important over foundation. A long sweeping movement can shift the base underneath, especially when applying a cream over an unset foundation. Gentle tapping or pressing gives you more control over where the reflective pigment ends up.
Use a clean fingertip or a small, slightly damp makeup sponge for cream and liquid formulas. For powder highlighter, a small soft brush may be more appropriate; apply with light, controlled movements rather than repeatedly scrubbing the surface.
Keep the glow on the upper cheekbone plane. Start close to the highest point of the bone rather than drawing a continuous stripe from the temple to the apple of the cheek. This limits the amount of product that reaches areas with more noticeable pores.
Blend the edges back towards the central highlight area so the reflective pigment does not spread unnecessarily onto textured inner cheeks. The idea is to blur the boundary while keeping the glow concentrated.
The most reliable approach is to work in sheer layers. Apply a small amount, assess the result from a normal conversational distance and only add more if the cheekbone needs extra definition. Two very thin passes can give better control than one opaque application, although the exact result depends on the formula.
If the product has already formed a noticeable edge, use the clean side of a sponge to gently soften it. Avoid adding more highlighter to fix an overly bright stripe.
Finally, take a photograph with your phone’s flash enabled. A narrow highlight that looks delicate in the mirror can appear surprisingly concentrated under frontal lighting. If you notice a hard reflective line, diffuse the boundary before adding any more product.
Technique can improve almost any formula, but the texture of the product still matters. Fine lines, in particular, may respond differently to cream, liquid and powder finishes.
Liquid or Powder Highlighter: Which Looks Better if You Have Fine Lines?
Cream and liquid highlighters are often a good starting point for fine lines because their flexible, emollient textures can blend into the underlying makeup without creating an obviously powdery layer. However, finely milled powders may suit oily skin better, while balms offer another option. The most flattering choice depends on the finish, application and compatibility with your base.
There is no universal rule that every liquid highlighter looks smoother than every powder. A liquid packed with visible glitter can exaggerate surface irregularities more than a carefully formulated satin powder.
To compare the textures meaningfully, consider how each product behaves on your skin rather than relying solely on its format.
| Formula | Potential advantage | What to watch for |
|---|---|---|
| Cream | Can blend seamlessly with a hydrated base | Heavy textures may move foundation or collect in creases |
| Liquid | Allows a very sheer, adjustable sheen | Fast-setting or highly shimmery formulas may leave visible edges |
| Finely milled powder | Useful for controlled application on oilier skin | Excess product may look dry or accentuate flaky areas |
| Balm or balm-to-powder | Offers an alternative finish between creamy glow and soft-focus makeup | Some balms can feel slippery or disturb the base underneath |
A particularly relevant hybrid example is Danessa Myricks Beauty Yummy Skin Blurring Balm Lowlighter. Allure’s review of the Danessa Myricks blurring balm lowlighter describes its balm-to-powder texture and subtle soft-focus finish. This is an editorial assessment of one product, not proof that every hybrid highlighter blurs pores or fine lines.
Jelly textures can also offer an alternative application experience, but their finish varies widely. Some leave a sheer sheen; others remain glossy or contain noticeable reflective particles. Texture category alone is not a guarantee of a non-glittery result.
Base compatibility deserves a test of its own. A lightweight water-based liquid may layer differently over foundation than a silicone-rich or particularly emollient highlighter. However, water and silicone ingredients can coexist in compatible formulations, so checking the label alone will not reliably predict pilling.
Instead, test the actual combination. Apply foundation to a small area, let it settle and gently press the highlighter over it. If the products roll into little crumbs, separate or disturb the foundation, try a different application method or pairing.
For dry skin with fine lines, start with a light cream or sheer liquid. For oily, mature skin, test a very finely milled powder alongside a lightweight cream and compare how each behaves after several hours.
Once the formula is settled, consider where the light actually lands. Placement is often the difference between a flattering sheen and pores that suddenly look more prominent.
The Highlight Zone Mistake That Makes Pores Look Deeper
The most common placement mistake on pore-prone skin is extending highlighter across the inner cheeks and towards the sides of the nose. These areas frequently have more visible pores, and strong reflective finishes can make their outlines stand out. Keeping highlighter on the upper, outer cheekbone usually creates dimension without drawing as much attention to this texture.
Think of the face as a collection of different surfaces rather than one continuous canvas. The upper cheekbone may appear relatively smooth, while the area beside the nose has more visible openings and unevenness. Using the same amount of reflective product across both areas can produce very different results.
Bright pigment can increase the contrast between the edges of a pore and the surrounding skin. This may make the pore appear more defined, although the product has not physically altered its depth.
Map your own texture before deciding where highlighter belongs. Everyone’s pore pattern is different, and a placement that works beautifully on one face may be less flattering on another.
Before applying makeup, examine your skin in indirect daylight. Notice where pores, acne marks and uneven patches are most apparent. You do not need to eliminate these areas from every makeup application; simply use them to guide where highly reflective products will look most natural.
Place the highlighter just above or outside the most textured region, following the upper cheekbone. This still creates a lifted appearance without covering the entire cheek in shimmer.
If you have already applied too much highlighter near the nose, avoid rubbing it off. Instead, gently press a nearly clean makeup sponge over the area. If necessary, add a tiny amount of the remaining foundation on the sponge to dilute the reflection. The aim is to soften the effect without stripping the base.
A useful alternative for very textured cheeks is to keep the central face softly satin and let a small amount of light reflect from the outer cheekbone alone.
With placement under control, the next question is how to preserve that subtle finish. The order of highlighter and setting spray can influence the final appearance.
When Should You Apply Highlighter if You Use Setting Spray at the End?
Apply highlighter before setting spray when your priority is integrating it into the finished makeup and supporting overall wear. Apply a small amount after setting spray if you want to restore extra brightness to the cheekbones. Neither sequence guarantees better longevity or smoothness: the result depends on the highlighter, spray and underlying makeup.
Setting sprays vary considerably. Some form a film intended to reduce makeup transfer, while others are designed to provide a hydrating, radiant or mattifying finish. Their interaction with highlighter therefore cannot be predicted from application order alone.
For a full workday, applying a thin layer of highlighter before setting spray is a sensible starting technique. Mist the spray according to its instructions, allow it to dry and check whether the sheen remains evenly blended.
For a short evening event or photography, you can experiment with applying highlighter after the setting spray has dried. This may leave the reflective finish looking more pronounced, although it has not necessarily been fixed in place by the spray.
A light two-stage application offers a useful compromise to test: press on a minimal amount of highlighter before setting spray, then add a tiny second touch to the upper cheekbone after drying. Avoid building thick layers, especially over visible texture.
Formula interaction matters too. A mattifying spray may change the appearance of a dewy highlighter, while some combinations can cause patchiness, beading or pilling. Alcohol-containing sprays may also feel drying on certain skin types.
As explained in Allure’s comparison of makeup setting sprays, these products differ in their film-forming ingredients, finishes and intended effects. The article does not establish one universally superior highlighter application sequence.
Before relying on a new combination for an event, test the products together on a small area of the jawline or cheek. Check the result after everything has dried, rather than judging it while the spray is still wet.
Even when the initial result is smooth, changing skin oil levels can affect its appearance throughout the day. Combination skin needs a slightly different strategy.
Why Does Radiant Makeup Turn Greasy After 3 Hours on Combination Skin?
Radiant makeup can look greasy after a few hours on combination skin because natural sebum builds up and mixes with foundation, highlighter or other complexion products. Some emollient formulas may also lose their original finish during wear. The solution is to distinguish excess oil from product breakdown, then control shine selectively without mattifying the entire face.
Combination skin rarely behaves uniformly. The forehead, nose and chin may become noticeably oily while the outer cheeks remain comparatively balanced or dry. Using the same primer and powder across every area can therefore create an unnecessarily flat finish in some places and insufficient oil control in others.
There are two useful possibilities to investigate. If the skin feels oily and blotting removes much of the shine, sebum is likely contributing. If the highlighter appears patchy, separated or slippery even where the skin is not especially oily, the formula or its interaction with your base may also be involved.
Oil and makeup can spread through touching, blending and daily wear, but there is no reason to assume that shine on the outer cheeks always comes from oil migrating outwards from the T-zone.
Prepare different facial zones differently. Try a light mattifying or blurring primer where oil or pores are more noticeable, with a compatible hydrating base on drier outer cheeks. Keep the reflective highlighter restricted to the areas where you actually want luminosity.
The American Academy of Dermatology Association recommends oil-free, water-based makeup as an option for oily skin and explains how blotting papers can absorb excess sebum. Its advice on controlling oily skin recommends pressing blotting paper gently against the face rather than rubbing it.
For a midday correction, press a blotting sheet against the shiny forehead, nose or inner cheeks for a few seconds. Lift it away carefully. If necessary, apply a very light dusting of translucent powder to the oily areas, keeping it away from the cheekbone glow.
This approach manages excess shine without automatically covering every reflective area. However, blotting may still remove some makeup, and no technique guarantees that a highlighter will remain unchanged for a specific number of hours.
After controlling the finish in real life, it is worth checking how that same makeup looks through a camera. Photography can reveal placement problems that an ordinary mirror does not.
Why Does Your Face Look Flat on Camera Even When It Looks Fine in the Mirror?
Your face can appear flatter in photographs because frontal lighting reduces the visible shadows that normally define the cheekbones, nose and other facial contours. A highlighter positioned beautifully for side lighting may become less noticeable under a phone flash, or reflect as one concentrated bright patch. Adjusting placement rather than increasing product is usually the better first step.
In a mirror beside a window, directional light creates highlights and shadows that move as you turn your head. A phone flash positioned close to the camera lens illuminates the face more frontally, reducing some of those natural variations.
The amount of dimension that survives in a photograph also depends on the camera’s exposure, image processing and the surrounding light. A highlighter that appears subtle in person may look much brighter in one image and almost invisible in another.
For photographs, experiment with moving the main highlight slightly higher along the cheekbone. A restrained touch on the brow bone or cupid’s bow may add definition, provided those areas are not particularly textured and the finish remains balanced.
Do not automatically apply more highlighter to compensate for flat lighting. A larger amount of reflective product may produce one obvious flash reflection rather than a smoother-looking face.
Visible glitter is especially worth checking. Individual reflective particles can produce conspicuous bright points under direct flash, although the effect varies with particle size, angle and camera settings.
Use this simple comparison before a photographed event:
- Take a selfie beside a window using indirect daylight.
- Take a second photograph under ordinary indoor lighting.
- Take a third photograph with the flash switched on.
- Compare the cheekbone placement, visible sparkle and blending edges.
- Adjust the amount or position of highlighter only where necessary.
The goal is not to force identical results across three different lighting conditions. It is to find a placement that looks balanced and does not create harsh reflective patches.
Once the finish works in daylight and photographs, the final challenge is everyday wear: maintaining radiance without allowing excess shine to dominate the face on the journey home.
What matters before the final wear test
- Assess the finish in realistic lighting rather than choosing the brightest-looking product indoors.
- Keep reflective makeup away from areas where oil and visible texture are most difficult to manage.
- Check how foundation, highlighter and setting products behave together before committing to a full-day routine.
How Do You Get a Radiant Finish Without Looking Shiny on the Train Home?
To stay radiant without looking shiny after a commute, create a small, controlled area of luminosity on the cheekbones and keep oil-prone areas softly balanced. Choose a sheer satin or soft-focus highlighter rather than a strongly glittery or greasy-looking formula. During the day, blot excess oil selectively instead of powdering over the entire face.
The difference between radiance and shine comes down partly to how light reflects. Diffused reflection creates a softer, more even-looking glow, while strong direct reflection from an oily or glossy surface can appear noticeably shiny. Real cosmetic finishes often combine both effects, so the distinction is visual rather than absolute.
For everyday wear, look for product descriptions such as satin, soft-focus, skin finish or finely pearlescent. These are useful starting points, not standardised performance guarantees. A product advertised as luminous may still look beautifully natural, while one labelled satin may contain particles that are too obvious for your preference.
A warm train carriage, changing humidity, touching your face and a longer day can all affect the appearance of makeup. Where a face covering is worn, friction and trapped moisture may create additional transfer or wear. No provided source establishes that one category of highlighter consistently survives a particular commuting duration better than another.
The practical solution is to test your chosen formula during a normal day and inspect the result when you get home. Check whether the cheekbone sheen remains even, whether product has gathered around visible pores and whether the T-zone has become the main source of shine.
Keep a small blotting sheet in your bag. A compact cream highlighter or balm can provide an optional touch-up, but use it only if the original product has faded and the base underneath is still intact. Adding more reflective makeup over excess oil can make the face look shinier rather than fresher.
The best final routine is one that requires little correction. A softly controlled base, careful cheekbone placement and a fine-particle finish generally give you more flexibility than a heavy layer of shimmer.
Your five-step smooth-glow checklist
- Inspect the particles. Swatch the highlighter beside a window and identify whether the result is a continuous sheen or visible glitter specks. Your check: a daylight swatch you can assess from different angles.
- Identify your texture zones. Examine bare skin in natural light and locate the areas where pores or unevenness are most noticeable. Your check: a clear mental map of where to minimise reflective makeup.
- Apply one sheer layer. Press a small amount onto the upper cheekbone and soften the edges without spreading it across the inner cheek. Your check: no obvious stripe at conversational distance.
- Test the finished combination. Apply your usual setting spray and compare the result in window light and a phone photograph. Your check: even reflection without obvious pilling or bright patches.
- Review the wear. Look at the makeup after your usual working day or commute, then blot oil where needed. Your check: note whether shine, fading or separation is the main issue before changing products.
For a reliable daily routine, prioritise a product that looks smooth across different lighting conditions over one that delivers maximum brightness in a single mirror check.
Start with a small amount of your preferred satin cream, liquid or finely milled powder on the upper cheekbones, then assess the complete look in daylight. Build only where you need extra dimension. The most convincing glow is the one that enhances your skin without making you think about the highlighter itself.
Can you wear highlighter if you have acne scars?
Yes. Highlighter can be worn over skin with acne scars, although highly reflective formulas may make raised or indented areas more noticeable. Try a sheer satin product on smoother sections of the upper cheekbone and avoid concentrating shimmer directly over textured scars. Application over irritated or broken skin is best avoided until the skin has recovered.
Does a glitter-free highlighter mean it will never emphasise pores?
No. A glitter-free formula can still create strong reflections that accentuate visible pores, particularly when applied thickly or across the inner cheeks. Fine particles, controlled placement and a light application are all important. Glitter-free describes the absence of obvious sparkle, not a guaranteed pore-blurring effect.
Is champagne highlighter better than pink or gold for textured skin?
Not necessarily. Champagne, pink and gold describe colour rather than particle size or texture performance. Choose a shade that complements your skin tone and produces a smooth-looking sheen. A well-matched fine-particle gold can look more natural than a glitter-heavy champagne, and the reverse may also be true.
Can you mix liquid highlighter with foundation for a softer glow?
Mixing a small amount of compatible liquid highlighter with foundation can create a more diffused luminous finish. However, applying the mixture across the entire face may increase shine or draw attention to textured areas. Test the combination first, and consider limiting it to the outer cheeks rather than the T-zone. Avoid mixing products into their original containers.
Should you use a blurring primer underneath highlighter?
A blurring primer may help create a more even-looking base, especially where pores are prominent, but its effect depends on the formula and the products layered over it. Apply a thin amount where needed, allow it to settle and check that foundation and highlighter blend smoothly. More primer is not automatically better, and too many layers may encourage pilling.