
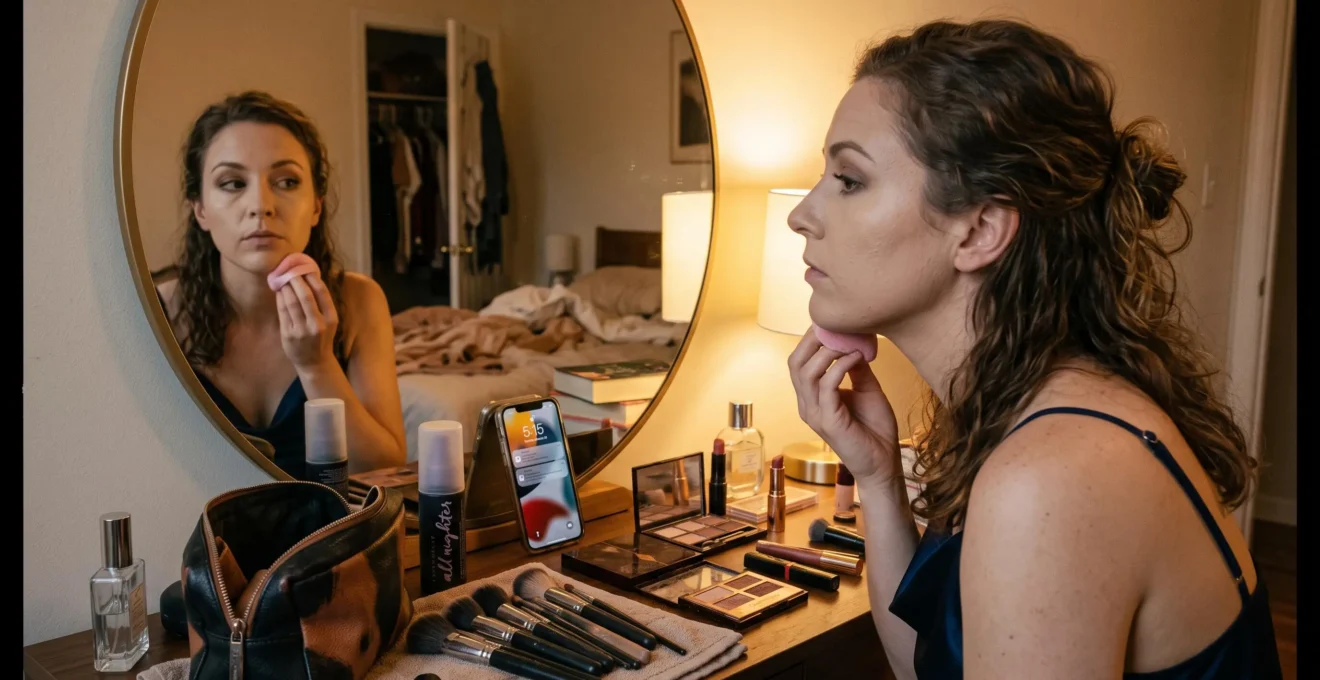
Formal hair and makeup last longer when every stage of preparation supports the next. The most reliable approach is to prepare skin without leaving excess product, apply makeup in thin layers, set only the areas that need extra control, and choose hairstyles that can tolerate travelling, movement and changes in temperature.
A wedding reception, graduation ceremony or gala can involve a crowded train, outdoor photographs, a warm dining room and several hours of conversation. These conditions challenge different parts of a finished look. Foundation may develop shine around the nose, concealer can settle into expression lines, and carefully styled hair may lose its shape against a car headrest or coat collar.
The solution is not necessarily stronger hairspray, thicker foundation or repeated powdering. It is a coordinated routine built around skin type, hair texture, travel arrangements and realistic preparation time. A small amount of strategic maintenance may still be useful, but hourly touch-ups should not be the foundation of the plan.
Long-lasting formal hair and makeup: the essentials
- Build coverage gradually, moisturise appropriately and concentrate setting products on areas prone to movement or shine.
- Choose a hairstyle that suits your hair texture and travel conditions, allowing heat-styled sections to cool fully before releasing them.
- Plan backwards from your departure time, including product absorption, styling, outfit changes and a final photographic check.
- Why Does Your Formal Makeup Melt Faster at Events With Warm Indoor Heating?
- How Do You Build an Event-Proof Base in 5 Layers Without It Looking Heavy?
- Setting Spray or Powder: Which One Stops Shine Without Flashback in Photos?
- The Travel Mistake That Ruins Formal Hair Before You Even Arrive
- When Should You Start Getting Ready for a Formal Event to Avoid Rushing the Finish?
- Sleek Low Pony or Soft Waves: Which Looks More Polished for a Work Dinner?
- How Do You Lock Your Base So It Survives a Full Day Without Looking Heavy?
- How Do You Make an Intricate Updo Stay Put for a 6-Hour Event Without Headache?
Why Does Your Formal Makeup Melt Faster at Events With Warm Indoor Heating?
Formal makeup can break down more quickly in warm event spaces because heat, perspiration, skin oil and moisture affect how products sit on the face. Crowded rooms may also feel more humid than the environment where makeup was applied. The result depends on your skin type, the products underneath your foundation and how thoroughly the finished base has set.
The journey from a cool bedroom to a heated reception room creates changing conditions for the makeup. Warmth and perspiration may make a previously comfortable foundation feel slippery, while humidity and repeated facial movement can reveal weaknesses around the eyes, nose and mouth.
It helps to distinguish two patterns rather than treating every sign of wear as the same problem.
- Oil-related breakdown: shine becomes noticeable on the forehead, nose or chin, and foundation may separate or lose its even appearance.
- Moisture-related breakdown: perspiration, watering eyes or damp conditions disturb makeup, while mascara, eyelash curl and concealer may become less reliable.
Oil and moisture can occur together, but their solutions differ. An oily forehead may benefit from gentle blotting and a small amount of powder. A creased under-eye area may instead need less concealer, careful blending and a formula better suited to that area. Adding powder without identifying the cause can make the finish look worse.
Skin type provides a practical starting point. Oily skin may develop visible shine first; dry skin can reveal flaky patches or product settling; combination skin can show both patterns simultaneously. Normal skin can still experience localised wear around expression lines or the nose.
The American Academy of Dermatology‘s advice on controlling oily skin recommends oil-free, noncomedogenic products and emphasises that oily skin still needs moisturising. It also recommends pressing blotting paper gently against oily areas rather than rubbing it across the face.
A useful self-diagnostic is to observe your usual makeup several hours after application. Notice where shine appears, where coverage gathers and which areas remain comfortable. This is more informative than following an entirely matte routine simply because the event will take place indoors.
Skincare residue deserves attention too. If a rich moisturiser or facial oil has not settled before primer and foundation are applied, the layers may move more easily. That is a practical compatibility concern, not a reason to avoid moisturiser or assume that skincare is always responsible for makeup failure.
Once the likely failure points are clear, the next priority is constructing a base that provides coverage without accumulating unnecessary thickness.
How Do You Build an Event-Proof Base in 5 Layers Without It Looking Heavy?
An event-proof makeup base can be built in five deliberately thin stages: prepared skin, compatible primer, lightweight foundation, targeted concealer and selective setting products. Each layer has a separate job, so the goal is not to use more makeup but to avoid demanding everything from one thick application. This helps preserve a natural finish for close-up photographs.
The five-layer structure is a practical application framework rather than a scientifically validated formula. Its value lies in controlling the quantity and placement of products.
- Prepared skin: cleanse gently, apply a suitable moisturiser and allow it to settle. Use the skincare your skin actually needs rather than adding rich products everywhere.
- Compatible primer: apply a thin layer where it helps with the desired finish or foundation wear. A gripping primer may be useful, but not every foundation requires one.
- Lightweight coverage: blend a small amount of foundation from the centre of the face outwards. Add coverage only where the first pass is insufficient.
- Targeted concealer: cover individual marks or areas of discolouration instead of applying thick concealer across the whole face.
- Selective locking: use powder and, if suitable, setting spray to support the areas that need additional hold.
The central principle is less product, more evenly distributed coverage. Two light passes are often easier to control than one thick layer. The second pass should be limited to places that genuinely need additional coverage, rather than automatically repeating foundation everywhere.
Long-wear formulations may help with longevity, but some feel drier or less comfortable than more hydrating alternatives. If the cheeks become tight while the forehead turns shiny, treat those zones differently. Apply suitable moisturiser to the whole face as needed, then adjust primer and makeup textures locally rather than withholding hydration from oily skin.
Before moving to setting products, conduct a mirror test. Stand in daylight, inspect your face from approximately arm’s length, then smile and look closely at the sides of your nose, mouth and eyes. Visible lines of accumulated foundation suggest excess product rather than a need for more powder.
It is also worth checking the base under artificial indoor lighting. A finish that appears even in natural daylight can reveal unblended edges beneath stronger directional lights.
A well-constructed base makes setting easier, but the choice between powder and spray still matters, especially when flash photography is expected.
Setting Spray or Powder: Which One Stops Shine Without Flashback in Photos?
Setting powder is generally the more useful choice for absorbing excess oil and reducing shine, while setting spray can help create a more unified finish and may improve wear depending on its formula. For many formal looks, a little powder on oily areas followed by a light setting mist is a practical combination. Neither product is automatically flashback-free.
Flashback describes an unwanted pale or bright appearance that becomes visible in flash photographs. Certain reflective or light-scattering ingredients, including some uses of silica and titanium dioxide, can contribute to the effect, particularly when products are applied heavily. However, flashback depends on the complete formulation, application and photographic conditions, not the presence of one ingredient alone.
That distinction matters because a setting powder should not be rejected simply for being powder, nor should a setting spray be assumed safe for every photograph.
The following comparison separates the main purposes of each option.
| Decision factor | Setting powder | Setting spray |
|---|---|---|
| Primary purpose | Absorb oil and set liquid or cream products | Create a finishing layer and potentially support wear |
| Best application | Targeted areas such as the forehead, nose and chin | Light, even application across the finished face |
| Finish | Often more matte, depending on formula | Matte, natural or luminous, depending on formula |
| Main risk of excess | Dryness, buildup and exaggerated texture | Patchiness, excessive wetness or a visible film |
| Flash photography | Test the specific product and quantity | Test the complete makeup combination |
Professional makeup artists interviewed for Byrdie‘s comparison of setting spray and setting powder describe these products as complementary. Their guidance supports selective powder application followed by a light mist, although it does not establish that combining them always delivers better longevity for everyone.
For a wedding or gala, apply powder sparingly where the skin tends to become shiny. Then use setting spray according to the manufacturer’s directions, avoiding the temptation to saturate the face.
Repeated powdering throughout the event can produce an uneven surface, especially when fresh product is pressed onto accumulated oil. Blot first if necessary, then assess whether additional powder is genuinely needed.
A flash test before departure is particularly valuable. Photograph the finished base using your phone’s flash in a relatively dim room, then inspect the forehead, under-eye area, nose and jawline. Check whether any product appears noticeably paler than the surrounding skin.
A phone photograph cannot reproduce every professional camera setup, but it can identify obvious problems while there is still time to correct them.
The same principle of anticipating environmental stress applies to hair: a hairstyle that looks perfect at home may be exposed to its greatest disruption before the event even begins.
The Travel Mistake That Ruins Formal Hair Before You Even Arrive
A common travel mistake is completing a delicate hairstyle before a journey without accounting for headrests, outerwear and changes in humidity. These can flatten volume, disturb smooth sections or loosen curls before arrival. When facilities permit, preparing the hair at home and reserving a small amount of finishing work for the destination can protect the overall result.
This is particularly relevant to guests travelling by car, train or public transport to a wedding or graduation. A high-volume hairstyle may be pressed against a headrest, while a coat collar can repeatedly rub the nape of a polished updo.
Travel introduces several separate challenges. Warm, crowded vehicles may make the scalp feel damp, and static from clothing or upholstery can contribute to flyaways. Moving between cool outdoor air, heated transport and an indoor venue may also affect the appearance of the style.
Heat-styled curls deserve special attention because the cooling stage helps establish their finished shape. In ghd‘s voluminous-curl styling tutorial, sections are curled, pinned and allowed to cool before release. This illustrates a useful technique, although the tutorial does not guarantee a particular duration of hold.
For an event requiring a significant journey, consider a two-stage preparation method.
- At home, wash or prepare the hair as appropriate, dry it thoroughly, create the desired root direction and complete any heat styling that can cool and set safely before travelling.
- At the destination, if a suitable private space is available, release temporary sets, refine loose curls, adjust pins and apply the final finishing product.
This method is not suitable for every occasion. A wedding venue may have no dressing area, and carrying heated tools may be impractical. In those cases, finish at home, let the hair cool completely and choose a style that will not be repeatedly crushed during the journey.
Protect the hairstyle without compromising safe travel. Do not remove or interfere with a vehicle headrest or compromise a seatbelt position for the sake of maintaining volume. Instead, choose a lower-profile style, remove bulky outerwear when practical and make minor adjustments after reaching the venue.
A compact travel case can contain matching hairpins, a small comb and any permitted travel-size finishing product. Such items are useful contingencies, not an invitation to restyle the entire head during the event.
Once travel is included in the preparation strategy, the next question is when to begin getting ready so the finishing stages remain calm and controlled.
When Should You Start Getting Ready for a Formal Event to Avoid Rushing the Finish?
Start getting ready by working backwards from your departure time, not simply from the event’s advertised start. Allow separate blocks for skincare, makeup, hair, dressing, setting and travel, then add a buffer for the task most likely to require correction. Aim to finish reasonably close to departure rather than applying the entire look unnecessarily early.
For a UK wedding guest or graduate, travel time may be substantial, and the ceremony may begin promptly. The preparation schedule should therefore account for the time needed to arrive, find the correct entrance and settle in without rushing.
The most useful approach is to assign realistic durations from your own experience. Someone who regularly completes simple makeup quickly should not adopt the same schedule as someone attempting an intricate hairstyle for the first time.
Consider this explicitly hypothetical example: a guest needs to leave at 4:00 pm. They estimate 20 minutes for skin preparation and absorption, 45 minutes for makeup, 35 minutes for hair, 20 minutes for dressing and final checks, plus a 20-minute buffer. Their planned preparation would begin at approximately 1:40 pm. These are illustrative timings, not universal requirements.
Sequencing can save effort. One practical order is to prepare the skin, apply the main makeup, allow completed hair sections to cool or set while checking the base, and then finish the hairstyle. This prevents unnecessary waiting without disturbing freshly applied makeup.
Some routines require a different sequence. If washing, blow-drying or heat styling is likely to cause perspiration, complete those activities before foundation. The goal is to prevent later tasks from undoing earlier work.
Three frequently overlooked time requirements deserve their own space: moisturiser settling before foundation, eyelash adhesive reaching its appropriate stage before lash placement, and changing into clothing without disrupting hair or transferring makeup onto a neckline.
Your five-step formal-event preparation checklist
- Confirm the departure time: record the event start, travel duration and required arrival margin in one timetable.
- Map your routine: write down a realistic duration for skin preparation, makeup, hair and dressing.
- Identify the likely delay: allocate a visible buffer to the stage that usually takes longest or requires correction.
- Complete a wear and photo check: inspect the finished makeup in daylight and flash photography, and check that the hairstyle remains comfortable when moving.
- Prepare the contingency kit: place blotting paper, a small comb and suitable hairpins in your event bag, then confirm that everything fits.
Starting very early can create different problems. Foundation applied long before departure has additional time to settle, develop shine or transfer onto clothing before the actual occasion begins. Where possible, complete the most vulnerable finishing steps nearer departure.
With the timing established, choosing a hairstyle becomes easier because the decision can be based on expected maintenance, rather than appearance alone.
Sleek Low Pony or Soft Waves: Which Looks More Polished for a Work Dinner?
A sleek low ponytail and soft waves can both look polished for a formal work dinner, but they age differently during an evening. A sleek pony maintains a structured outline when its surface stays smooth, while soft waves often remain visually forgiving as individual sections loosen. The more reliable choice depends on hair texture, length, weather and tolerance for flyaways.
The sleek ponytail creates a controlled silhouette, particularly with tailored clothing or a high neckline. However, that precision can make new flyaways noticeable. A smooth finish may require careful brushing, a suitable styling product and secure fastening without excessive tension.
Soft waves have a less rigid outline. Their advantage is that gradual loosening does not necessarily make the hairstyle appear unfinished. Their disadvantage is that some hair types lose curl definition quickly, especially when exposed to moisture or repeated brushing.
Use the following distinctions as starting points rather than fixed rules.
| Hair characteristic | Sleek low ponytail | Soft waves |
|---|---|---|
| Fine hair | Can appear polished but may need root support and gentle tension | May add apparent volume but can lose shape |
| Layered hair | Shorter layers may need additional securing | Layers can create movement if the curls hold |
| Thick hair | Can control bulk when anchored securely | May require more styling time and careful sectioning |
| Textured or curly hair | Can work with appropriate smoothing and tension management | Can enhance natural texture with suitable definition products |
| Expected deterioration | Flyaways or loosening around the fastening | Gradual relaxation of curl definition |
Hair texture alone does not determine the winner. A person with naturally smooth, straight hair may find a sleek pony easier to maintain than curled waves. Someone with naturally wavy hair may achieve a durable soft style with considerably less effort.
For a sleek ponytail, brush hair into the desired direction, smooth the outer surface with an appropriate product, and secure it without pulling painfully. For waves, work in manageable sections and let heat-styled curls cool before loosening them. Avoid repeatedly running fingers through the hair during the evening.
A hybrid style can offer a useful compromise: soft waves gathered into a half-up arrangement or low, loosely secured style. This maintains a clear silhouette while allowing individual sections to relax naturally.
The same maintenance principle applies to makeup: the best long-wear routine protects the areas that genuinely need help rather than setting the entire face equally.
How Do You Lock Your Base So It Survives a Full Day Without Looking Heavy?
Locking makeup for a full day works best when excess oil is removed gently, powder is applied only where needed, and setting spray is used in a controlled, even layer. Focus on areas prone to creasing or movement rather than coating the entire face heavily. This keeps less problematic areas looking more like natural skin.
Building the base and locking it are separate tasks. Foundation and concealer provide coverage; setting products help manage their finish and wear. Excessive setting cannot reliably compensate for an incompatible foundation, overly rich product residue or a thick initial application.
A practical targeted-locking method pays attention to four areas:
- Around the nose: check for oil, movement and foundation collecting in creases.
- Smile lines: remove visibly accumulated product before lightly setting, if needed.
- Eyelids: use a suitable eye primer or eye-compatible setting product where creasing occurs, avoiding products not intended for the eye area.
- Chin: assess whether talking, touching or oil production causes coverage to wear unevenly.
These are useful inspection points, not a universal rule that every face needs powder in exactly four places. Some people may need additional attention across the forehead or under the eyes; others may require very little setting at all.
Begin by checking whether the skin is oily. If necessary, press blotting paper against the area without dragging it. Gently smooth any makeup that has collected in lines, then apply a small amount of appropriate powder using a controlled motion.
Setting spray technique also affects the finish. Hold the bottle at the distance specified by its manufacturer, mist evenly and allow the product to dry without touching the face. Using too much spray or concentrating it in one spot may disturb the makeup or create an unwanted visible finish.
The ideal number of passes depends on the sprayer and formula. There is no reliable universal distance or quantity that works for every product, so the label instructions and a practice application are more useful than a fixed technique presented as a guarantee.
Before the event, conduct a simple endurance check at home. Wear the complete look for approximately an hour while talking, smiling, drinking and moving normally. Inspect the areas that crease, shine or transfer, and note whether the finish remains comfortable.
This is a personal rehearsal rather than proof that makeup will survive an entire day. However, it can reveal problems early enough to adjust the product quantity or placement.
Once the makeup is secure, the final challenge is keeping an elaborate hairstyle comfortable as well as intact throughout the occasion.
Key takeaways before choosing an updo
- Choose a hairstyle whose weight and structure suit your hair, rather than relying on tightness to create hold.
- Build grip and stable attachment points during styling, then check comfort through normal head movement.
- Carry only the tools needed for a discreet adjustment, not an entire replacement styling kit.
How Do You Make an Intricate Updo Stay Put for a 6-Hour Event Without Headache?
An intricate updo is more likely to remain comfortable when its weight is supported by several secure anchor points rather than one tightly pulled section. Prepare the hair with suitable grip, use pins that engage the hairstyle’s foundation, and check for uncomfortable pressure before leaving. Good hold should come from structure and balanced support, not painful tension.
For a six-hour wedding reception or gala, the challenge is not simply preventing movement. An updo must also accommodate head turns, sitting, dancing and changes in posture without repeatedly pulling at the same part of the scalp.
Start by creating a stable foundation. Depending on hair texture, a small amount of dry shampoo, texturising product or light backcombing can make slippery sections easier to secure. Naturally textured hair may already provide enough grip without these additions.
Hair that was washed the previous day can sometimes be easier to style than freshly conditioned, very slippery hair, but this is not universal. If the scalp becomes oily or uncomfortable, preparing clean hair with a suitable styling product may be preferable.
Build the updo in manageable sections. Instead of pulling all the hair into one tight fastening, secure portions to a stable braided, twisted or lightly teased foundation. Bobby pins can be placed in opposing directions or crossed where that arrangement provides better grip, although no universal pin configuration guarantees six-hour hold.
Distribute the load so that a heavy bun or decorative section does not depend entirely on one small cluster of pins. If the style starts slipping, address the structural weakness rather than simply adding more hairspray.
Comfort requires equal attention. Tight ponytails, braids and related hairstyles can exert repeated tension on hair follicles. Cleveland Clinic‘s explanation of hairstyle tension and hair loss discusses the risks associated with repeated pulling, including traction alopecia.
That medical discussion concerns ongoing or repeated tension and does not establish a specific headache-prevention method for a single formal event. Nevertheless, an updo that causes pain, persistent pulling or scalp pressure should be loosened or adjusted rather than endured for appearance.
Before departure, turn your head slowly, look down, sit back and move as you would during the event. Check whether pins press against the scalp or whether the hairstyle shifts noticeably. A comfortable, stable structure is a better starting point than one that feels secure only while standing still.
The contingency kit can remain minimal: a couple of pins matching the hair colour and a small comb may be enough to address a loose surface section. If an anchor fails, secure the affected section rather than dismantling the entire hairstyle in a busy reception room.
Before your next formal occasion, rehearse the complete hair and makeup combination under realistic conditions, including your outfit, a short period of normal movement and a photographic check. Adjust what actually fails in that rehearsal, and keep the event-day routine as simple as possible.
Should you wash your hair on the morning of a formal event?
It depends on hair texture, scalp condition and the intended style. Some updos are easier to secure when hair has a little natural grip, while fine or oily hair may benefit from washing closer to the event. If freshly washed hair feels slippery, use a suitable texturising product rather than assuming it must be left unwashed.
Can long-lasting makeup still look natural in professional photographs?
Yes. Build thin coverage, conceal only where necessary and avoid excessive powder. Check the completed makeup in daylight and with flash before departure. Camera lighting, skin texture and product formulation all influence the final appearance, so a rehearsal is more reliable than simply increasing coverage.
What should you carry if you want to avoid frequent touch-ups?
A compact kit might include blotting paper, lip colour, matching hairpins and a small comb. These items address common signs of wear without requiring a complete makeup bag. Choose products based on problems noticed during a practice run, rather than packing something for every possible scenario.
Does waterproof makeup always last longer at weddings and galas?
No. Water-resistant or waterproof formulas may be useful when tears, moisture or perspiration are expected, but resistance to water is not the same as resistance to skin oil, rubbing or creasing. Eye comfort and safe removal also matter. Choose products according to the conditions you expect and test them before the occasion.
How can you keep hair and makeup intact when attending an event straight after work?
Choose a base that wears comfortably through the day and a hairstyle that can be refreshed without complete restyling. Before the event, blot excess oil, correct only the areas where makeup has shifted, adjust visible flyaways and check the appearance under indoor lighting. Avoid piling fresh products onto an already heavy base.