
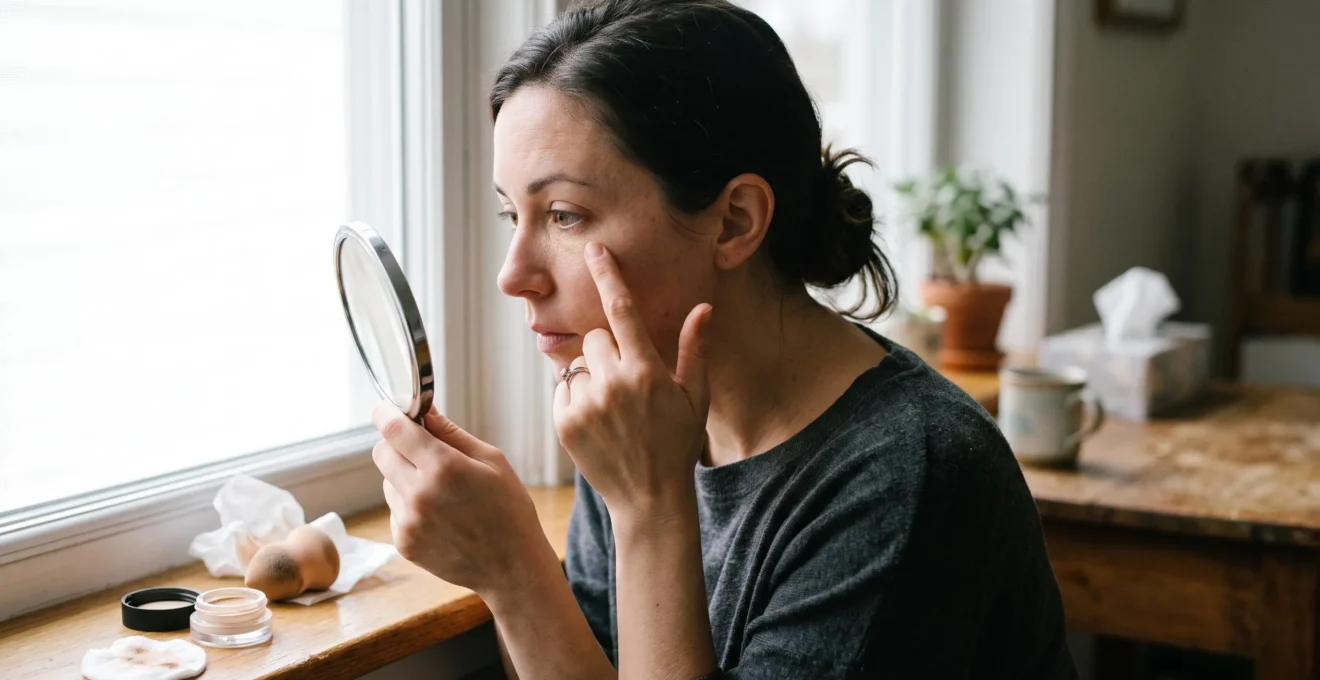
Under-eye concealer that looks smooth when first applied can settle into fine lines, emphasise dryness or turn grey within a couple of hours. The solution is rarely to apply more product. A more reliable approach combines lightweight skin preparation, a corrector matched to the darkness, a flexible concealer and minimal setting powder where needed.
The key is to treat colour correction and coverage as two separate jobs. A corrector reduces the appearance of blue, purple or brown shadows; concealer brings the corrected area closer to the surrounding skin tone. When either layer is too thick, too light or poorly matched, the result can look heavy rather than seamless.
For UK readers, changing daylight is an especially useful test: a bathroom mirror can make a shade appear flattering that looks noticeably ashy beside a window. Skin texture, under-eye hollows and skincare residue also influence wear, so the best technique needs to account for more than the concealer formula alone. Although no application method guarantees a crease-free finish for exactly two hours, careful layering and targeted touch-ups can help makeup remain more natural throughout the day.
The essentials for smoother under-eye coverage
- Use a small amount of peach, pink or orange corrector according to the darkness and your skin depth.
- Apply flexible concealer in a thin layer, concentrating coverage where shadows are strongest.
- Let skincare settle, remove excess product and set only where necessary rather than powdering the entire under-eye.
- Why Does Concealer Make Under-Eye Circles Look Greyer in Daylight?
- How Do You Use Colour Corrector Under the Eyes Without Making It Look Heavy?
- Peach or Pink Corrector: Which One Works Better for Blue-Purple Circles?
- The Under-Eye Powder Mistake That Emphasises Fine Lines Instantly
- When Should You Apply Eye Cream So Concealer Doesn’t Slip or Crease?
- Why Does Concealer Slide Off Active Spots Even When You Set It?
- How Do You Apply Translucent Powder So Skin Still Looks Like Skin?
- How Do You Conceal Blemishes So They Don’t Peek Through After 4 Hours?
Why Does Concealer Make Under-Eye Circles Look Greyer in Daylight?
Concealer can make dark circles look greyer when its undertone or depth does not sufficiently counter the underlying discolouration. Applying a thicker layer does not necessarily solve that mismatch. A shade that looks bright and clean in artificial bathroom lighting may appear ashy in daylight, particularly when it is too pale or lacks the warmth needed to balance blue-purple shadows.
There are two problems to distinguish. The first is a colour mismatch: the concealer may be too cool, too light or otherwise unsuitable for the colour of the darkness beneath it. The second is insufficient coverage. These can look similar, but they require different adjustments. If the finish looks grey despite substantial coverage, adding another layer may simply make the area heavier.
Concealer pigments and the colour beneath them interact visually, so the final result depends on the combination rather than the shade viewed on its own. A thick, opaque layer can also emphasise texture and create a visibly different patch from the surrounding skin. A warmer shade or a small amount of corrector may improve the result more effectively than additional concealer.
Use a simple daylight check before changing your entire routine:
- Apply your usual concealer in a thin layer.
- Wait approximately two minutes, then inspect the result beside a window or outdoors in indirect daylight.
- Look for an ashy halo, a grey inner corner or an obvious pale patch against the cheek.
- If the area looks grey, test a warmer or better-matched shade before adding coverage.
Start by testing a shade close to your skin depth, or at most around one shade lighter if a brighter finish is your goal. This is a starting point rather than a universal rule: the correct depth depends on your complexion and the darkness being covered.
For persistent blue-purple circles, test a peach-toned corrector beneath the concealer. If the colour improves without a thicker finish, the main issue was likely the colour balance rather than the amount of coverage.
The most useful adjustment is the one that corrects the colour while preserving the skin’s natural appearance. Once the shade looks right in daylight, the next step is to keep the corrective layer as light as possible.
How Do You Use Colour Corrector Under the Eyes Without Making It Look Heavy?
Use colour corrector only on the darkest part of the under-eye, then apply a thin layer of concealer to even the colour. The corrector should reduce the contrast between the shadow and surrounding skin, not create a visible patch of peach, pink or orange. The less corrective pigment you need, the less concealer you may need to place over it.
Start by examining the area in natural light. Dark circles are not always uniform: the inner corner may look blue-purple, while the hollow beneath the eye may appear brown or simply darker because of shadow. Correcting the whole under-eye with one strong shade can therefore create excess colour in areas that need little or no correction.
Instead, concentrate the product where the darkness is strongest, often around the inner corner and inner half of the under-eye. Use a fingertip or a small brush to tap on a sheer layer, feathering the edges outward. Avoid spreading a full crescent of corrector across the entire under-eye unless the discolouration genuinely extends that far.
Give the corrector a brief moment to settle before applying concealer. If it remains slippery or visibly wet, gently press away excess with a fingertip rather than rubbing it off. This helps avoid moving the first layer around when the second goes on. The ideal timing depends on the formula, so judge the surface rather than relying on a fixed waiting period.
Choose a flexible, lightweight concealer that blends with the corrector without requiring a thick coating. Using a heavy, full-coverage face concealer as both corrector and finishing layer can produce an unnecessarily dense result. The objective is to neutralise the darkness first, then use concealer to refine the remaining colour difference.
For a practical reference, Allure‘s colour-corrector selection and application advice discusses matching corrective shades to different types of discolouration and complexions. Its recommendations are professional editorial guidance rather than controlled evidence that one formula or layer thickness will work for everyone.
A five-step under-eye application checklist
- Inspect the darkness in daylight and record whether it looks predominantly blue, purple, brown or mixed.
- Select a corrector that suits both the discolouration and your skin depth; note the shade tested.
- Apply a small amount only to the darkest area and blend the edges; check that no obvious colour patch remains.
- Let the corrector settle, then tap on a thin layer of concealer; compare the corrected area with the surrounding skin.
- Check the finish beside a window and after a short wear test; record whether the main issue is greyness, creasing, dryness or insufficient coverage.
Good colour correction should be difficult to detect once the concealer is blended. With the amount under control, choosing the right corrective colour becomes the next decision.
Peach or Pink Corrector: Which One Works Better for Blue-Purple Circles?
Peach is a useful starting point for blue-looking under-eye shadows, while pink-toned correctors may suit some fair complexions and certain forms of under-eye discolouration. However, no single colour works for every blue-purple circle. The right choice depends on the precise shade of the darkness and your skin depth, which determine how the corrective pigment appears once blended.
Use two decisions rather than choosing by the colour name on the packaging alone.
| What you see | Corrector to test | What to watch for |
|---|---|---|
| Blue-leaning shadows | Peach | Check that the result looks neutral rather than orange. |
| Purple-violet shadows on a fair complexion | A suitable pink or salmon shade | Check that the finish does not become pale or ashy. |
| Blue-purple shadows on a deeper complexion | A deeper peach, warm orange or red-orange shade, depending on the darkness | A pale pink may look ashy, while excessive orange can remain visible through concealer. |
| Mixed or uneven under-eye darkness | Different corrective shades tested selectively | Do not apply the strongest shade across areas that need little correction. |
Skin depth is particularly important. A pale peach that looks natural on fair skin may not provide enough warmth for a deeper complexion. Conversely, a saturated orange corrector can leave a noticeable warm cast if the darkness is relatively subtle or the product is too intense for the skin.
To test a shade, inspect the under-eye beside a white surface in daylight. This can help you judge whether the darkness leans more blue or violet, although mixed pigmentation and structural shadows may make the distinction imperfect. Test the corrector on a small area, blend it thinly and then apply your intended concealer over it.
If the corrected area looks too orange, reduce the amount before changing the entire routine. A tiny amount of a compatible concealer can be mixed into the corrector to soften its intensity, but test the mixture on a small area first. Mixing products can change their texture and coverage, so it is not guaranteed to produce the same finish with every formula.
Remember that some under-eye darkness comes from hollows that cast shadows rather than pigmentation alone. Corrector can improve the colour contrast, but it cannot remove the hollow itself. Using more pigment to compensate for a structural shadow may therefore make the makeup look heavier without creating a completely even result.
The best shade is the one that reduces the visible darkness without leaving its own colour behind. Once that balance is right, powder technique becomes important because even well-matched concealer can look less natural when it is set too heavily.
The Under-Eye Powder Mistake That Emphasises Fine Lines Instantly
The most common powder-related mistake is using too much product or applying it in a way that emphasises texture. Powder does not automatically prevent creasing, and it cannot compensate for a thick or mobile concealer layer. On dry or mature under-eyes, excessive powder may make fine lines and flaky patches more visible, even when the makeup initially looks smooth.
Before setting, look at the concealer while your face is relaxed. If product has collected in a fine line, gently tap it back into a thin layer with a fingertip. Applying powder over the crease without first redistributing the product can make that unevenness more noticeable. The aim is to set a smooth layer, not to lock an existing fold of makeup in place.
Use a small amount of finely milled powder and keep it where the concealer actually sits. A small velour puff can press a light veil into the skin; a brush may also work when used sparingly and with a gentle touch. The appropriate method depends on the powder, the concealer and the texture of the under-eye area.
For a smoother application:
- Remove excess concealer from any visible crease by tapping gently.
- Pick up a minimal amount of powder and remove obvious excess from the applicator.
- Press the powder lightly over the concealed area rather than repeatedly sweeping across the skin.
- Leave areas without concealer alone instead of powdering the entire under-eye automatically.
Dry or mature under-eyes may look better with less powder or none at all. This involves a trade-off: skipping powder can leave the concealer more prone to movement, but reducing powder may preserve a more flexible, skin-like finish. A light setting spray is another option to test, although results depend on the formula and are not guaranteed to replace powder for every person.
For a midday correction, do not automatically add another layer of powder. Press the area gently with a clean fingertip to redistribute the product, then reassess. If coverage is still needed, use a very small amount of concealer only where the darkness has reappeared.
Powder should support the finish, not become the most visible part of it. If concealer repeatedly slips or gathers despite careful setting, check your skincare preparation next: a slippery or insufficiently hydrated surface can undermine the result before powder is applied.
When Should You Apply Eye Cream So Concealer Doesn’t Slip or Crease?
Apply eye cream early in your makeup routine and allow it to absorb until the skin no longer feels noticeably wet or tacky before applying concealer. The goal is hydrated skin without a slippery surface. Applying concealer immediately over a rich cream can make blending difficult, while skipping hydration entirely may leave dry patches that become more visible under makeup.
Timing is only part of the solution. A lightweight eye cream may sit comfortably under concealer, whereas a rich balm or oil-heavy product may leave more residue. The interaction also depends on the concealer itself: products can differ in how they spread, set and combine with skincare, so a formula that works well for one person may not suit another.
Build skin preparation into the start of the routine:
- Cleanse gently and apply eye cream to bare skin according to the product’s directions.
- Continue with other makeup preparation steps, such as applying base products or doing your brows, while the cream settles.
- Touch the under-eye gently to check for excess residue. The skin should feel comfortable and hydrated, not wet or slippery.
- If product remains on the surface, blot gently with a tissue rather than rubbing the area dry.
- Apply corrector and concealer in thin layers, then assess whether the finish remains smooth as you move your face.
Professional advice in Allure’s makeup artist advice for concealer on fine lines supports lightweight hydration, flexible concealer textures and using less product to reduce visible accumulation. The article also notes that overly slippery eye creams can interfere with application. These are practical recommendations, not proof that one waiting period or skincare formula prevents creasing for a specific number of hours.
Avoid assuming that every silicone-containing eye cream will cause pilling. Compatibility depends on the full formulations and how they are layered. If pilling occurs, try simplifying the routine or testing the concealer over a different lightweight moisturiser before replacing every product.
Dryness needs a different response from excess slip. If concealer catches on flaky patches, improve hydration and reconsider the texture of the products being layered. Applying more powder to a dry surface can emphasise the problem rather than resolve it.
The ideal preparation leaves the under-eye comfortable, with no obvious residue and no dry patches. Once the skincare and concealer layers work together, similar principles of surface preparation and precise placement can help with blemishes elsewhere on the face.
Why Does Concealer Slide Off Active Spots Even When You Set It?
Concealer can remain uneven over an active spot because the area may be raised, oily, irritated or flaky. Powder alone cannot make an uneven surface smooth, and repeatedly adding product can emphasise the spot’s edges. The objective is to reduce visible colour differences while keeping the layer thin enough that the surrounding skin does not become a thick, obvious patch.
Start with gentle preparation. Cleanse the area and allow the skin to dry before applying makeup. If you already use a suitable blemish treatment, follow its directions and avoid adding aggressive new treatments immediately before an event. Irritated or peeling skin can make concealer harder to blend, even when the shade is well matched.
For targeted coverage, a small pointed or dense brush can help place product precisely:
- Apply a thin layer of foundation or complexion product over the surrounding skin if you normally use one.
- Tap a small amount of skin-matching concealer onto the remaining visible discolouration.
- Blend only the edges with a fingertip, small brush or sponge without wiping the product away from the centre.
- If the finish needs setting, press a minimal amount of powder onto the concealed area.
Choose the amount according to the spot’s shape. A raised blemish may remain visible because of its physical texture even when the colour is successfully concealed. Covering the entire peak with a thick layer can make the raised area more conspicuous; keeping the product thin and blending the edges may create a smoother overall appearance.
Avoid harsh exfoliation or unfamiliar drying products the night before an important occasion. The resulting flaking may be more difficult to conceal than the original blemish. Makeup advice is not a substitute for appropriate acne care, particularly when spots are painful, persistent or irritated.
Successful spot concealing is a balance between colour coverage and texture. The same restraint applies when setting makeup more broadly: powder should be placed where it serves a purpose rather than used indiscriminately across every part of the face.
How Do You Apply Translucent Powder So Skin Still Looks Like Skin?
Apply translucent powder only to areas that need help with shine or makeup movement, using a small amount and light pressure. The T-zone and selected concealed areas may benefit from setting, while the outer cheeks and other areas that already look balanced can often remain powder-free. This selective approach helps preserve the natural reflection and texture of the skin.
Two variables make a difference: the fineness of the powder and the amount deposited on the skin. Finely milled powder may blend more seamlessly than a coarser texture, but even a fine formula can look dry if too much is applied. Pressing a small amount with a puff often provides more control than sweeping a loaded brush repeatedly over the face.
Translucent does not mean invisible on every complexion or in every lighting condition. Some formulas may look pale or create a white cast in flash photography. This is particularly important when choosing a powder for deeper skin tones. Test the finish in daylight and take a flash photograph if you expect to be photographed under flash lighting.
A lightly tinted setting powder can be an alternative if a translucent formula visibly lightens the skin. Match the colour to the surrounding complexion and check that the powder does not alter the concealer shade beneath it.
Use this placement method as a starting point:
- Set the T-zone if it becomes noticeably shiny.
- Press a small amount onto concealed areas that need additional hold.
- Leave the outer cheeks and naturally balanced areas unpowdered when possible.
- Check the result in daylight before adding more product.
If you have already over-powdered, do not immediately apply another thick layer of makeup. A light mist of a compatible setting spray may help soften a powdery finish. Allow it to settle and reassess the skin before making further changes. Facial oil is another possible technique for certain finishes, but it can disturb the base or increase slip, so it is not a universal correction.
Powder-free areas can preserve a more skin-like finish, but they may not offer the same degree of hold as set areas. Your choice should reflect how the makeup wears on your skin rather than a rule that the entire face must be either powdered or unpowdered.
Natural-looking makeup depends on controlling where product sits, not simply choosing a powder labelled translucent. With a lighter setting technique established, the remaining challenge is maintaining coverage on blemishes throughout the day without creating a visibly thicker layer during touch-ups.
Key takeaways
- Match corrective pigment to both the colour of the darkness and the depth of your complexion.
- Build coverage in thin layers and address oil or visible creasing before adding more product.
- Use daylight and a realistic wear test to assess whether your technique needs a colour, texture or setting adjustment.
How Do You Conceal Blemishes So They Don’t Peek Through After 4 Hours?
Longer-lasting blemish coverage depends on the whole makeup routine, not just the concealer. Skin preparation, the base product, the concealer’s texture and the setting method all influence the final appearance. A long-wear formula can still perform poorly if the layers underneath do not work together or if too much product has been applied to an uneven area.
Begin with a thin complexion base, allowing it to do most of the work of evening out the skin tone. Then add concealer only where redness or discolouration remains. This layered approach can be more natural than placing a thick patch of concealer directly onto bare skin. A small pointed brush helps target the remaining mark, while gentle tapping blends the edges without removing the coverage from the centre.
Redness may need a different colour strategy from a brown mark or a blue-purple shadow. A green corrector can help neutralise visible redness before concealer, but it should be used sparingly and blended carefully. Yellow-based corrective shades may also be worth testing depending on the colour of the mark and the surrounding skin. No corrective shade is universal, so judge the finished result rather than the product colour alone.
Professional application guidance in Allure’s professional concealer application tips describes using a sheer complexion base before targeted blemish concealing and blending the edges of a small amount of product. This supports a precise application strategy, but it does not establish that every concealer will stay in place for four hours.
For a midday check, inspect the spot before touching it. If the surrounding skin is oily, gently blot around the concealed area without rubbing across the centre. If the mark has become visible again, tap a small amount of concealer onto the exposed area and blend the edges. Set it lightly if necessary rather than covering the whole patch with additional powder.
There is also a limit to what makeup can achieve. If a blemish is raised, peeling or actively irritated, the texture may remain visible even when the colour is less noticeable. More product is not always the answer; a thinner layer can look smoother and remain less obvious as the face moves.
Before your next makeup application, test the complete routine under ordinary daylight and check it again after several hours. Note whether the main issue is returning redness, excess oil, dry texture or product settling; identifying the actual failure makes the next adjustment more useful than simply buying a higher-coverage concealer.
Why does my under-eye concealer crease after two hours?
Creasing can occur when too much concealer collects in fine lines, when skincare leaves a slippery surface or when the formula does not suit your skin texture. Before adding powder, gently tap excess product out of visible creases. Then try a thinner layer and set only where necessary. The exact wear time varies with the formula, skin preparation and natural facial movement.
Should under-eye concealer be lighter than foundation?
A concealer can be slightly lighter than foundation if you want a brighter finish, but a shade that is much too pale can make dark circles appear grey or ashy. Start close to your skin depth, assess the result in daylight and adjust the undertone before adding more coverage. A colour corrector can help when the underlying darkness is strongly blue or purple.
Can you wear under-eye concealer without powder?
Yes. Skipping powder can help preserve a flexible, less dry-looking finish, particularly if your under-eye area has fine lines or flaky patches. The trade-off is that concealer may move or crease more readily. Test the result over several hours and introduce a small amount of finely milled powder only if your makeup needs additional hold.
Is peach or orange corrector better for dark circles on deeper skin?
Both may be worth testing. The best option depends on the darkness itself and your skin depth. Deeper complexions may need a more saturated peach, orange or red-orange shade than fair complexions. Apply a small amount to the darkest area, blend it thinly and check whether the concealer removes the visible corrective colour without leaving an orange or ashy cast.
How can you stop concealer looking dry under the eyes?
Prepare the skin with suitable lightweight hydration, allow the cream to settle and remove excess residue before applying makeup. Use a flexible concealer in a thin layer and avoid automatically powdering the whole under-eye. If the area looks flaky, reconsider the skincare and product texture rather than adding more concealer or powder over the dry patches.