
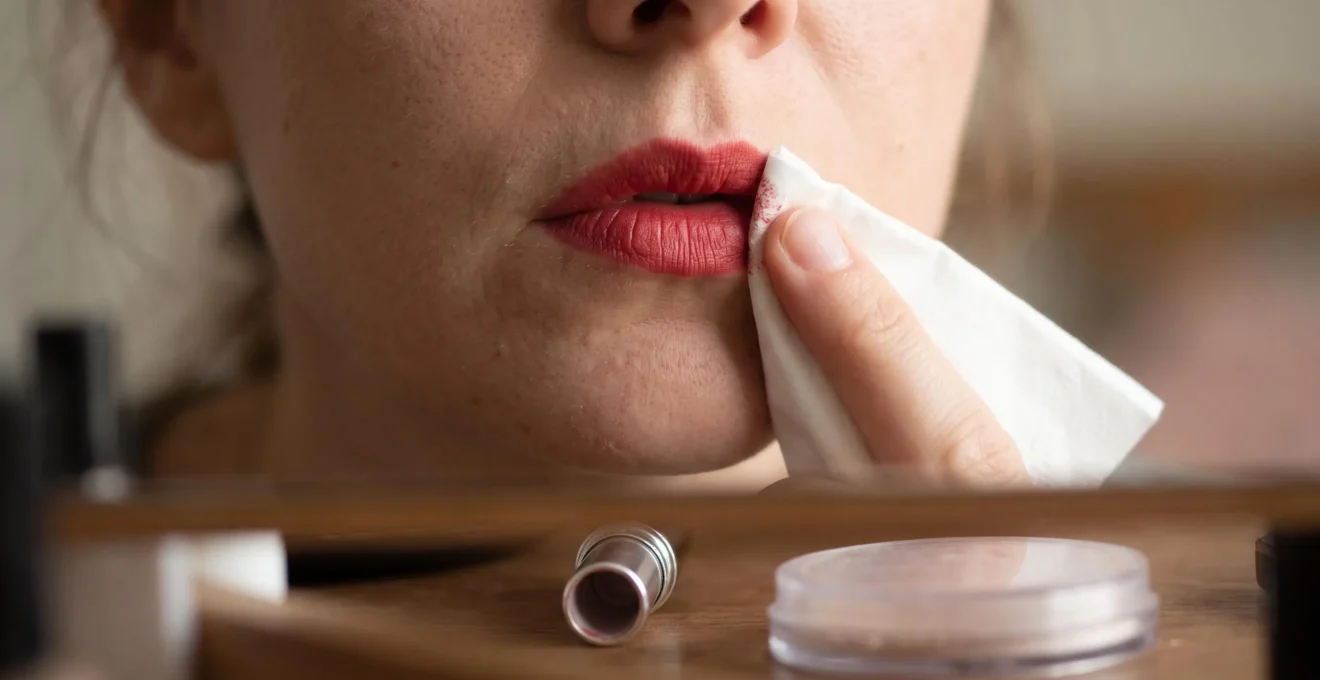
Making lipstick last through a meal without crumbling starts with three things: a smooth, comfortable lip surface, a formula that suits your lips, and thin layers that can move naturally when you talk and eat. Applying more lipstick is rarely the best solution. Excess product can collect in lip lines, transfer onto glasses and wear away unevenly.
The practical approach is to moisturise ahead of time, remove excess balm before applying colour, define the lip shape with liner and build coverage gradually. For traditional lipstick, gentle blotting can improve the finish. Transfer-resistant liquid formulas require a different approach: apply a controlled layer and let it set without disturbing the film.
Food oils, friction and moisture can still remove lipstick, especially along the inner lip. The goal is therefore realistic longevity rather than an impossible promise of zero transfer. With the right preparation and a small, targeted touch-up, a defined lip can remain attractive through coffee, lunch and a full working day without becoming thick or uncomfortable.
How to keep lipstick looking fresh through meals
- Prepare lips with gentle moisturising care, then blot away excess balm before applying colour.
- Choose thin lipstick layers and a suitable setting technique rather than building a thick, rigid coating.
- After eating, blot carefully and repair only the faded areas instead of covering the entire lip again.
- Why Does Lipstick Break Apart on Dry Lips Even When You Use Balm?
- How Do You Set Lipstick So It Survives Coffee and Lunch Without Feeling Thick?
- Liquid Matte or Bullet Lipstick: Which Lasts Longer Without Drying You Out?
- The Lip Scrub Mistake That Makes Lipstick Look Worse the Next Day
- When Should You Apply Lipstick if You Powder Your Whole Face?
- Why Does Makeup Break Down Faster Around the Mouth and Nose After You Eat?
- Defined Brows or Statement Lip: Which Looks More Professional With Minimal Makeup?
- How Do You Make Makeup Last 12 Hours Without Adding More Product?
Why Does Lipstick Break Apart on Dry Lips Even When You Use Balm?
Lipstick can break apart on dry lips even after balm application because moisturising does not instantly remove flakes or restore a smooth surface. A thick layer of balm may also leave lipstick sitting on a slippery coating rather than directly against the lips. As you speak, drink and eat, the colour can shift, separate or disappear unevenly.
The distinction is between lip condition and surface preparation. Dry, flaky lips have an uneven texture that makes smooth application difficult. At the same time, some rich balms leave an oily or waxy residue that can interfere with the way particular lipstick formulas set.
Humectants such as glycerin and hyaluronic acid help attract or retain water, while occlusive ingredients such as petrolatum, waxes and shea butter help limit moisture loss. They serve different purposes, and neither category is inherently unsuitable for lipstick wear. The important variable is how much product remains on the surface when colour is applied.
Use a nourishing balm during your skincare routine rather than immediately before your lipstick. Allow it time to settle, then press a clean tissue gently against your lips.
If the tissue shows obvious greasy residue, try blotting once more before applying lipstick. This is a practical surface check, not a scientifically validated adhesion test. Some lipsticks tolerate balm underneath; others perform best on a nearly product-free surface.
For persistently chapped lips, prioritise recovery over wear time. The American Academy of Dermatology’s guidance on chapped lips recommends non-irritating moisturisers and ingredients such as petrolatum and shea butter. A thicker ointment before bed may be especially useful for very dry lips.
Avoid licking, picking or biting flaky areas. If cracking persists despite appropriate care, seek medical advice rather than repeatedly covering the irritation with lipstick.
Once the lips feel comfortable and excess balm has been removed, the next consideration is building colour that stays flexible rather than forming a thick coating.
How Do You Set Lipstick So It Survives Coffee and Lunch Without Feeling Thick?
Set traditional lipstick with thin applications, gentle blotting and, if your lips tolerate it, a barely visible amount of translucent powder. Build colour gradually instead of applying one heavy coat. This can reduce excess product and improve the appearance of wear, although no powder technique can guarantee that lipstick will survive oily food or repeated contact.
Start with lip liner on dry, comfortable lips. Outline the natural lip border and lightly fill the areas where colour tends to disappear. A compatible liner gives you a defined shape and a useful colour base.
For a traditional cream or satin lipstick, try this sequence:
- Apply a thin, even first layer with a lipstick bullet or lip brush.
- Press your lips gently against a folded tissue to remove excess colour.
- For a more matte finish, place a single thin tissue over the lips and lightly dust translucent powder through it with a small brush.
- Remove the tissue and apply a second thin layer where additional opacity is needed.
- Blot again without rubbing, then check that the lips still move comfortably.
Makeup artists interviewed in Allure’s makeup-artist tips for longer-lasting lipstick recommend clean lip preparation, liner and thin applications with blotting. These are professional techniques, not controlled evidence of a particular number of hours of wear.
Powder is optional, not essential. Too much can make an already dry finish look chalky or emphasise flakes. Start without it if your lips are sensitive, and only add the smallest amount when the formula benefits from extra mattifying.
Different setting methods create different finishes:
| Method | Finish and comfort | Practical limitation |
|---|---|---|
| Blotting alone | Lightweight; retains more of the lipstick’s original texture | Some transfer remains likely |
| Translucent powder through tissue | More matte, with less surface shine | May emphasise dryness or fine lines |
| Setting spray tapped onto lips | Formula-dependent; not a reliable universal lip-setting method | Only appropriate if the product is intended for lip contact |
| Dedicated lip sealer | May provide a more fixed finish | Can feel tight or alter the original texture |
For coffee, let any transfer-resistant formula finish setting before drinking. Avoid pressing the full centre of the lips against a glass where practical. After a meal, dab with a napkin instead of wiping repeatedly, then touch up the inner lip where colour has faded.
Your five-step meal-proof lipstick check
- Moisturise ahead of application and blot excess balm; check that there is no obvious greasy surface film.
- Define the lips with liner; check that both corners and the cupid’s bow are outlined cleanly.
- Apply a thin colour layer and blot; check the tissue for excess pigment rather than leaving it on the lips.
- Set with the method your formula supports; smile and speak to check that the finish remains flexible.
- After eating, dab the lips and inspect the inner edge; repair only the visibly faded area.
The best technique still depends on the lipstick itself: a film-forming liquid matte behaves differently from a traditional bullet, particularly when exposed to food and friction.
Liquid Matte or Bullet Lipstick: Which Lasts Longer Without Drying You Out?
Liquid matte lipstick is often the better choice for reducing transfer through drinks and meals, while a creamy bullet lipstick is generally easier to refresh and may feel more comfortable on dry lips. Neither category guarantees long wear without cracking. The deciding factors are film flexibility, lip condition, formula quality and how much contact the lipstick experiences.
Many transfer-resistant liquid lipsticks use film-forming ingredients that remain on the lips after volatile carriers evaporate. This can produce a more resistant coating, but it also creates a formulation challenge: the film must withstand lip movement without becoming brittle.
2022 research on flexible, long-lasting lipstick films, published in the Journal of Society of Cosmetic Chemists of Japan, examines precisely this balance between hardness, flexibility, peeling and colour retention. The research concerns particular formulation materials, so it cannot establish that every liquid matte outperforms every bullet lipstick.
Traditional bullet lipsticks usually contain a combination of waxes, pigments and emollients. Many maintain a creamier feeling but transfer more readily because the colour does not set into the same type of resistant film. Formula differences matter more than the packaging category alone.
| Factor | Liquid matte | Cream or satin bullet |
|---|---|---|
| Transfer resistance | Often higher once fully set | Typically lower |
| Comfort on dry lips | Can emphasise flakes or tightness | Often more forgiving |
| Meal wear | May remain around the outer lip while fading centrally | More likely to transfer and fade gradually |
| Touch-up | May require removing loose film before repairing | Usually easier to blend into existing colour |
| Best suited to | Transfer control on comfortable lips | Flexible wear and easy maintenance |
For a hybrid approach, apply a thin liquid matte base and let it set completely. If the formula permits layering, dab a small amount of compatible cream lipstick or balm onto the centre for comfort. Expect that the creamy layer may increase transfer.
A second option is a satin bullet lipstick applied over a compatible lip liner, using the blotting method described earlier. It offers less transfer resistance than many liquid mattes but may provide a better balance when comfort matters most.
For visibly flaky, sore or cracked lips, avoid treating an ultra-matte product as a solution to the underlying problem. A comfortable formula and proper lip care are more useful than forcing a resistant coating onto irritated skin.
Choosing the right finish solves only part of the problem. The way the lips are exfoliated can also determine whether the surface looks smooth or irritated the following day.
The Lip Scrub Mistake That Makes Lipstick Look Worse the Next Day
The biggest lip-scrub mistake is using excessive pressure or repeatedly exfoliating lips that are already dry, irritated or cracked. Scrubbing may temporarily remove visible flakes, but aggressive friction can worsen irritation and leave the surface less comfortable. For smoother lipstick application, gentle moisture care is often preferable to trying to polish the lips immediately before wearing colour.
Lip skin is delicate, so a gritty scrub should not be treated as a compulsory preparation step. Rubbing harder does not guarantee a smoother result, and it can create additional redness, tenderness or visible peeling.
The American Academy of Dermatology’s general safe-exfoliation advice warns that inappropriate or excessive exfoliation can damage skin and cause irritation. That guidance is not a lip-specific trial, but its emphasis on adapting exfoliation to skin sensitivity is relevant here.
Do not scrub visibly split or sore lips. If the lips are intact and merely have a little superficial roughness, a damp, soft washcloth used with minimal pressure may be a gentler option than a coarse sugar scrub. Stop if the skin stings or becomes red.
If choosing to exfoliate, doing so during an evening skincare routine rather than immediately before an important lipstick application leaves an opportunity to moisturise and assess how the lips respond. This is a practical scheduling preference, not a proven rule that nighttime exfoliation improves lipstick durability.
Avoid following a rigid daily or weekly scrub schedule regardless of lip condition. The appropriate interval depends on sensitivity, the method used and whether irritation occurs. Many people do not need a dedicated lip scrub at all.
Chemical exfoliants are not automatically a safer alternative. Acids formulated for facial skin should not be applied to the lips unless specifically intended for that use. An overnight lip mask or simple fragrance-free ointment can offer comfort without deliberate exfoliation.
For a smoother next-day finish, remove makeup gently, moisturise before bed and check the condition of the lips in the morning. Only apply colour when the surface feels comfortable enough to tolerate it.
Once the lip surface is prepared, the order of your wider makeup routine becomes important, particularly when loose or pressed powder is involved.
When Should You Apply Lipstick if You Powder Your Whole Face?
Apply lipstick after powdering your face when your priority is accurate colour, a clean lip border and comfortable texture. If you prefer to complete and set your lipstick first, protect the lips while applying facial powder. Either order can work; the important step is preventing loose powder from settling into lipstick and creating a dull, dry-looking finish.
For most everyday routines, finishing the complexion before lipstick is the simplest approach. Apply foundation and concealer, set the areas that need powder, brush away any excess around the mouth and then apply lip liner and colour.
This keeps translucent or tinted face powder from changing the lipstick shade or collecting on a tacky lip surface.
There is also a reasonable case for applying lipstick earlier. If your lip look requires careful liner work, layered colour and precise setting, you might prefer completing that stage before the final complexion powder. In that case, use a folded tissue as a temporary shield while powdering nearby areas.
Be particularly careful around the corners of the mouth, upper lip and nasolabial folds. Loose particles can mix with moisturiser, foundation and lip products, producing a caked appearance that becomes more obvious when the face moves.
If you notice powder on the lip border before lunch, use a clean, soft brush to remove loose residue without disturbing the liner. Blot the lips if necessary, then inspect the edges before touching up colour.
Your midday repair also depends on the original application order. When lipstick was applied after powder, a straightforward blot-and-touch-up may be enough. If powder has settled over the lipstick, remove that residue first rather than immediately applying another coloured layer.
For particularly dry skin, avoid adding powder over the entire lower face merely to extend lipstick wear. Lipstick setting and complexion setting address different surfaces and should be controlled separately.
The next challenge is keeping the surrounding makeup intact, because the mouth and nose experience more friction and moisture than most other areas of the face.
Why Does Makeup Break Down Faster Around the Mouth and Nose After You Eat?
Makeup breaks down faster around the mouth and nose because these areas experience concentrated movement, moisture and friction. Eating exposes the skin and lipstick to food oils, while drinking and wiping repeatedly disturb the finish. Foundation can also shift where moisturiser, sunscreen and natural skin oils accumulate, making this area more vulnerable than the cheeks or forehead.
The skin around the mouth stretches when talking and chewing. The nose and upper lip may also become moist during a busy day, particularly in warm conditions. A makeup base that looks stable elsewhere can therefore crease or separate around these high-movement zones.
Skincare contributes another variable. A rich moisturiser or facial oil applied too generously around the upper lip can leave excess slip beneath foundation. Sunscreen is essential for daytime protection and should not be skipped simply to improve makeup durability; instead, allow it to settle according to its instructions and avoid unnecessary additional oily layers.
Rather than using the same primer and powder everywhere, assess the face in separate zones:
- Upper lip and sides of the nose: use lightweight preparation and targeted setting if excess shine is a problem.
- Smile lines and mouth corners: keep foundation thin so movement does not produce a heavy crease.
- Cheeks: retain enough moisturising care for a comfortable, natural finish.
- Lip border: avoid unnecessary foundation buildup that could mix with lipstick and liner.
After eating, inspect the area before reaching for more makeup. Use a clean napkin to blot away moisture or oil rather than rubbing. A cotton bud can help lift small lipstick transfers from the surrounding skin.
Next, use a clean fingertip or small makeup sponge to press and redistribute foundation around the affected area. If colour coverage has genuinely disappeared, add only a tiny amount of compatible complexion product to the exposed patch.
Do not place fresh powder directly over greasy residue. Blot first, assess what remains and powder only if needed. This prevents an ordinary post-meal correction from becoming an increasingly thick makeup layer.
Keeping this area fresh also makes a statement lipstick look more intentional, particularly when the rest of the makeup is minimal.
Defined Brows or Statement Lip: Which Looks More Professional With Minimal Makeup?
Both defined brows and a statement lip can look professional with minimal makeup. Brows create structure around the eyes and usually require little attention during meals, while a statement lip adds immediate colour and can make a simple complexion feel polished. The better choice depends on your features, workplace setting and whether you can comfortably maintain the lip colour throughout the day.
For video meetings, brows often help define the upper face, where eye contact and expressions draw attention. A softly defined brow paired with a natural lip can look balanced without a complicated routine.
In person, a well-applied statement lip can become the focal point of otherwise understated makeup. It works particularly well with a clean complexion and subtle eye definition, provided the lip edges remain crisp.
Consider the practical demands of the day rather than following a rigid beauty rule.
| Situation | Practical choice | Reason |
|---|---|---|
| Video-heavy working day | Softly defined brows | Frames the eyes with minimal upkeep |
| Presentation or in-person meeting | Brows or statement lip | Choose according to the impression and balance you prefer |
| Lunch with clients | Defined brows with a subtle lip, or a tested transfer-resistant lipstick | Reduces the need for visible corrections |
| Long day with limited touch-up time | Natural brows and a comfortable, low-maintenance lip | Keeps the routine manageable |
A statement lipstick is not inherently less professional than a neutral shade. What tends to make the difference is the overall finish: even colour, clean edges and makeup that remains comfortable rather than visibly flaking.
The hybrid approach can be especially effective. Lightly fill sparse brow areas, brush the hairs into place and pair them with a thin, carefully set lip colour. This distributes definition across the face without requiring heavy eye makeup or foundation.
If the day includes multiple meals, choose a lipstick you have already tested rather than relying on an unfamiliar claim of all-day wear. A softer shade may be easier to maintain discreetly if transfer or central fading occurs.
The same principle applies to longevity generally: a controlled, comfortable finish is easier to maintain than a complicated look that demands constant additional product.
Key takeaways for a longer-lasting makeup routine
- Prepare different facial zones according to their needs instead of applying more powder everywhere.
- Preserve the original finish by blotting and redistributing makeup before considering extra coverage.
- Choose lipstick techniques that remain comfortable after several hours, not just immediately after application.
How Do You Make Makeup Last 12 Hours Without Adding More Product?
To help makeup remain presentable over a 12-hour day without continually adding product, focus on light application, targeted setting and small corrections that preserve the original finish. Blot excess oil, smooth displaced makeup and avoid layering over buildup. The result depends on your skin, activities and products, so 12 hours is a planning goal rather than a guaranteed wear duration.
Start with appropriate skincare and allow each product to settle before adding the next layer. Apply foundation only where coverage is needed, then use a small amount of setting powder in areas that become shiny or move easily.
For the lips, use the preparation and formula choice that best suits your condition. A comfortable satin lipstick may be preferable to an extremely resistant matte if tightness or cracking is a recurring problem. Alternatively, a flexible transfer-resistant film may reduce the amount of colour lost through drinks.
Instead of scheduling full reapplications, use short checkpoints to identify the areas that actually need attention.
| Checkpoint | What to check | Minimal correction |
|---|---|---|
| Mid-morning | Shine beside the nose and lipstick transfer | Blot excess oil and smooth the lip edge |
| After lunch | Inner-lip fading and disturbed foundation near the mouth | Remove transfer, press existing makeup into place and repair colour only where needed |
| Late afternoon | Creasing, visible buildup and dryness | Gently redistribute displaced product and avoid adding layers over flakes |
Each check can be brief when the original makeup is still mostly intact. A folded tissue, clean fingertip, small sponge or cotton bud may be enough for minor corrections.
Added product can become counterproductive when it sits on top of skin oil, food residue or previously displaced makeup. Instead of restoring the original finish, another layer may emphasise texture and create uneven coverage.
Remove or redistribute before replacing. If the problem is excess oil, blot it. If foundation has gathered in a crease, gently smooth it. If lipstick has worn away only at the centre, repair that area without adding unnecessary thickness to the outer lip.
There is also an important distinction between cosmetic maintenance and skincare protection. Daytime sunscreen should be reapplied as directed for the level and duration of exposure; preserving foundation should not take priority over adequate sun protection.
For lipstick specifically, the complete routine combines advance moisturising, gentle lip preparation, suitable liner, controlled colour application, appropriate setting and careful post-meal repairs. None of those steps needs to create a thick or uncomfortable finish.
At your next makeup application, test one change at a time: start by reducing the thickness of your lipstick layer, observe how it wears through a meal and adjust your preparation or formula based on the result. That gives you a repeatable routine built around your own lips rather than an unrealistic promise of perfectly untouched makeup.
Can lipstick stay completely transfer-proof through an oily meal?
No lipstick can be assumed completely transfer-proof under every eating condition. Oils, friction and repeated contact can disturb even resistant formulas. Transfer-resistant lipstick may reduce visible marks, but checking the inner lip after eating remains sensible.
Should you put lip balm over matte lipstick when it starts feeling dry?
A small amount of a compatible balm may improve comfort, but it can soften the matte appearance and increase transfer. If the lipstick has formed a peeling film, additional balm may not restore an even finish. In that case, gently removing the damaged section and reapplying according to the product instructions may work better.
Why does lipstick disappear from the inside of the lips first?
The inner lip experiences frequent contact with saliva, food and drink. It is also a high-movement area, so colour may wear away there before the outer border. Avoid applying lipstick too far onto the moist inner lip surface, and repair faded colour sparingly after meals.
Can you apply fresh liquid matte lipstick over a cracked layer?
It depends on the formula, but applying fresh colour over a visibly cracked or peeling film often makes the uneven texture more obvious. If the product instructions allow layering, use only a very thin amount. Otherwise, remove the damaged colour gently, prepare the area and reapply to a clean surface.
Is lip liner necessary for long-lasting lipstick?
Lip liner is optional, but it can help define the edges, reduce the appearance of feathering and provide a colour base. Filling the lips lightly with a compatible liner may also make gradual lipstick fading less noticeable. Its effectiveness depends on the liner, lipstick and condition of the lips.