
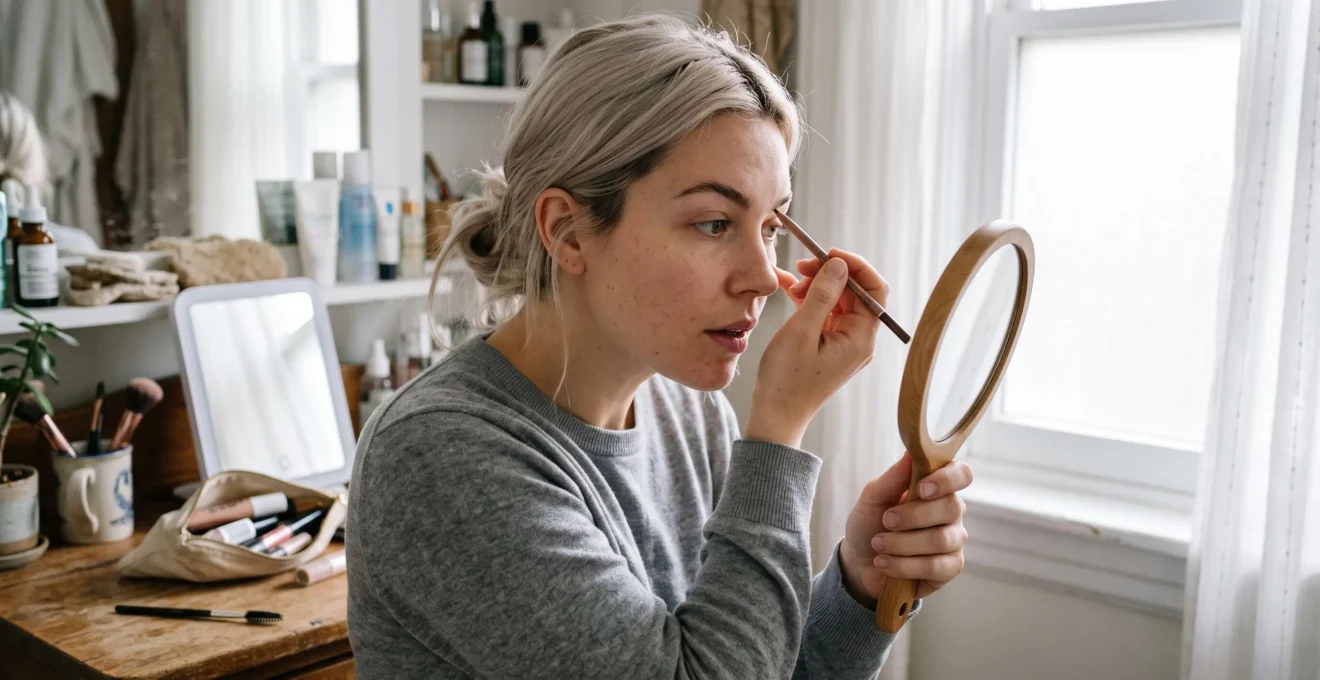
When your hair is dyed lighter, the most natural-looking brow pencil is not necessarily the one that matches your new hair colour. The right shade depends on your natural brow hairs, skin undertone, complexion and the contrast you want to preserve. A brunette pencil can still look harmonious with blonde hair, particularly when your eyebrows remain naturally dark; a softer brown or taupe may work better when your overall colouring is fair and your brows are relatively light.
The aim is to create definition without turning the eyebrows into solid, sharply outlined shapes. That means choosing a suitable undertone, applying pigment only where needed and keeping the front of the brow relatively airy. It also means checking your shade in daylight rather than trusting a product name such as “Medium Brown” or “Ash Blonde”. These labels do not guarantee a consistent depth or undertone across different brands.
For UK readers changing their hair colour, the most useful approach is to assess the whole face after dyeing, test a small amount of product and build definition gradually. The result should look balanced with both your dyed lengths and any darker roots, without requiring a complete brow transformation.
Natural Brow Pencil Shades for Lightened Hair
- Choose a pencil according to your natural brow hairs, skin undertone and desired contrast, rather than matching dyed hair literally.
- Use short, light strokes in sparse areas and leave the inner brow softer to avoid a blocky finish.
- Check the colour in daylight, then use a light layer of brow gel to help keep the shape in place.
- Why Do Brow Pencils Make Brows Look Too Dark Even When You Choose « Medium Brown » ?
- How Do You Use a Brow Pencil for Hair Strokes Without Creating a Blocky Front ?
- Micro-Tip or Classic Brow Pencil: Which Gives Faster Results Without Looking Drawn On ?
- The Brow Tail Mistake That Makes Eyes Look More Downturned
- When Should You Apply Brow Gel if Your Pencil Keeps Smudging by Midday ?
- Why Do Your Eyeshadows Look Orange Indoors but Neutral in Daylight ?
- Defined Brows or Statement Lip: Which Looks More Professional With Minimal Makeup ?
- How Do You Look Polished Without Wearing « Full Glam » to Work ?
Why Do Brow Pencils Make Brows Look Too Dark Even When You Choose « Medium Brown » ?
A medium-brown brow pencil can look too dark after you lighten your hair because the surrounding colour changes the contrast your eye perceives. The pencil itself may not have changed, but it can appear more prominent against blonde or caramel lengths, particularly when the brows remain densely pigmented. The shade name also tells you little about the product’s exact depth, undertone or how strongly it deposits colour.
It helps to distinguish matching the colour of your brows from matching the intensity of the overall look. Your eyebrows do not need to become blonde simply because your hair is blonde. Instead, the pencil should imitate the soft shadow between brow hairs while preserving enough definition to frame your eyes.
In its expert-led guide to eyebrow colour, Allure‘s advice on choosing eyebrow makeup colours emphasises the relevance of hair colour, skin tone, brow density and undertone. A pencil slightly lighter than the natural brow hairs can produce a softer effect, although the best result depends on the individual rather than a universal shade formula.
For naturally dark brows beneath newly blonde hair, a brunette pencil may still be the most convincing choice. As discussed in Allure’s advice on eyebrow colour after dyeing your hair, lighter head hair does not automatically require a blonde brow product. On a very fair complexion, however, a lighter pencil can soften the contrast if the existing brows dominate the face.
| Hair and brow situation | Starting point to test | What to check |
|---|---|---|
| Level 8–10 blonde with naturally dark brows | Soft brunette or a suitable neutral brown | Whether the brows retain definition without looking overly graphic |
| Caramel hair with medium-brown brows | Neutral brown or a softly warm brown | Whether the warmth complements the hair without becoming reddish |
| Light-brown hair with naturally lighter brows | Light or medium brown, depending on brow depth | Whether the pencil fills gaps without creating a darker outline |
| Bleached or tinted brows | A shade suited to the current brow colour and desired definition | Whether the pencil blends with the treated hairs rather than sitting visibly on top |
This grid is a practical starting point, not a validated colour chart. Skin undertone can help refine the choice: cool or neutral brown and taupe shades often create a restrained shadow, while some complexions and auburn hair benefit from greater warmth. An overly ashy shade may look disconnected from warm colouring, just as a distinctly reddish pencil can look conspicuous against cool blonde hair.
Test two nearby shades on a small section of the inner brow or on the skin beside it, using a light hand. View the swatches near a window and compare them with both your brow hairs and your dyed lengths. If one shade appears noticeably redder, greyer or heavier than the other, that difference matters more than the name printed on the packaging.
The best starting shade is the one that creates a believable transition between skin and brow hairs. Once the colour is right, careful application matters just as much: even a flattering pencil can look artificial when too much pigment collects at the front.
How Do You Use a Brow Pencil for Hair Strokes Without Creating a Blocky Front ?
To create natural-looking hair strokes, use a fine pencil, apply minimal pressure and work mainly in sparse areas rather than shading the entire eyebrow. At the front, begin slightly above the lowest visible hairs and draw short, upward strokes that follow the direction of natural growth. Keep the first third relatively light, allowing skin to remain visible between the hairs.
The difference between a hair-like result and a blocky one is often the amount of product deposited with each stroke. Pressing firmly or repeatedly tracing the same area can turn separate marks into a solid patch. Start with a barely visible first pass, inspect the result, then add a few more strokes only where a gap still needs definition.
For the brow front, work from the existing growth pattern rather than drawing a uniform row of vertical lines. Some hairs grow upwards, while others angle outwards. Vary the direction and length slightly to keep the finish believable. Avoid creating an equally dark border along the top and bottom of the brow, particularly if your dyed hair is substantially lighter than your natural colour.
Eyebrow specialist Kristie Streicher recommends short, light strokes concentrated in sparse areas, with only a few carefully controlled marks near the inner brow. Her application guidance in ELLE‘s interview with Kristie Streicher also emphasises preserving translucency between hairs and skin, rather than building a completely opaque shape.
If your natural eyebrow hairs are much darker than your newly lightened hair, pale pencil strokes drawn directly over those hairs can look like visible marks rather than extensions of the brow. Concentrate on actual gaps instead. Where the natural hairs provide enough coverage, leave them alone; where additional softness is needed, a lightly tinted brow gel may help blend the appearance of darker roots and lighter lengths.
After each pass, use a clean spoolie to diffuse excess pigment. Brush gently in the direction of growth rather than repeatedly combing the product into the skin. If the front looks like a solid shape when viewed from arm’s length, remove some pigment with the spoolie instead of adding more product in an attempt to blend it.
Once the front looks soft, the middle and tail can provide more definition without making the entire eyebrow equally dark. The pencil format you choose will influence how easily you can maintain that balance.
Micro-Tip or Classic Brow Pencil: Which Gives Faster Results Without Looking Drawn On ?
A micro-tip pencil is often the easier option when your brows are already reasonably full and you only need to fill a few gaps. Its fine point allows small, controlled marks that can resemble individual hairs. A classic wider-tip pencil can cover sparse areas more quickly, but it requires a lighter touch to avoid depositing too much colour, particularly when lightened hair makes strong brow definition more noticeable.
The right choice depends on how much of the eyebrow needs filling, how confidently you control pressure and whether speed or precision matters most. A fine tip is not automatically more natural: repeated strokes in the same place can still produce a dark patch. Likewise, a wider tip can work well when used on its edge with short, flicked movements rather than broad shading.
| Criterion | Micro-tip pencil | Classic pencil |
|---|---|---|
| Best suited to | Full brows with small gaps or irregular edges | Sparser brows that need more coverage |
| Application | Individual, precise strokes | Short flicks using the tip or edge |
| Main risk | Overworking the same small area | Creating broad, overly dark patches |
| Speed | More controlled, potentially slower per stroke | Can cover larger gaps faster |
| Natural finish | Depends on pressure, placement and shade | Depends on pressure, placement and shade |
Formula also matters. A waxier pencil may deposit and hold a defined line, which can be useful for structure but unforgiving if the shade is too dark or the application too heavy. A softer, powder-finish formula may allow a more diffused result, although the finish will still depend on the product and your skin. There is no universal formula rule that guarantees a natural effect.
Try each format on a different brow, using the same light pressure and a comparable shade. Compare the time required to fill the gaps, correct mistakes and soften the front. This provides a more useful test than judging either product solely by the speed of its first application.
For lighter hair, the most efficient pencil is the one that produces the desired shape without repeated correction. If the classic tip fills gaps quickly but leaves a heavy front, the additional blending may erase its initial time advantage.
With the right pencil in hand, focus next on the shape of the brow itself. Even a well-chosen shade can look unbalanced if the tail extends too far downwards.
The Brow Tail Mistake That Makes Eyes Look More Downturned
A brow tail that extends too low or becomes too long can make the outer eye area appear heavier. This is especially noticeable when the rest of the makeup is light, because a dark, descending line becomes a strong visual feature. Keeping the tail tapered and aligned with the natural brow shape helps maintain definition without pulling attention downwards.
Begin by identifying your natural arch and the direction in which the brow already grows. A traditional placement guide uses a diagonal line from the side of the nose through the outer corner of the eye to estimate the tail endpoint. Treat this as a reference rather than a rigid rule: facial proportions and natural brow growth differ, and the most flattering endpoint may not match a geometric guideline exactly.
When filling the tail, keep the line narrower than the main body of the brow and gradually reduce the amount of pigment towards the endpoint. Avoid extending it simply to create symmetry with the opposite brow. Natural eyebrows rarely have identical shapes, and forcing both tails into the same length can make the result look drawn on.
Lightened hair makes this detail worth checking because a heavily defined tail can appear more prominent against a softer overall colour palette. A micro-tip pencil is useful for extending a few sparse hairs without turning the tail into a solid line. Use a spoolie to soften any harsh edge before adding more product.
For a quick visual check, take a front-facing photograph in daylight with a neutral expression. Cover the lower half of the image and look only at the eye area. If the brows seem to pull the outer eyes down, inspect the direction and length of the tails before changing the entire shape. The photo is a practical comparison tool, not a definitive test of facial symmetry.
A well-shaped tail gives the brow structure without requiring a darker pencil. The next challenge is keeping that definition intact through a working day without creating a second layer of product.
When Should You Apply Brow Gel if Your Pencil Keeps Smudging by Midday ?
For most routines, apply brow gel after filling the brows with pencil so the gel can help hold the hairs and finish the shape. If the pencil smudges because the skin is oily or skincare has migrated into the brow area, however, changing the sequence alone may not solve the problem. The useful first step is to identify what is making the pigment move.
Begin with the condition of the skin. Rich moisturiser, facial oils or sunscreen may leave residue around the brows, while naturally oily skin can make some pencil formulas less stable. Gently blot the brow area with a clean tissue before application if needed, taking care not to irritate the skin. Allow skincare to settle and avoid applying a thick layer of cream directly beneath the brow hairs.
For a straightforward routine, fill only the sparse areas, then brush through a thin layer of clear or lightly tinted gel. Remove excess gel from the applicator before it touches the brows. This helps reduce clumping and prevents the gel from turning a restrained pencil application into a dense, dark shape.
If oil continues to cause smudging, test a small amount of a suitable setting product on clean, dry skin before applying the pencil. Keep the layer thin and allow it to settle according to the product instructions. Compatibility varies between formulas, so test the complete routine rather than assuming that every setting product works with every brow pencil.
Clear gel is useful when the pencil already provides the right colour and the main objective is to keep the hairs in place. Tinted gel can be an alternative when you want to soften the contrast between darker natural roots and lighter lengths. It may provide enough colour in some areas to reduce how much pencil is needed, but it should not be used to conceal a shade mismatch by building up a heavy layer.
Apply the pencil sparingly before adding gel. If the brows become darker, stiffer or clumped together, remove the excess with a clean spoolie instead of adding another coat. A small amount of product generally makes it easier to maintain the soft definition established at the start of the routine.
A five-step brow routine to test and refine
- Inspect your brows in daylight and note where natural hairs are sparse; keep a short list of the areas that genuinely need filling.
- Test two pencil shades near the inner brow and record which one looks more balanced against your current hair colour and skin.
- Fill only the gaps with light strokes; check the front from arm’s length and remove any solid-looking patch with a spoolie.
- Apply a thin layer of clear or tinted brow gel after pencilling; record whether the colour stays soft and the hairs remain in place.
- Check the result again around midday and note any smudging, clumping or fading; use those observations to adjust the shade, skincare residue or formula at the next application.
Once the product layers are under control, check the finished colour under the lighting in which you actually wear your makeup. A pencil that appears neutral in one room can look noticeably warmer in another.
Why Do Your Eyeshadows Look Orange Indoors but Neutral in Daylight ?
Eyeshadow can appear more orange indoors because artificial light changes how its colour is perceived. Warm-toned lighting can emphasise warm-looking colours, while daylight may make the same product appear more neutral. The effect depends on the light source, the product’s pigments and the surrounding colours, so an indoor colour shift does not automatically mean the eyeshadow itself is unsuitable.
The U.S. Department of Energy explains that light sources differ in colour temperature and in their ability to render object colours. Its guidance on light colour and rendering provides the technical background for understanding why the same cosmetic swatch can look different under different lamps. The page concerns lighting rather than makeup testing, so it does not establish a particular colour shift for any eyeshadow or brow pencil.
The same practical issue applies when choosing eyebrow makeup. A warm bathroom bulb may make a brown pencil appear redder than it does near a window. A shade selected in one lighting environment may therefore look less harmonious once you step outdoors, particularly when your hair has been lightened and the contrast between your hair, brows and skin has changed.
To compare shades consistently, test them in three places: near a window during daylight, under your usual warm indoor lighting and under the mirror light you use most often. Look for differences in redness, greyness and apparent darkness rather than judging the colour by its name alone. A neutral or softly cool brown may provide the understated effect you want, but a warmer shade can be more harmonious with some complexions and hair colours.
Use the same approach for eyeshadow and brow pencil, without assuming that one lighting condition reveals a uniquely correct colour. What matters is whether the product remains balanced across the environments in which you will wear it. If a pencil looks red in one room and neutral in another, compare it beside your hair and natural brow hairs before replacing it.
When colour and shape both look balanced, the brows can provide a polished frame without requiring a full makeup routine. The remaining choice is how much emphasis to give them compared with other features.
Defined Brows or Statement Lip: Which Looks More Professional With Minimal Makeup ?
For a professional look with minimal makeup, softly defined brows are usually the more adaptable everyday choice, while a statement lip creates a stronger focal point. Neither is inherently more professional: the appropriate option depends on the workplace, the impression you want to make and how much maintenance you are comfortable with during the day.
Well-shaped brows provide structure around the eyes and can work with a wide range of clothing and lip colours. When your hair has been lightened, a carefully selected pencil can also help balance the contrast between your brows and your new hair colour. That makes a natural brow routine useful beyond a single makeup look.
A statement lip offers a different advantage. A bold red, berry or other saturated shade can become the main feature of an otherwise simple face. The trade-off is that some lip products need more attention after eating, drinking or wearing a mask. If frequent touch-ups are inconvenient, a restrained lip colour with defined brows may be more practical.
For everyday workwear, concentrate on one feature rather than trying to make every part of the face equally prominent. Soft brows paired with even-looking skin and a neutral lip create a balanced finish. Alternatively, keep the brows close to their natural appearance and let the lip provide the emphasis for a meeting, event or occasion where a stronger statement is intentional.
Lightened hair does not require a particular makeup style. The key is to consider the overall balance: if the brows remain naturally dark, softening their edges may be enough; if they are lighter or sparse, carefully placed strokes may provide the definition you want without overpowering the rest of the face.
Choose your signature feature according to the time available, the setting and your preference for maintenance. Defined brows are a reliable option when you want a repeatable routine, while a statement lip is useful when you deliberately want to draw attention to the mouth.
The most polished result does not come from adding more makeup. It comes from choosing a few elements that work together, applying them with control and checking that the overall finish suits the setting.
Key Takeaways
- Use the brow pencil shade and application technique that create balanced definition, rather than following a fixed rule based on dyed hair colour.
- Keep the routine simple enough to repeat consistently: sparse-area filling, a soft front, a tapered tail and a light setting layer.
- Assess the finished look in daylight and in the lighting you use every day before adding more colour or changing products.
How Do You Look Polished Without Wearing « Full Glam » to Work ?
You can look polished without wearing full glam by combining softly defined brows, light coverage where needed and one deliberate finishing detail. The aim is consistency rather than quantity: a balanced brow shape, an even-looking complexion and a restrained lip or cheek accent can look considered without requiring multiple layers of makeup.
Start with the brows because they establish much of the definition around the eyes. Choose a pencil that complements your natural brow hairs and current hair colour, add a few short strokes where coverage is missing and leave the front relatively light. Check the tail for a clean taper, then use clear or tinted gel to finish the shape without adding unnecessary pigment.
Next, apply concealer or base product only where you want to even the appearance of the skin. A full layer of foundation is not essential if the aim is a quick, natural finish. Blend the edges of any applied product and avoid creating a visibly heavier complexion than the soft brow definition calls for.
Finish with one optional accent, such as a muted lip colour or a small amount of cheek colour. If your brows are already the main point of definition, a subtle lip can keep the face balanced. If you prefer a statement lip, keep the brows neat but avoid making both features equally strong unless that is the effect you want.
For hair that has been dyed substantially lighter, a heavy makeup look can feel disconnected from the softer colours around the face, depending on your complexion and personal style. That does not mean bold makeup is unsuitable; it simply makes restrained brow definition a useful starting point when you want an easy weekday routine.
A repeatable morning check can help: verify the shade in daylight, keep the first third of the brow airy, taper the tail, set the hairs with a small amount of gel and then finish the skin. Add a lip or cheek accent only if it contributes to the overall look. This order makes it easier to notice when the brows are already sufficiently defined.
The practical next step is to test your current pencil in daylight, adjust the pressure before buying another product and keep a note of what works with your dyed hair. A few controlled changes are often more useful than replacing the entire makeup routine.
Should your eyebrows match your dyed blonde hair?
No. Blonde hair does not automatically require blonde eyebrows. Naturally dark brows can complement lightened hair, while a softer pencil may suit people who want less contrast. Choose according to your natural brow colour, complexion, undertone and preferred finish.
Is a brow pencil one or two shades lighter always better?
No universal shade difference works for everyone. Professional recommendations sometimes favour a pencil lighter than the natural brow hairs to create a soft shadow, but the result depends on brow density, skin tone, hair colour and the product itself. Test the shade rather than relying on a fixed numerical rule.
Should you use taupe or brown for blonde hair?
Taupe can work well when you want a muted, neutral or cool-looking result, while brown may be more appropriate for naturally darker brows or warmer colouring. Check for unwanted grey or red tones in daylight, and remember that product labels vary between brands.
Can you keep dark eyebrows after bleaching your hair?
Yes. Keeping naturally dark eyebrows is a valid aesthetic choice after lightening your hair. If the contrast feels too strong, try a softer pencil application or a lighter tinted gel rather than automatically changing the brow colour itself.
How can you stop brow pencil from looking drawn on?
Use a suitable shade, apply short strokes with light pressure and concentrate on sparse areas. Leave some skin visible between hairs, keep the front soft, taper the tail and remove excess pigment with a spoolie. A thin layer of brow gel can finish the shape without adding unnecessary density.