
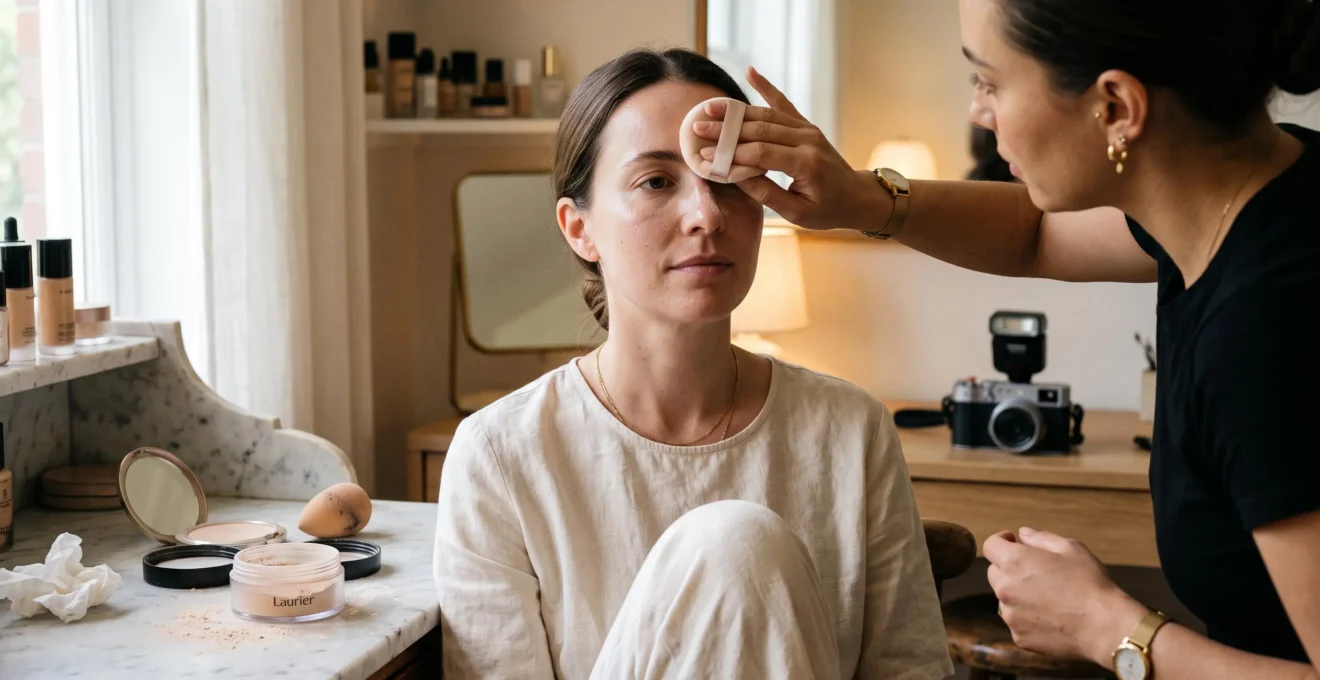
The best translucent powder for controlling shine without flashback is not necessarily the whitest, finest or most heavily mattifying formula. For event photography, look for a powder that remains invisible when applied sparingly, does not leave a chalky cast on your skin tone and performs well under direct flash. A light application concentrated on oily areas usually produces a more convincing result than powdering the entire face.
Flashback, visible dryness and cakiness are different problems. Flashback involves how a formula appears under particular lighting. Cakiness usually becomes more obvious when powder accumulates over foundation, concealer or facial oils. An excessively matte finish can also remove the subtle reflections that make skin look dimensional on camera.
Whether you are preparing for a UK wedding, an evening event or photographs taken with a phone flash, the most reliable approach is to test your actual powder, foundation and application technique together. No ingredient label alone guarantees a flashback-free finish.
Translucent powder without flashback: the essentials
- Choose by photographic performance: some silica-rich HD powders can produce a visible white cast under strong direct flash, but individual formulas and application amounts matter.
- Press a small amount onto oily areas: focus on the T-zone and only set the under-eyes if necessary to avoid a dry, flat complexion.
- Blot before touching up: remove surface oil first, add minimal powder and check the finished makeup in both natural light and direct flash.
- Why Does « Translucent » Powder Look White in Photos With Flash?
- How Do You Apply Translucent Powder So Skin Still Looks Like Skin?
- Loose or Pressed Translucent Powder: Which Works Better for Midday Touch-Ups?
- The Baking Mistake That Makes Under-Eyes Look Crepey by Lunchtime
- Should You Powder Before or After Setting Spray for a Smoother Finish?
- Why Does Your Face Look Flat on Camera Even When It Looks Fine in the Mirror?
- Setting Spray or Powder: Which Keeps Makeup On Longer if You Get Oily by Midday?
- How Do You Make Makeup Last 12 Hours Without Adding More Product?
Why Does « Translucent » Powder Look White in Photos With Flash?
Translucent powder can look white in flash photography because its particles scatter or reflect incoming light, creating a pale cast that the camera records more prominently than the eye notices in normal lighting. Certain silica-rich HD formulas are associated with this effect, especially when applied heavily. However, flashback depends on the complete formula, application and lighting conditions, not silica alone.
A direct camera flash sends a concentrated burst of light towards the face. Some of that light is scattered back towards the lens by powder particles sitting on the skin. Against a darker background, the resulting pale areas can become especially conspicuous. Softer daylight generally produces a less noticeable effect because its direction and distribution differ.
Professional makeup artist Ashleigh Ciucci discussed this problem in Allure’s explanation of translucent powder flashback. The article identifies silica-containing HD powder as a possible explanation for a highly visible white cast in celebrity photographs. It is a professional interpretation of a photographed incident, not a controlled comparison establishing that all silica powders cause flashback.
Translucent also describes several different finishes. A completely colourless powder may appear invisible in daylight but still create a pale effect under flash. A slightly tinted translucent powder may contain pink, yellow or peach pigments intended to complement particular complexions. Those pigments can influence the visible cast, but a tinted formula is not automatically flashback-proof.
Very finely milled HD powders deserve particular attention. Their soft-focus appearance in diffused light can be excellent, yet certain formulas become more obvious under harsh, frontal lighting. Talc is another common powder ingredient, but the evidence here does not establish it as a principal cause of flashback. Ingredient concentration, particle characteristics and the finished formulation all complicate simple rules.
Before a photographed event, use this practical check:
- Apply your usual skincare, foundation, concealer and powder using the quantities you intend to wear.
- Take a photograph without flash in natural or evenly diffused light.
- In a dim room, take another photograph using direct phone or camera flash.
- Compare the under-eyes, sides of the nose, forehead and any heavily powdered areas.
- If a white cast appears, remove excess powder and repeat the test; if the problem persists, test a different formula.
A genuine flashback test must use the full makeup combination, since changing foundation, concealer or application quantity may alter the result. The goal is a powder that controls shine while remaining visually unobtrusive in the conditions you expect.
Once the formula passes the photography test, application technique becomes the next priority: even a suitable powder can look heavy when distributed across areas that do not need it.
How Do You Apply Translucent Powder So Skin Still Looks Like Skin?
Apply translucent powder by pressing a small amount onto areas that genuinely need shine control, rather than sweeping it across your entire face. A velour puff or suitable makeup sponge allows more precise placement. Keep the cheeks and other naturally balanced areas lightly powdered or untouched, so skin retains its texture, movement and subtle dimension.
Start with a settled foundation or concealer base. Load a puff with a small amount of powder, then work the product into the puff or tap away the visible excess. Press gently over the sides of the nose, central forehead and chin, lifting and repositioning the puff instead of dragging it across the makeup.
Pressing can reduce unnecessary disturbance of the foundation beneath. Sweeping a loaded brush repeatedly over a still-tacky base may move coverage or distribute excess powder into dry patches. A soft brush remains useful for removing surplus product, but it should not be your main tool for forcing a heavy layer into place.
Powder placement matters more than full-face coverage. The T-zone commonly benefits from more shine control, while the outer cheeks, temples and high points of the face often look fresher with a little natural luminosity. Under-eye powder should be especially restrained because concealer can gather around fine lines.
For targeted setting, a brief press-and-release approach works well. Some artists use a slightly more generous initial deposit, let it settle briefly and gently brush away the remaining loose powder. This can help place product evenly, but it is not a reason to leave a thick layer sitting on dry skin. For everyday makeup, starting with less is generally easier to control than removing a heavy application.
| Skin type | Recommended placement | Common mistake to avoid |
|---|---|---|
| Dry | Minimal powder around the nose or central forehead, only where necessary | Setting every cheek and under-eye crease with a thick layer |
| Combination | Target the forehead, nose and chin while preserving balanced cheek areas | Using the same quantity on oily and dry areas |
| Oily | Apply thin, controlled layers across areas with persistent shine | Depositing a heavy initial coat in the hope of preventing all oil |
Skin preparation supports this technique. Dry skin usually benefits from comfortable hydration before makeup, while oilier skin may respond better to lightweight, oil-free products. Allow skincare to settle before applying complexion products, then check whether powder is actually needed in each area.
Finally, inspect the result near a window rather than relying entirely on a magnifying mirror. You should still see natural skin texture without obvious pale patches or a thick, dusty surface.
A precise morning application also makes later maintenance easier, because there is less existing powder for fresh product to accumulate on when shine returns.
Loose or Pressed Translucent Powder: Which Works Better for Midday Touch-Ups?
Pressed translucent powder is usually the more practical choice for midday touch-ups because a compact is portable and offers controlled access to the product. Loose powder is often easier to distribute precisely during initial makeup application at home, particularly when using a separate puff or brush. Neither format automatically prevents flashback or cakiness; formulation and quantity remain decisive.
The morning application and a lunchtime touch-up solve different problems. On freshly applied foundation, powder helps establish the finish. Several hours later, facial oil, skincare residue and existing makeup are already present. Adding more powder directly over this mixture can create a visibly thicker surface.
For this reason, remove surface oil before adding powder. The American Academy of Dermatology recommends gently pressing blotting paper against oily areas for a few seconds rather than rubbing. Its guidance on oily skin and blotting techniques also recommends oil-free and noncomedogenic skincare and makeup for people with oily skin.
Once the shine has been absorbed, inspect the area. You may find that no additional powder is required. If the finish is still too reflective, press a very thin amount of powder onto the relevant area without disturbing the foundation beneath.
| Decision factor | Loose translucent powder | Pressed translucent powder |
|---|---|---|
| Best situation | Controlled initial application at home | Midday or evening touch-ups |
| Portability | Jar and loose contents can be inconvenient | Compact format is easier to carry |
| Application control | Flexible loading with a separate brush or puff | Convenient small-area application |
| Overapplication risk | High if too much product is tipped out or loaded | High if the compact is repeatedly rubbed over oily makeup |
| Flashback | Depends on formula, amount and lighting | Depends on formula, amount and lighting |
Another consideration is colour. Repeated applications of a pink, yellow or peach-toned translucent powder may build up enough pigment to change the apparent finish of the foundation. The complexion might look progressively warmer, paler or duller even if the foundation itself has not chemically oxidised.
If you regularly touch up, look for a shade that stays neutral on your complexion after multiple light applications, not merely on the first swatch.
At the end of a typical day, photograph your face in natural light and examine the nose, chin and under-eyes. Visible powder accumulation suggests the touch-up quantity or frequency needs reducing.
The same restraint matters even more around the eyes, where a technique designed for long-wear coverage can quickly accentuate fine lines.
The Baking Mistake That Makes Under-Eyes Look Crepey by Lunchtime
The biggest under-eye baking mistake is applying a thick layer of powder over heavy or poorly prepared concealer and leaving the excess in place longer than the finish requires. Powder can emphasise fine lines and make the area look dry or crepey, particularly on skin already prone to visible texture. A thin, hydrated concealer base and restrained setting generally produce a more natural daytime result.
Traditional baking involves depositing a relatively generous amount of loose setting powder over concealer, allowing it to sit for several minutes and brushing away the excess. It may create a strongly matte, defined finish that suits some event makeup looks, but it is not necessary for every complexion.
The under-eye area presents a particular challenge because the skin is thin, moves frequently and often shows fine texture. Powder can absorb available surface oils and moisture from the cosmetic layers, changing how the concealer looks and feels. However, this cosmetic drying effect should not be confused with proof that baking physiologically dehydrates the skin; the supplied evidence does not establish that claim.
Professional advice covered in Allure’s under-eye concealer setting tutorial supports hydrating the area before concealer, building coverage in thin layers and using a light dusting of powder as an alternative to heavier baking.
For a smoother finish, begin with an eye-compatible moisturiser that has had time to settle. Apply concealer only where coverage is needed, keeping the layers thin. If product gathers in fine lines before setting, gently smooth those lines with a clean fingertip or sponge and then apply a minimal amount of powder.
A limited mini-baking variation concentrates powder near the inner and outer eye areas rather than coating the entire under-eye region. For skin that creases easily, immediate light setting without any waiting period may be preferable. Neither method guarantees completely crease-free makeup, and both should be tested with the chosen concealer.
Event makeup and everyday makeup need not use the same technique. A deliberately matte look may photograph well in controlled conditions but appear more textured in daylight, especially several hours later. Conversely, an extremely light application may retain a more skin-like appearance while offering less control over concealer movement.
The most useful assessment is a wear test. Apply the same concealer with lighter powder on one side and your usual technique on the other. Compare the finish at application, in natural daylight later and under flash before deciding which version works better.
Once the under-eye finish is balanced, the order of powder and setting spray can help refine how the rest of the complexion looks and wears.
Should You Powder Before or After Setting Spray for a Smoother Finish?
For a smoother, more natural-looking finish, applying a light layer of powder before setting spray is often a useful starting point. The spray can help soften an excessively powdery appearance without requiring more foundation. Applying spray before powder is another option for controlling shine, but powder should go onto a surface that has dried sufficiently to avoid patchiness or uneven colour.
These application orders address slightly different priorities. Powder followed by spray is intended to reduce surface shine first and then refine the appearance of the layers. Spray followed by powder allows the complexion to settle before targeted mattifying, potentially leaving the powdered areas looking more matte.
Neither order has been established as universally superior in controlled comparative testing. Product formulations, application quantities and drying times all influence the result.
Professional artists interviewed in Allure’s professional makeup longevity advice discuss both powder layering and setting spray at different stages of makeup application. The article also warns against applying powder directly to a wet surface, which may darken its appearance or produce an uneven finish.
For combination skin, a practical alternative is to apply setting spray after foundation, allow it to dry, press translucent powder onto the T-zone and finish with a very light mist if needed. This approach aims to preserve a comfortable finish on the cheeks while maintaining targeted shine control.
However, more spray does not necessarily mean better results. Saturating the face after powdering can disturb the underlying makeup, create droplets or cause powder to gather unevenly. Follow the product’s recommended spraying distance and quantity rather than assuming a fixed number of sprays suits every formula.
To compare methods, test powder-first and spray-first applications on separate occasions using the same foundation and skincare. Keep the powder quantity similar, allow each layer to settle and photograph the finished result under natural light and direct flash.
Watch for differences in three areas: how quickly your T-zone becomes reflective, whether the complexion develops visible texture and whether the powder remains unobtrusive in photographs.
Once the layers are working together, consider how much facial dimension to preserve. A perfectly matte finish in the mirror is not necessarily the most flattering result on camera.
Why Does Your Face Look Flat on Camera Even When It Looks Fine in the Mirror?
Your face may look flatter in photographs because frontal lighting reduces the shadows and highlights that normally reveal facial contours. Covering the entire complexion with matte powder can further reduce the subtle reflections that help define its shape. The solution is selective shine control: mattify distracting oily areas while preserving or adding a little controlled luminosity where it enhances facial structure.
In a mirror, you see your face in changing light and from slightly different angles as you move. A photograph captures a particular viewpoint, lighting arrangement and exposure. Although the camera records three-dimensional features, its two-dimensional image can make contours appear less prominent, especially under bright frontal illumination.
Direct phone flash and ring-style lighting commonly illuminate the face from near the camera’s viewpoint. This can reduce directional shadows, making the forehead, cheeks and jaw appear less sculpted. Side lighting creates stronger differences between illuminated and shaded surfaces, often revealing more facial dimension.
Powder placement can reinforce or counteract these effects. If every part of the face has the same matte finish, there may be little distinction between areas that naturally catch light and areas where oil produces unwanted shine.
Matte does not have to mean completely flat. Keep the centre of the forehead, sides of the nose and chin controlled where necessary, then preserve subtle luminosity on selected high points of the cheeks. If using highlighter, apply it sparingly and avoid emphasising areas where enlarged pores or texture are a concern.
The most flattering placement also depends on face shape and lighting:
| Photographic situation | Powder strategy | Dimension to preserve |
|---|---|---|
| Front-facing phone selfie | Control reflective areas in the central face | Soft cheekbone highlights and natural contour |
| Indoor event with direct flash | Use a flash-tested powder sparingly around the T-zone | Balanced cheek and temple luminosity without obvious glitter |
| Window-lit portrait | Powder only distracting shine visible from the camera angle | Natural highlights created by directional daylight |
| Video under continuous lighting | Assess shine while moving and turning the head | Gentle transitions between matte and luminous areas |
For a fuller face, preserving light on the upper cheekbones while avoiding excess shine on the centre of the cheeks may help maintain definition. For a narrow or angular face, an overly matte finish can make existing contours look more severe. These are aesthetic starting points, not universal rules determined by facial shape.
When assessing the result, photograph your face from the expected camera position rather than relying solely on the bathroom mirror. Notice whether the lighting itself is creating flatness before trying to fix it with additional makeup.
Preserving dimension is important, but shine control also needs to hold up over time, especially when facial oil begins to affect the foundation beneath.
Setting Spray or Powder: Which Keeps Makeup On Longer if You Get Oily by Midday?
For skin that becomes oily by midday, setting powder is usually the more direct tool for reducing visible surface shine, while an appropriate long-wear setting spray may help makeup resist movement or transfer. Using both can be useful, but their effects depend on formulation. Neither product stops the skin producing oil, so suitable skincare, foundation and application technique remain essential.
Powder and setting spray work differently. Powder particles can absorb or redistribute surface oils and reduce reflected light, giving the complexion a more matte appearance. Some setting sprays contain film-forming ingredients intended to improve makeup cohesion or wear resistance, while others primarily refresh or alter the cosmetic finish.
That distinction matters when choosing a product. A hydrating facial mist should not automatically be expected to perform like a long-wear setting spray. Equally, a powder that immediately reduces shine may not prevent foundation from separating several hours later.
The right combination depends on how the skin behaves throughout the day.
| Skin profile | Primary approach | Supporting approach |
|---|---|---|
| Oily | Thin layers of powder on shine-prone areas | A compatible long-wear setting spray if additional wear support is needed |
| Combination | Targeted T-zone powder | Setting spray over the complexion as appropriate |
| Dry | Minimal powder on areas that crease or transfer | A suitable setting spray to refine the finish, without assuming every spray increases wear time |
Do not add powder directly over accumulated oil. First, gently press blotting paper or a clean tissue against the shiny area. Lift it away without rubbing, assess the finish and add only enough powder to restore the desired level of mattness.
If the foundation has already separated, powder alone may make the unevenness more visible. Gently redistribute any remaining makeup with a clean sponge before deciding whether a small correction is necessary. Applying repeated layers over a broken-up base rarely restores the original smooth finish.
Persistent oiliness also deserves attention earlier in the routine. Lightweight moisturiser, an appropriate primer where useful and oil-free or noncomedogenic complexion products may help make the finished makeup easier to manage. Avoid assuming that stronger mattifying products or additional powder will automatically improve wear.
For especially oily skin, a midday blotting step may still be necessary. That does not mean the original setting technique failed: normal oil production continues beneath cosmetics.
Rather than relying on more product throughout the day, a better long-wear strategy is to refine preparation, layer thickness and planned maintenance from the beginning.
What to remember before a long day
- Prioritise compatibility: skincare, foundation, concealer and powder should settle together without slipping, clumping or creating visible patches.
- Use application quantity strategically: powder should control the areas most likely to become shiny, while setting spray supports the finish where appropriate.
- Plan one useful check: assess shine and makeup separation before an important photograph or event, rather than repeatedly layering products throughout the day.
How Do You Make Makeup Last 12 Hours Without Adding More Product?
To give makeup the best chance of lasting through a 12-hour day without repeatedly adding product, prepare the skin appropriately, apply compatible complexion products in thin layers and set only the areas that need it. Use blotting rather than constant powder reapplication when shine develops. Twelve-hour wear is a practical goal, not a guarantee, because skin type, climate, activity and formulation affect longevity.
Long-lasting makeup begins before foundation. Overly rich skincare applied immediately before complexion products may leave a slippery surface, while insufficient hydration can make coverage look uneven on dry patches. The aim is comfortable, settled skin rather than an excessively greasy or stripped surface.
Choose skincare suited to your skin type and give it time to settle. Then apply foundation in small amounts, building coverage only where needed. Concealer should also be layered sparingly, particularly around the eyes and areas with visible texture.
For oily or combination skin, a compatible primer may help with specific concerns, but it is not essential for everyone. Once the base is even, press translucent powder onto the areas where shine typically emerges. Finish with a setting spray when it suits your products and desired result.
A useful schedule for an event day might look like this. The timings are illustrative rather than scientifically established wear intervals.
| Stage | Action | What to assess |
|---|---|---|
| Before application | Cleanse appropriately, moisturise and let skincare settle | Skin feels comfortable, without excessive surface slip |
| At application | Use thin foundation and concealer layers, then targeted powder | Coverage looks even without visible powder buildup |
| After setting | Apply setting spray if suitable and allow it to dry | No new droplets, patches or displaced makeup |
| Midday | Inspect the T-zone and gently blot if shiny | Oil is reduced without disturbing coverage |
| Before important photos | Check the finish in available light and touch up only if necessary | Shine, flashback and texture remain controlled |
| After 12 hours | Photograph the complexion in natural light and direct flash | Identify the first areas where makeup faded, separated or became textured |
It is also important to distinguish reducing product quantity from removing every maintenance step. Blotting can improve the appearance of shine without adding another cosmetic layer. If some coverage has worn away, however, a true restoration may require a small amount of makeup rather than powder alone.
When a routine regularly fails, investigate the location of the problem. Foundation disappearing around the nose may call for less slippery skincare or thinner product layers. Dry, cracked-looking cheeks may need a different moisturiser or less powder. Creased concealer may benefit from reduced coverage and more targeted setting.
Your five-step camera-ready makeup checklist
- Check skin preparation: allow moisturiser and any primer to settle, then confirm that the skin feels comfortable rather than excessively slippery. The result is a ready-to-makeup base.
- Apply thin complexion layers: blend foundation and concealer in small amounts, then inspect the finish near a window. The result is even coverage without visible product ridges.
- Map your powder placement: press a light amount onto shine-prone areas and check the cheeks and under-eyes for unnecessary mattness. The result is a clearly identified set of powdered zones.
- Perform a flash photograph test: take one photograph in natural light and one with direct flash in a dim room. The result is a comparable pair of images showing any white cast.
- Review the finish after wear: record where shine, creasing or separation appears first and whether blotting is sufficient. The result is one specific adjustment to test during the next application.
Keep each trial consistent. Changing powder, foundation, moisturiser and setting spray simultaneously makes it difficult to determine which adjustment actually improved the finish. Test one meaningful change at a time, using similar lighting and wear conditions wherever possible.
With a routine that works, the aim is not to eliminate every hint of shine or natural texture. It is to prevent distracting flashback, excess oil and visible product buildup while allowing the complexion to look like real skin.
For your next event, complete a full makeup trial in advance, take a direct-flash photograph and note how the finish changes during the day. Keep the formula and application method that look balanced in both natural light and photographs, then make only the adjustments your results justify.
Does every silica-based translucent powder cause flashback?
No. Some silica-rich HD powders are associated with a noticeable white cast under strong flash, but flashback depends on the complete formula, amount applied and photographic lighting. An ingredient list alone cannot establish whether a powder will produce flashback. Testing the finished makeup under direct flash is more useful than automatically excluding every formula containing silica.
Is tinted translucent powder better for darker skin tones?
A subtly tinted translucent powder may be easier to blend into some medium-to-deep complexions than a visibly pale formula, but the correct choice depends on undertone and pigmentation. Avoid assuming a powder marketed as universal will be invisible on every skin tone. Test a small amount over your usual foundation in daylight and direct flash, looking for an ashy, yellow or otherwise mismatched cast.
Can you fix powder flashback after the makeup has already been applied?
Sometimes. Gently removing loose excess powder with a clean, soft brush may reduce a visible cast. If the powder is heavily embedded in the complexion, the affected area may need careful correction or reapplication. Setting spray is not a guaranteed flashback fix, and adding more products can introduce texture. Always check the result with another flash photograph.
Should translucent powder be applied over sunscreen before flash photography?
Translucent powder can be used over a settled sunscreen and compatible makeup, but the finished combination should be tested for visible cast or uneven texture. Some sunscreen formulations can themselves influence photographic appearance, making it difficult to attribute every pale area to powder. Do not omit necessary sun protection simply to prevent flashback, and do not assume that applying setting powder provides adequate sunscreen coverage.
Can a damp makeup sponge make translucent powder look less cakey?
A slightly damp sponge can sometimes help press and blend small amounts of powder into an existing makeup finish, but it is not suitable for every formula. Too much moisture may cause powder to clump, darken or disturb concealer and foundation. Use minimal product, avoid soaking the sponge and test the technique before relying on it for an event.