
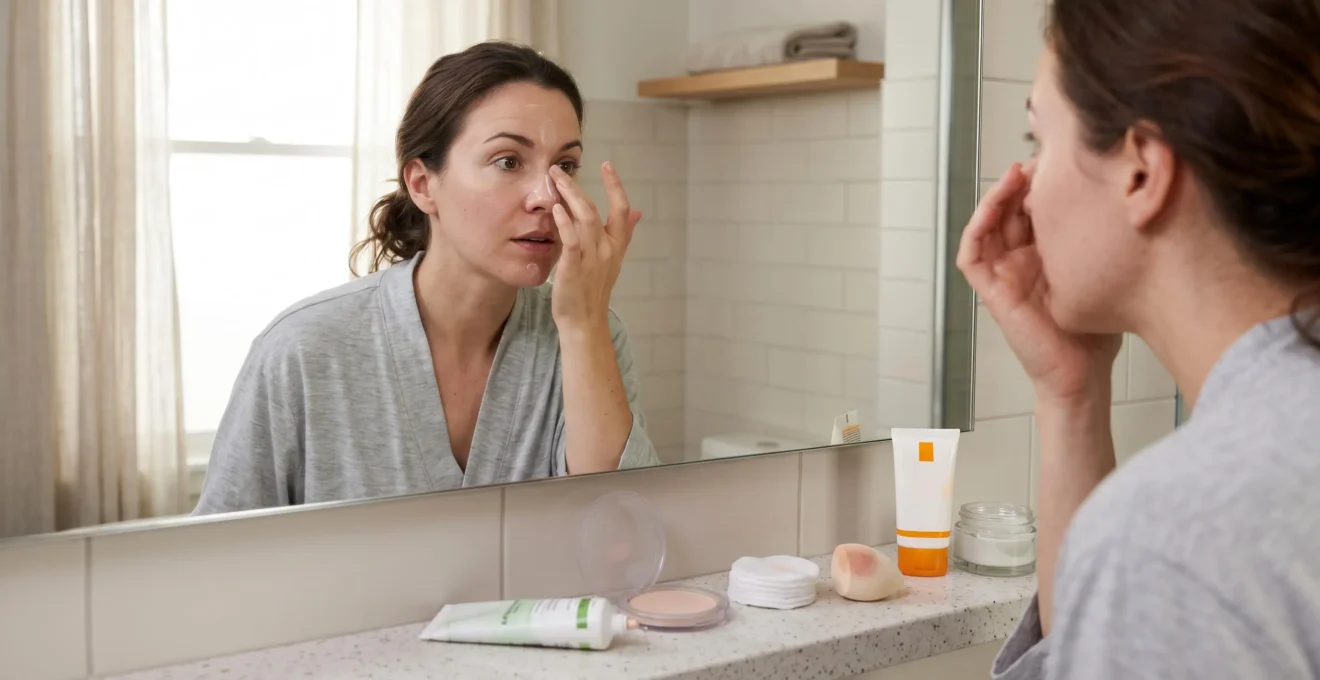
Primer can help makeup last longer, but its effectiveness depends on where it is applied, how much is used and whether the surrounding skincare and foundation work well with it. A gripping primer may improve wear on an oily nose while creating unnecessary texture on dry cheeks. A smoothing formula may soften the appearance of pores without providing the adhesion needed in areas where foundation separates.
For UK makeup wearers dealing with shine, patchiness or pilling, the most reliable starting point is a targeted routine rather than another layer of product. Apply skincare and sunscreen first, allow the layers to settle, and use a small amount of primer only where it addresses a specific problem. Press it into the skin instead of repeatedly rubbing it, then apply foundation in thin layers.
Ten hours of wear is a useful goal, not a guaranteed result. Skin type, temperature, humidity, facial movement and the compatibility of individual formulas all influence the finish. The practical objective is to identify where makeup fails first and adjust that area without disturbing the rest of the face.
The essentials for longer-lasting primer
- Apply primer selectively according to skin texture and oil production rather than automatically covering the entire face.
- Let skincare and sunscreen settle, use a thin primer layer and press foundation into place to reduce pilling.
- Check makeup wear throughout the day and correct the specific cause of separation instead of adding more product everywhere.
- Why Does Primer Make Makeup Slide Off Faster on Combination Skin?
- How Do You Apply Primer Only Where You Need It Without Creating Patchy Areas?
- Gripping Primer or Smoothing Primer: Which Helps More With Enlarged Pores?
- The Primer Rubbing Mistake That Creates Pilling in Seconds
- How Long Should You Wait Between Skincare and Primer if You Wear SPF Every Day?
- Why Does Foundation Separate Around Your Nose Even When You Use Primer?
- Why Does Makeup Break Down Faster Around the Mouth and Nose After You Eat?
- How Do You Make Makeup Last 12 Hours Without Adding More Product?
Why Does Primer Make Makeup Slide Off Faster on Combination Skin?
Primer can make makeup slide on combination skin when the formula, quantity or placement creates a surface that does not work well with the foundation applied over it. The oily centre of the face may need less product or a different finish from the drier cheeks. If the primer worsens wear in one zone, using more of it across the face is unlikely to solve the problem.
Consider the T-zone and outer cheeks separately. The forehead, nose and chin can develop visible shine as sebum reaches the skin surface, while the cheeks may feel tight or show dry patches. A rich or slippery primer that feels comfortable on the cheeks may contribute to movement in the centre. Conversely, a strongly mattifying product may leave the cheeks looking dry and emphasise flakes.
Silicone-containing products are not automatically incompatible with oily skin, nor do all gripping primers improve wear. The finished result depends on the full combination of skincare, primer and foundation. Allure‘s professional makeup primer application guide recommends choosing a formula for the skin’s needs, applying it sparingly and checking how it behaves with foundation.
To diagnose the problem, compare similar makeup applications on separate occasions. Wear the same skincare and foundation once without primer and once with your usual primer. Photograph the face at the same point, around four hours after application, and note where shine, separation or dryness first appears. This is a practical comparison, not a controlled test, so keep other variables as consistent as possible.
- If the finish deteriorates earlier with primer, reduce the amount or test a different formula.
- If both applications break down in the same place, investigate oil, skincare residue and application technique.
- If the primer improves the T-zone but dries the cheeks, restrict it to the centre of the face.
The aim is not to find one primer that performs identically everywhere. It is to use the least product needed to improve the finish in each area, while leaving skin that already wears makeup well largely undisturbed.
How Do You Apply Primer Only Where You Need It Without Creating Patchy Areas?
Apply primer only to areas where it addresses a visible concern, such as shine, enlarged-looking pores or foundation movement. Use a thin layer, soften the edges and avoid applying it over skincare that has not settled. The result should look like one continuous foundation finish, not separate patches of different textures across the face.
Begin with clean skin and the skincare your face actually needs. Apply sunscreen as the final skincare step during the morning, then allow it to settle before makeup. Next, divide the face into practical zones rather than treating it as one uniform surface.
- Oily T-zone: Press a small amount of gripping or mattifying primer onto the forehead, nose and chin where makeup tends to move.
- Visible pores: Use a smoothing primer selectively where the texture is most noticeable, such as the sides of the nose.
- Dry cheeks: Prioritise suitable moisturiser and use a hydrating primer only if it improves the foundation finish.
- Balanced areas: Leave them unprimed if foundation already applies and wears evenly.
Use clean fingertips or a small clean brush to place the product accurately. Press or smooth it gently over the target area without building a thick layer. If a clear boundary appears between primed and unprimed skin, feather the edge outward with a clean fingertip while the product is still workable. Avoid repeatedly sweeping over the same area, which can disturb the film.
Keep the amount modest. Primer is not a replacement for moisturiser, and covering the whole face with a heavy layer can create unnecessary buildup. Allow the product to settle according to its formulation before applying foundation in thin, controlled layers.
Your five-step primer application check
- Identify the areas that become shiny or patchy first; record them in a simple face-zone note.
- Choose the primer for each target area; write down whether the goal is grip, mattification or smoothing.
- Apply a thin layer only to those areas; check that no thick or visibly wet patches remain.
- Allow the primer and preceding skincare to settle; record whether the surface feels ready for foundation.
- Inspect the finished foundation in natural side light; note any visible boundaries or texture differences and adjust placement at the next application.
Natural side light is especially useful for spotting uneven texture that may be less obvious under bathroom lighting. A visible line between zones suggests that the primer placement, quantity or blending needs adjustment; it does not automatically mean the foundation is unsuitable.
Once the zones are under control, the next decision is which primer texture each area needs. That choice becomes particularly important when visible pores and makeup adhesion are both concerns.
Gripping Primer or Smoothing Primer: Which Helps More With Enlarged Pores?
Smoothing primer is generally the more direct choice when the priority is temporarily blurring the appearance of pores, while gripping primer is intended to help makeup stay in place. Neither is universally better, and a pore-smoothing finish does not necessarily improve wear. For combination skin, the best approach may be to address visible texture and foundation movement separately.
Smoothing formulas can create a more even-looking surface by softening the appearance of texture. Gripping formulas focus on helping subsequent makeup adhere. However, individual formulations vary, and a primer labelled “gripping” or “pore-filling” does not guarantee a particular result on every face.
Visible pores are also a skin characteristic rather than a defect that makeup can permanently eliminate. According to Cleveland Clinic’s dermatologist advice on visible pores, genetics plays a major role in pore size, while excess oil can make pores more noticeable, especially in the centre of the face. A cosmetic primer can temporarily change their appearance, but it does not permanently shrink them.
Use the location of the concern to guide your choice. If pores are most visible on an oily nose, test a small amount of smoothing primer there first. If foundation also slides on the sides of the nose, test a gripping product on a nearby area separately. Avoid immediately layering two different primers across the entire nose, since their combined texture may create pilling or uneven application.
| Primary concern | First option to test | What to assess |
|---|---|---|
| Visible pores | Smoothing primer | Whether texture looks softer under foundation |
| Foundation sliding | Gripping primer | Whether makeup remains more stable |
| Dry or flaky cheeks | Suitable skincare, with hydrating primer if needed | Whether foundation sits evenly without emphasising dry patches |
| Both pores and sliding | Separate, small-area tests | Whether each product improves its intended concern without disturbing the other |
Test any combination on one cheek or a small area before using it across the face. Keep the foundation and application technique consistent so the difference is easier to assess.
Once the formula is appropriate, application technique becomes the next variable. Even a suitable primer can produce a poor result if it is repeatedly rubbed after it begins to set.
The Primer Rubbing Mistake That Creates Pilling in Seconds
Pilling occurs when skincare or makeup forms small rolled-up clumps on the skin instead of leaving a smooth, continuous finish. Repeated rubbing can contribute to the problem, especially when earlier layers have not settled or too much product has been applied. Pressing primer into the skin and reducing friction during foundation application can help, although pilling can have several causes.
Apply a thin layer of primer with clean fingertips, using gentle pressing motions rather than vigorous circular rubbing. Give the product time to settle before moving on to foundation. When applying foundation, use controlled pressing or patting motions in areas where sweeping tends to lift the underlying layers. Keep brushes and sponges clean so accumulated product does not contribute to clumping.
Skincare residue matters too. A serum, moisturiser or sunscreen that still feels wet may move when primer is added. Heavy layering can also leave more product on the skin than the next step can accommodate. Different formulations may interact unpredictably, but it is not possible to conclude that a particular ingredient combination will always cause pilling without testing the actual products.
Makeup artist Karol Rodriguez recommends allowing skincare to settle and reducing friction during application. Her practical advice is discussed in Allure’s foundation pilling troubleshooting article, which also highlights clean tools and patting foundation into place.
If pilling has already started, stop adding product. Gently lift or roll away the loose clumps with a clean, slightly damp sponge, using minimal pressure. Allow the area to settle, then reassess whether a small amount of foundation can be pressed on without disturbing the remaining finish. If the layer remains uneven, removing and reapplying makeup locally may be more reliable than covering the clumps.
Reducing friction is only part of the solution. When daily sunscreen is part of the routine, the timing and order of the layers also matter for both makeup performance and sun protection.
How Long Should You Wait Between Skincare and Primer if You Wear SPF Every Day?
There is no single waiting time that works for every skincare and sunscreen combination. Allow each layer to settle before applying the next, and avoid treating a fixed number of minutes as a guarantee that the products are compatible. Sunscreen should be applied after skincare and before primer or foundation, without reducing the amount needed for adequate protection.
A practical morning sequence is cleanser, moisturiser if needed, sunscreen, primer and foundation. Keep the skincare routine lightweight enough to settle comfortably, but do not skip necessary moisturiser or compromise sunscreen application simply to save time.
Cleveland Clinic recommends applying sunscreen after cleansing and moisturising but before makeup, and allowing it a few minutes to dry and settle. Its guidance on applying sunscreen before makeup also emphasises that makeup containing SPF should not automatically be assumed to provide the protection indicated on its label when too little product is used.
After applying sunscreen in the amount directed by its instructions, give it time to form an even layer before adding primer. The exact interval depends on the products and conditions. A touch test can help identify whether the surface still feels wet or transfers readily, but it cannot verify the level of UV protection or prove that the sunscreen film is intact.
If the primer causes sunscreen to roll up, do not keep rubbing the products together. Review whether the skincare layers are excessive, whether the primer is being applied too aggressively and whether the combination performs better with a longer settling interval. If needed, test an alternative primer on another occasion while maintaining appropriate sunscreen use.
- Apply sunscreen evenly and in the amount specified by its instructions.
- Let the layer settle before applying primer.
- Press primer on gently rather than repeatedly sweeping over the sunscreen.
- Do not interpret a dry-feeling surface as proof of complete UV protection.
Once the layers are behaving well, the nose is often the next place to investigate because oil, curved contours and facial movement can make foundation particularly difficult to keep even.
Why Does Foundation Separate Around Your Nose Even When You Use Primer?
Foundation can separate around the nose despite primer because this area often combines visible oil, curved contours, movement and creases where makeup accumulates. Primer cannot eliminate all of these factors. The more effective approach is to use a small amount of a suitable formula, apply foundation thinly and identify whether oil, skincare residue or application technique is responsible for the breakdown.
Start by examining the sides of the nose and the creases beside the nostrils. If the foundation separates quickly, check whether moisturiser or facial oil has left a slippery residue in that area. Products applied to the cheeks can also migrate towards the centre of the face, so the problem may not originate with the primer itself.
Apply a small amount of gripping or mattifying primer where makeup moves, pressing it gently into the target area. Follow with a thin layer of foundation rather than buffing a large amount across the nose. Where the finish needs more stability, use a small amount of pressed powder after the foundation has been applied, avoiding unnecessary buildup in the creases.
Timing offers useful diagnostic clues. Separation within the first hour may suggest that the layers are interacting poorly or that too much skincare remains on the skin. A finish that deteriorates gradually as shine develops may point towards oil breakthrough. Makeup that lifts after rubbing, touching or blotting may indicate excessive friction or pressure.
These clues are not definitive diagnoses. Compare the same area across similar makeup applications and change one variable at a time. For example, keep the foundation unchanged while reducing the primer amount, then assess whether the nose wears more evenly.
- Use less product in the creases around the nostrils.
- Press foundation into place instead of repeatedly buffing it back and forth.
- Set the area selectively rather than applying a heavy powder layer across the whole face.
- Blot excess shine gently before deciding whether a touch-up is needed.
Even a well-prepared nose and T-zone can lose some coverage after eating. At that point, heat, moisture, food oils and movement become additional factors that primer cannot completely control.
Why Does Makeup Break Down Faster Around the Mouth and Nose After You Eat?
Makeup often breaks down around the mouth and nose after eating because food oils, moisture, warmth, lip movement and wiping physically disturb the foundation. Primer may improve the initial finish, but it cannot make makeup completely resistant to these conditions. The practical solution is to minimise friction during meals and restore only the affected areas afterwards.
The area around the lips moves continuously while speaking and eating. Food and drink can also remove product from the upper lip, the corners of the mouth and the creases beside the nose. A rich lip balm applied too close to the lip line may make the surrounding foundation more likely to move, particularly when it transfers onto the skin.
Before applying makeup, keep the skin preparation around the mouth comfortable but avoid leaving a thick, oily residue immediately next to the lip line. Apply foundation in a thin layer and use a separate lip product where appropriate. If lipstick is part of the routine, blotting excess product according to its formulation can help reduce transfer, although no technique prevents every form of wear.
After eating, inspect the area before adding anything. If food residue or moisture is present, remove it gently. Press a clean tissue against the skin to blot rather than wiping horizontally across the face. Once the surface is dry enough for makeup, use a clean sponge to press remaining foundation into place if the finish can be recovered without further rubbing.
If coverage has disappeared completely, use a small brush or fingertip to apply a minimal amount of foundation only where needed. Blend the edges into the surrounding makeup rather than layering a fresh coat over the entire lower face. Avoid adding powder to damp or oily residue before removing it, as this can make the texture more noticeable.
The same principle applies throughout the day: a long-wearing finish depends on identifying what has changed and responding locally, not repeatedly adding more product to an already layered face.
Key takeaways
- Identify whether the first sign of wear is oil, dry texture, pilling or physical transfer before changing the routine.
- Keep the skin preparation, primer and foundation layers thin enough to work together without repeated rubbing.
- Use targeted touch-ups and a consistent wear-time audit to distinguish genuine improvements from temporary coverage.
How Do You Make Makeup Last 12 Hours Without Adding More Product?
To extend makeup wear without adding more product, improve the preparation, placement and application of the layers already in your routine. Use primer only where it helps, apply foundation sparingly, set areas according to their needs and minimise friction during the day. Twelve hours without any touch-up is not guaranteed, but a targeted routine can make deterioration easier to manage.
Start by establishing a baseline. Photograph your makeup shortly after application and again at hours two, four and eight, using similar lighting and angles. Record where shine appears, whether foundation separates and whether dry patches or pilling develop. These observations help distinguish a product that improves the finish from one that merely makes the skin feel smoother at the beginning.
Make one change at a time. If the nose becomes shiny first, adjust the amount and placement of primer there rather than adding another layer across the cheeks. If foundation pills, investigate the setting time of skincare and the amount of friction used during application. If the cheeks become flaky, reassess whether the mattifying products are unnecessarily drying that zone.
Powder and setting spray can support the finish, but neither substitutes for compatible layers and suitable application. Use powder selectively where shine develops, and avoid building up thick layers that may look heavy as the day progresses. If you use a setting spray, assess whether it improves your particular foundation and finish instead of assuming that more spray will automatically increase wear time.
Activity level, humidity, temperature and skin characteristics affect the result. A routine that performs well during a quiet day indoors may need maintenance during commuting, exercise or a long day out. The realistic goal is to minimise avoidable breakdown and make necessary corrections small and controlled.
Build a repeatable wear-time audit
- Photograph the freshly applied makeup in consistent light; save the starting image as your baseline.
- At hour two, record the first visible change and its location; label it as shine, separation, dryness, pilling or transfer.
- Repeat the check at hours four and eight; keep the observations together in one short wear log.
- Choose one adjustment that targets the earliest failure point; record the exact product placement or technique changed.
- Repeat the comparison on another similar day; retain the adjustment only if the observed finish improves without creating a new problem elsewhere.
When comparing results, remember that photographs and daily observations are practical tools rather than controlled performance measurements. Changes in lighting, weather, activity and skincare can influence what appears to work. Consistency makes the comparison more useful, but it does not establish a guaranteed wear duration.
For a more reliable ten- to twelve-hour result, prioritise compatible layers, selective primer application and realistic maintenance. If a primer repeatedly causes sliding or pilling despite careful use, test a different formula or leave that area unprimed rather than continuing to add product.
Should primer be applied to the entire face?
No. Apply primer where it addresses a specific concern, such as shine, visible pores or foundation movement. If your cheeks already wear foundation evenly, they may not need primer. A targeted application also reduces unnecessary layering and can help avoid patchiness.
Can you apply foundation immediately after primer?
It is better to allow primer to settle before applying foundation. The appropriate interval varies with the formula and the surrounding skincare. If the surface still feels wet or the product rolls under your fingers, give it more time and avoid repeated rubbing. A fixed waiting time is not a universal guarantee of compatibility.
Why does primer pill even when the skin feels dry?
Dry-feeling skin does not guarantee that every layer is compatible or evenly distributed. Excess product, friction, accumulated residue, tool contamination and interactions between formulations may contribute to pilling. Try reducing the amount, using clean tools and pressing products into place rather than repeatedly sweeping over the skin.
Is gripping primer better than silicone-based primer?
Neither type is universally better. Gripping primers focus on makeup adhesion, while smoothing primers can soften the appearance of pores and texture. Individual formulas behave differently, so test the product against your actual foundation and use it only in the areas where it improves the finish.
Can primer alone make makeup last 12 hours?
No primer can guarantee twelve hours of untouched makeup. Wear also depends on skin characteristics, foundation compatibility, preparation, application, environmental conditions and facial movement. A targeted routine and occasional local touch-ups are more realistic than relying on one product to prevent every form of breakdown.