
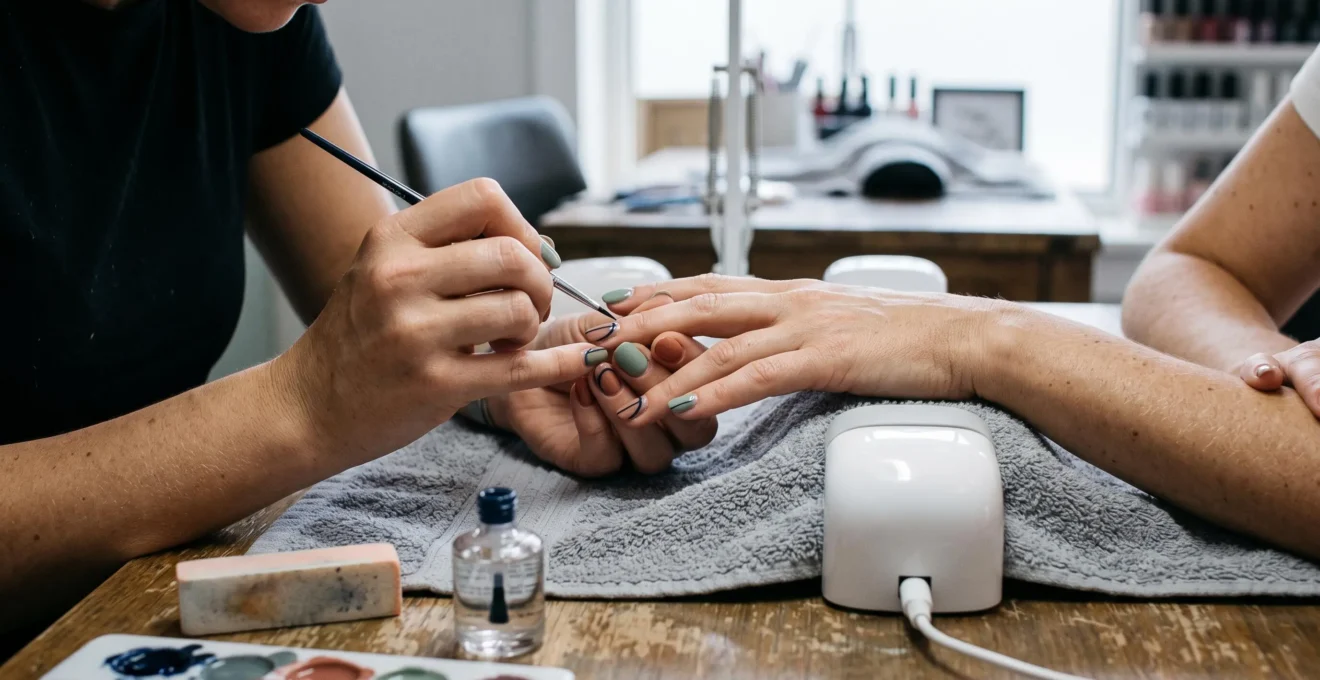
Detailed nail art can look polished at work without catching on clothing, hair or a keyboard. The key is to build visual complexity on a smooth surface rather than relying on raised decorations, thick layers or exposed edges. Fine liner designs, stamping and carefully placed decals can create intricate patterns while keeping the nail comfortable for everyday tasks.
For UK nail art fans, the most practical design is one that passes two tests: it looks deliberate from a distance and feels almost completely smooth when touched. That means choosing techniques suited to the natural nail and manicure system, keeping vulnerable edges tidy, and allowing every product layer to adhere and cure correctly. A glossy top coat helps protect the finished design, but it cannot compensate for poor preparation or incompatible products.
The same principle applies to longevity. Typing, washing hands, handling packaging and repeatedly touching hard surfaces all expose the manicure to friction, moisture and impact. Rather than eliminating detail, the goal is to place it where it is least likely to interfere with daily movement. Flat decoration, a controlled application and sensible maintenance offer a more reliable route to wearable nail art than simply adding more top coat.
The essentials of detailed, wearable nail art
- Keep intricate lines, foil and decorative details away from the most vulnerable part of the free edge.
- Choose flat techniques such as fine liner work, stamping and well-sealed decals instead of bulky raised decorations.
- Prioritise product compatibility, thin applications, correct curing and smooth sealing to reduce lifting, snagging and premature wear.
- Why Does Nail Art Chip at the Tips Within 3 Days Even With Top Coat?
- How Do You Layer Nail Art Details Without Making the Nail Feel Thick?
- Stamping or Stickers: Which Nail Art Option Looks Professional in 20 Minutes?
- The Sealing Mistake That Makes Nail Art Peel Off in One Sheet
- When Should You Add Nail Art During a Gel Set to Avoid Smudging?
- Builder Gel or Soft Gel: Which One Works Better If You Type All Day?
- Claw Clip or Barrette: Which Looks More Polished for Shoulder-Length Hair?
- How Do You Stop Gel Nails Lifting After 7–10 Days?
Why Does Nail Art Chip at the Tips Within 3 Days Even With Top Coat?
Nail art can chip within a few days despite a good top coat because the free edge experiences repeated flexing, friction and impact. If the colour or decorative layer is poorly bonded, too thick or positioned where the nail bends most, sealing alone will not prevent failure. The solution depends on whether the art, polish or natural nail is actually chipping.
The free edge is the part of the nail that extends beyond the fingertip. It is exposed to repeated contact when typing, opening packaging, fastening clothes or tapping hard surfaces. Fine lines, foil and decals that reach this edge can experience the same mechanical stress as the underlying coating. Once a small section separates, everyday contact can enlarge the damaged area.
A top coat is a protective finish, not structural reinforcement. It can help resist ordinary surface wear, but it cannot make an unstable base flexible enough, repair poor adhesion or prevent a weakened natural nail from splitting. **Sealing the design and supporting the nail are separate jobs.** A stronger overlay may help in some circumstances, but only if the underlying application is appropriate for the nail and the product system.
For a practical manicure, keep the most intricate details a little way back from the free edge. There is no universally proven millimetre measurement for every nail, so use this as a design guideline rather than a guarantee. A simple colour or clean finish near the tip is often easier to maintain than several layers of decoration.
The The GelBottle Studio Gel application guide recommends small amounts of nail-art product, curing between detailing stages and finishing with top coat. Its instructions apply to the specified compatible products, so curing requirements should not be transferred automatically to other gel systems.
Diagnosis matters before changing the technique. If only the artwork lifts, investigate its adhesion and compatibility. If the colour chips underneath it, review the base and application sequence. If the natural nail itself splits, shortening and smoothing the edge may help, but the structural problem needs attention rather than another layer of decoration.
The American Academy of Dermatology nail-care recommendations also advise keeping nails shaped and free of snags, avoiding using them as tools and protecting them during prolonged water exposure. These are general nail-care measures, not proof that a particular design will last a specific number of days.
Once the tip is protected and the source of damage is understood, the next challenge is creating fine detail without building a thick, uncomfortable surface.
How Do You Layer Nail Art Details Without Making the Nail Feel Thick?
Detailed nail art can stay thin when its complexity comes from colour, transparency and fine lines rather than stacked physical elements. Sheer glazes, jelly effects, subtle gradients and delicate liner work create depth without requiring bulky decorations. The important factors are the amount of product applied, compatibility between layers and a smooth transition between the artwork and the surrounding nail.
Visual depth is different from physical depth. A translucent wash over a contrasting base can create a layered appearance without a pronounced ridge. Fine lines can add definition to a minimalist design, while stamping can produce an intricate pattern in a relatively flat finish. These approaches are particularly useful for people who type frequently or handle fabric throughout the day.
Thickness complaints often come from individual applications rather than the number of design steps. A large bead of gel paint, an uneven decal, a thick top coat or a raised charm can create a noticeable ledge. Adding another coat over that ledge may make the surrounding surface look smoother, but it can also increase bulk if the underlying layer is not level.
For gel products, follow the manufacturer’s instructions for application and curing at each stage. Thin coats are not a reason to shorten the specified curing time. Regular polish, gel polish, builder products and nail-art gels have different drying, curing and adhesion requirements, so one universal layering sequence will not suit every combination.
A useful wear test is tactile. After the product has fully dried or cured, depending on the system, gently run a fingertip across the nail and around the sidewalls. A noticeable ridge where the design meets the base is a likely snag point. Correct an uneven finish using a compatible technique rather than applying an arbitrary amount of additional product.
Raised details can still be appropriate for an occasional occasion manicure, but they are less practical for someone who wants to run their fingers through their hair, pull on knitwear or type throughout the working day. Flat designs provide a more forgiving starting point.
Five checks for a thin, wearable finish
- Choose the technique first and record whether it uses regular polish, gel or a compatible nail-art product.
- Apply the base colour in controlled coats and check that it is even before decorating.
- Draw fine details with a small amount of product; note any lines that form visible ridges.
- Follow the product instructions for drying or curing and record which stages are complete.
- Run a fingertip over the fully finished nail and note any raised edges that need correcting before the manicure is considered wearable.
Once the surface feels smooth, the choice between stamping and stickers becomes easier: both can create intricate designs, but each has different handling and sealing requirements.
Stamping or Stickers: Which Nail Art Option Looks Professional in 20 Minutes?
Stamping is usually the better starting point for crisp, flat accents, while stickers are useful when a complex pattern needs to be reproduced quickly. Neither method is automatically more professional: the result depends on alignment, clean edges, compatibility with the base and a suitable finish. For a 20–minute design, choose the technique that minimises corrections rather than the one with the most elaborate pattern.
Stamping transfers a pattern from an etched plate onto the nail. It can create fine, consistent motifs, French-style lines and small decorative accents without adding much physical height. Its main limitation is timing: a transfer can smudge, miss part of the pattern or land at an angle. The defect is immediately visible, which makes it possible to correct before sealing.
Stickers can provide intricate illustrations or full-coverage patterns without drawing every line by hand. They are convenient when the design contains many small elements. However, a sticker that is too large, folded or poorly aligned may leave an edge that lifts or catches on clothing. Its thickness and the way it sits on the nail depend on the specific product.
The following comparison focuses on practical results rather than assuming either technique is universally superior.
| Criterion | Stamping | Stickers |
|---|---|---|
| Edge crispness | Sharp when the transfer is clean and correctly aligned. | Can be very crisp, depending on print quality and placement. |
| Surface height | Usually low-profile when the transfer is thin. | Depends on sticker thickness and whether the edges sit flush. |
| Correction | Misalignment or smudging is visible immediately and can be corrected before sealing. | Placement can sometimes be adjusted before adhesion is complete; lifting or tearing may complicate correction. |
| Typing and handwashing | Wear depends on the underlying polish, adhesion and protective finish. | Exposed edges can catch or lift if the product is not properly secured. |
| Best use | Small accents, repeating motifs and French-style details. | Intricate illustrations and complex patterns that would take longer to reproduce by hand. |
For a time-limited manicure, use stickers for complex motifs and stamping for smaller accents. Keep the pattern simple enough to inspect before finishing. A sticker may require a compatible sealing layer that covers its edges, whereas stamping often benefits from a light, even finish that preserves its low profile. These are practical starting points, not universal instructions for every product.
Compatibility is particularly important. Stamping polish needs an appropriate consistency and transfer method, and the base must be in the state required by the products being used. Stickers may adhere differently to dry regular polish, a cured gel surface or a tacky inhibition layer. Follow the sticker manufacturer’s instructions rather than assuming that every adhesive works on every surface.
A clean transfer or perfectly positioned sticker is only half the job. The next step is to seal the decoration without creating the adhesion problems that cause an entire design to detach.
The Sealing Mistake That Makes Nail Art Peel Off in One Sheet
Nail art can peel away in one sheet when the decorative layers and top coat fail to bond properly to the surface beneath them. A wet, inadequately dried or incorrectly cured layer may remain vulnerable, while incompatible products can also produce poor adhesion. The correct fix is to identify the product system and its required preparation, not simply to apply a thicker top coat.
A manicure can look smooth immediately after application and still have an underlying adhesion problem. If the decorative layer has not dried or cured as required, the finish may separate when it catches on fabric or experiences repeated friction. If several layers have bonded to each other but not adequately to the base, the entire stack can detach together.
Gel systems require particular care because a tacky inhibition layer is not the same thing as uncured gel throughout the product. Some systems are designed for compatible products to be applied over that tacky surface; others require a wipe or a different preparation step before the next product. Wiping every layer is therefore not a universal solution, and leaving every layer untouched is not one either.
Follow the manufacturer’s specified sequence. Check whether the surface should remain tacky, whether it needs cleansing, which products can be layered together and which curing conditions are required. A gel that feels tacky at the surface should not automatically be assumed to be fully cured underneath.
Sealing the free edge can help protect the exposed end of a coating. The GelBottle’s application guidance includes sealing the free edge and curing between detailing stages for the compatible products covered by its instructions. The technique must be adapted to the system being used rather than copied as a universal rule for every polish.
Top-coat thickness matters too. An unevenly thick layer may produce a bulky finish or fail to cure as intended, while an excessively sparse application may leave grooves or edges inadequately covered. Use the manufacturer’s recommended application amount and curing instructions; visual gloss alone cannot establish that a gel is properly cured.
A practical diagnosis starts with the point of separation. If the entire decorative film lifts cleanly, investigate adhesion and compatibility. If the top coat wears through while the design stays in place, assess coverage and surface friction. If the natural nail splits, the issue is not solved by sealing the design again.
With the bonding process under control, the order in which each decorative element is added becomes the next priority, particularly when working with gel products that require precise curing stages.
When Should You Add Nail Art During a Gel Set to Avoid Smudging?
Add nail art at the stage specified for the particular medium: some effects rely on a tacky surface, while others need a fully cured or dry base. Fine liner work, stamping, stickers, foil and chrome products do not all share the same adhesion requirements. The safest sequence is to establish the base, confirm the correct surface condition, add the decoration and cure or finish each stage as instructed.
The gel timeline begins with preparation and the compatible base system, followed by colour layers and decoration. The precise sequence depends on the product. Some foil or chrome techniques use a specific surface layer or inhibition layer; stamping and many stickers require a different surface condition. Applying every effect over the same tacky surface can lead to poor transfer, blurred lines or weak adhesion.
The opposite mistake is wiping or fully curing a surface when the next medium depends on the condition that has just been removed. A tacky surface may help a compatible product adhere, but it can also allow certain fine details to drag or spread if the materials are not designed to work together. The correct choice is product-specific, not simply a decision to wipe or avoid wiping every time.
For a multi-element design, establish the flattest components first. Add the base and any compatible background effect, complete the appropriate curing stage, then add fine lines or small accents in a sequence that avoids touching wet or uncured material. Place raised details last if the design calls for them, while recognising that they are generally less practical for daily tasks.
Flash-curing can help hold a completed gel detail in place before the next element is applied, but only where the product’s instructions allow it. It does not replace the required final curing cycle. Nor should the curing time be shortened because an individual line looks dry or stable.
The GelBottle’s Studio Gel instructions specify curing fine lines and small nail-art elements between detailing stages, followed by top coat. The guide gives product-specific curing directions and recommends the manufacturer’s designated lamp. Those requirements should be followed for that system rather than generalised to all gels.
A useful working habit is to keep the next product, brush and curing instructions ready before beginning the detail. That reduces the temptation to rush a transfer or touch a layer before it is ready.
Once the design is properly sequenced, the remaining question is how the underlying nail enhancement behaves under repetitive keyboard use and ordinary workplace friction.
Key takeaways
- Choose an enhancement system based on the natural nail, desired length, flexibility and maintenance requirements rather than assuming one formula suits everyone.
- Keep decoration low-profile and avoid extending bulky details into areas that repeatedly contact keyboards, fabric and hair.
- Consider removal and natural-nail health as part of the long-term decision, not just how the manicure looks on the first day.
Builder Gel or Soft Gel: Which One Works Better If You Type All Day?
Neither builder gel nor soft gel is automatically best for everyone who types all day. The practical choice depends on the particular formulation, natural nail flexibility, length, application and removal method. A manicure that is too rigid for the nail’s movement or poorly balanced can be uncomfortable and vulnerable to cracking, while an overly flexible or poorly adhered surface may wear under repeated friction.
Typing creates frequent contact between the nail and hard surfaces, especially when nails extend beyond the fingertips. Longer nails can make that contact more noticeable, but shortening them is not the only consideration. The underlying nail’s flexibility and the way the enhancement is applied influence how the finished manicure responds to everyday movement.
The term « builder gel » covers products designed for different applications, and « soft gel » can refer to soak-off systems with different formulations. These labels alone do not establish how a specific product will behave. Compare the instructions for the exact products being considered, including their intended use, compatible base coats, recommended thickness and removal requirements.
The AAD guidance on reducing artificial-nail damage notes that soak-off gel nails are more flexible than acrylic nails and may reduce the likelihood of natural-nail cracking. That comparison does not establish that soft gel is always better than builder gel for keyboard users. Performance depends on the specific system and how it is applied.
Use a short self-assessment before choosing an enhancement:
- Nail length: Does the free edge regularly strike the keys, or can the nails remain short enough for comfortable typing?
- Natural flexibility: Do the nails bend easily, or do they feel comparatively firm?
- Workload: Is typing occasional, or does it occupy much of the working day alongside other manual tasks?
- Maintenance: Can the manicure be maintained professionally, or will filing and product removal be handled at home?
- Design: Does the preferred nail art require a perfectly flat finish, or are raised elements essential to the look?
Removal should also influence the decision. Some enhancements require soaking with an appropriate remover, while others require filing by someone trained to use the particular system. Forcing product off or filing aggressively can damage the natural nail. Repeated damage may leave the nail less suitable for another enhancement, turning a short-term durability choice into a longer-term maintenance problem.
For a keyboard-heavy routine, start with a practical length and a low-profile design, then evaluate comfort and wear before committing to a more elaborate enhancement. A product’s removal method and maintenance needs matter just as much as its initial appearance.
Wearability also depends on the habits surrounding the manicure. Hair styling, clothing and other everyday tasks can expose the same raised edges to friction, so a polished look should work as a whole.
Claw Clip or Barrette: Which Looks More Polished for Shoulder-Length Hair?
For shoulder-length hair, a barrette often gives a sleeker, more deliberate finish, while a claw clip is useful for securing a twist and creating a little more volume. The better option depends on hair density, texture and the shape of the accessory. When protecting freshly detailed nail art, choose a smooth-sided fastening method and avoid repeatedly catching nails in hair or metal mechanisms.
A claw clip can secure a larger section of hair without requiring a complicated style. It may work especially well for thicker hair or a casual twist, although a bulky clip can look disproportionate with fine hair. A barrette creates a more linear, controlled finish and can suit a half-up style, but it needs enough hair to anchor securely without sliding.
The aim is to match the accessory to the texture and shape of the hairstyle. For fine hair, a smaller, lightweight clip or a barrette designed to grip a modest section can help prevent slipping. For thicker hair, a stronger claw clip may be more practical. A low twist with smooth sides can provide a neat finish without requiring a large accessory.
There is also a direct connection to nail-art maintenance. The side of the head is an area where hands repeatedly pass through hair, adjust clips and close fastenings. A large clip or exposed metal mechanism can catch a raised nail-art edge, particularly if a sticker or decorative element has not been sealed properly. This does not mean every accessory will damage a manicure; it means that protruding details deserve extra care during repeated contact.
A polished result comes from coordinating the details rather than adding more of them. Smooth the front sections before fastening the hair, keep the accessory aligned with the hairstyle and choose a finish that complements the overall look. Matte accessories can suit understated styling, while metal finishes can echo jewellery or other hardware.
For the first day after a detailed manicure, favour a hairstyle that needs fewer adjustments. A simple half-up style or a low twist can be easier to manage than repeatedly repositioning a clip near the nails. If a fastening catches, release it gently rather than pulling the nail through the hair or forcing the mechanism closed.
With the visible details and daily handling considered, the final step is preventing gel lifting at the base and sidewalls, where an otherwise polished manicure can begin to separate.
How Do You Stop Gel Nails Lifting After 7–10 Days?
Gel nails that lift after 7–10 days may have an application problem, a compatibility issue or wear-related damage. Common areas to investigate include preparation, product thickness, adhesion near the cuticle and sidewalls, and whether the free edge was finished as required. The timing alone cannot identify the cause, so inspect where the separation begins before changing the next manicure.
Preparation is important because the coating must adhere to the intended nail surface. Residual material, oil or moisture can interfere with application, while product placed on surrounding skin may compromise the finish. Preparation should follow the manufacturer’s instructions and must not involve cutting living cuticle tissue. The cuticle and surrounding skin help protect the nail area, and unnecessary cutting can increase the risk of irritation or infection.
Application thickness also affects the result. An overly thick layer may not cure as intended, and a product that extends onto the skin can create a vulnerable boundary. Each layer should be applied according to the specific system’s instructions, including the recommended curing method and compatible lamp. Wattage alone does not establish that a lamp is suitable for every gel formulation.
Water exposure and repeated movement can contribute to wear. Natural nails absorb moisture and can change as they are exposed to water and drying. An already compromised edge may be more vulnerable to further separation during washing, cleaning or manual work. Gloves during cleaning and dishwashing can help limit prolonged exposure, while avoiding the use of nails as tools reduces unnecessary mechanical stress.
The first inspection should distinguish a small cosmetic imperfection from an area where the enhancement has detached from the natural nail. Do not glue down lifted gel, cover a pocket with more product or repeatedly press the separated edge back into place. Moisture and debris can become trapped beneath a lifted enhancement, and further coating does not correct the original bond.
If a section has lifted, follow the product manufacturer’s removal and maintenance guidance or consult a qualified nail professional. Avoid picking or forcefully filing off gel, which can damage the natural nail. The appropriate removal method depends on whether the product is a soak-off gel, a hard gel or another enhancement system.
For the next set, record where lifting first appeared, how the nails were prepared and which products were used. That simple history gives a nail professional a more useful starting point than changing several application steps at once. If lifting recurs, or the nail becomes painful, discoloured or inflamed, stop applying product to the affected area and seek appropriate professional advice.
How can nail art look intricate without catching on clothes?
Choose fine liner designs, stamping or thin decals and keep the finished surface smooth. Avoid prominent raised elements where fingers repeatedly contact clothing, hair or keyboards. After the product has dried or cured as directed, check the sidewalls and edges for ridges that could catch on fabric.
Can you put top coat over nail stickers?
Often, but the correct method depends on the sticker and top-coat system. Check whether the sticker is designed for regular polish or gel, whether it needs a dry or cured surface and whether the manufacturer permits a particular top coat. Avoid assuming that every adhesive can be encapsulated with every gel product.
Why does nail art peel off even when the top coat looks perfect?
A glossy surface does not prove that the underlying layers are properly bonded or cured. Separation may involve incompatible products, inadequate preparation or an application sequence that does not suit the system. Inspect the point where the design detaches and follow the manufacturer’s curing and adhesion instructions rather than adding another coat automatically.
Is gel nail art suitable for people who type all day?
It can be, provided the length, enhancement system and design suit the person’s natural nails and workload. A shorter shape and low-profile artwork can reduce interference with typing. No particular gel label guarantees better performance for every keyboard user, so assess comfort, maintenance and removal requirements together.
What should you do if gel nails start lifting near the cuticle?
Do not pick at the lifted product, push it back down or cover the gap with another layer. Avoid allowing the separation to spread, and arrange appropriate removal or maintenance according to the product system. The American Academy of Dermatology’s gel-polish removal instructions warn that picking or forcefully filing off gel polish can damage natural nails. Hard gels and other file-off products may require a different removal approach.