
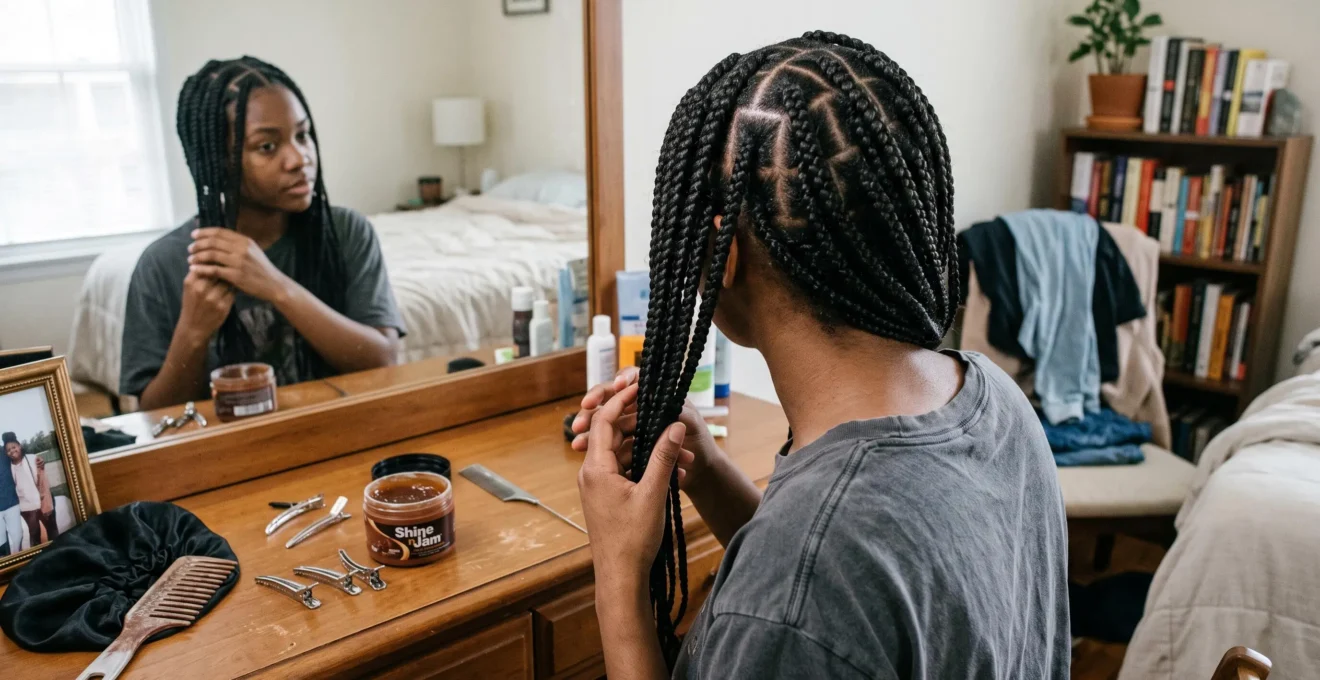
Keeping braids neat for three days is less about choosing the tightest style and more about matching the braid structure to your hair, preparing the sections properly and reducing friction during everyday activities. For most people, a Dutch braid offers a useful starting point when slipping is the main concern, while a French braid can provide a flatter, more understated finish. If you prefer twists, flat twists are worth considering when you want a style anchored to the scalp rather than individual twists moving freely.
Your hair texture, cut, styling products and daily routine all influence the result. Fine, straight hair may need more help staying secured, whereas curly and coily hair can retain its pattern well but develop visible shrinkage and surface frizz. No braid is guaranteed to look freshly installed for exactly 72 hours, and a style should never hurt in the name of longevity.
The practical goal is a braid that remains recognisable, comfortable and tidy, with only minor touch-ups needed on days two and three. A good preparation routine and overnight protection often matter as much as the choice between braiding techniques.
The quickest route to three neat days
- Choose Dutch braids for a more raised structure when straight or fine hair tends to slip; consider French braids for a flatter finish that can age more gradually.
- Section consistently, use only enough styling product to control flyaways, and avoid pulling tightly at the hairline.
- Protect the style overnight with a secure silk or satin covering, or a smooth pillowcase, and make small touch-ups rather than repeatedly redoing the braid.
- Why Do Braids Go Frizzy So Fast Even When You Start With Smooth Hair?
- How Do You Section Hair for Braids So They Look Clean From Every Angle?
- French Braid or Dutch Braid: Which One Feels Tighter Without Slipping?
- The Too-Tight Braid Mistake That Can Trigger Scalp Tenderness for Days
- When Is the Best Time to Braid Hair After Washing If You Want Maximum Grip?
- Two-Strand Twists or Flat Twists: Which One Lasts Longer Under a Hood?
- Silk or Satin: Which Fabric Protects Hair Better Overnight Without Slipping Off?
- How Do You Make Twists Look Defined Without Shrinking Up Too Much?
Why Do Braids Go Frizzy So Fast Even When You Start With Smooth Hair?
Braids can become frizzy within a day because everyday movement creates friction that lifts individual hairs out of the original pattern. Pillowcases, clothing collars, wind, exercise and repeated touching all contribute. Smooth-looking hair at installation does not guarantee lasting neatness: the braid must withstand movement, and the result depends on hair texture, sectioning and how the style is protected between wears.
A useful first step is to identify where the frizz appears, because not every type can be corrected in the same way.
- Root frizz: New growth, loose sections or hair escaping near the scalp. This can make the braid look untidy even when its length remains intact.
- Surface frizz: Individual hairs lifting along the braid as it rubs against clothing or bedding. Light smoothing may help without undoing the entire style.
- End frizz: Hair escaping from the finished tail or the ends of a plait. Depending on the style, the ends may need to be secured or carefully redone.
Hair texture changes how these problems appear. Straight, fine hair may slip from its original position more readily, while curly and coily hair can retain the braided structure but show shrinkage and surface texture as it moves. Neatness therefore does not look identical across hair types.
The condition of the hair fibre matters, too. A scientific review of hair cosmetics and fibre behaviour explains how friction, cuticle condition and grooming influence manageability and frizz. It also describes how conditioning ingredients can reduce friction; that benefit should not be confused with the holding power needed to secure a braid.
For preparation, try a small amount of a suitable styling product rather than relying on excessive smoothing. A lightweight mousse or styling gel may help control flyaways, but the amount and formulation should suit the hair. Heavy application can leave fine hair looking coated or weigh the braid down.
The most useful approach is to correct the specific area that is loosening rather than treating every flyaway as a sign that the entire braid has failed. Consistent preparation makes that easier, beginning with clean, even sections.
How Do You Section Hair for Braids So They Look Clean From Every Angle?
To create braids that still look tidy on day three, section the hair carefully before you begin and check the part lines from more than one angle. Use a tail comb for precision, clip away hair that is not being braided and keep neighbouring sections reasonably consistent in size. Clean partings at the crown, temples and nape help the style look intentional even as a few loose hairs appear.
The aim is not to make every section mathematically identical. It is to avoid abrupt changes in thickness or tension that can cause one part of a braid to loosen sooner than another.
Start with dry or nearly dry hair and a small amount of product, if needed. When the comb and fingers become coated with heavy product, it can be harder to maintain crisp part lines. Damp hair can also change shape as it dries, so inspect the finished sections again before beginning the braid.
Use the angle test before committing to the braid. Check the crown in a mirror, inspect the area behind each ear and look at the nape. If possible, use a second mirror to view the back of the head. This catches uneven spacing and stray hairs that are easy to miss when looking only at the front.
The visible top layer deserves particular attention. Hair along the part line and hairline frames the whole style, so keep these sections defined and clip the remaining hair out of the way. Interior sections can be slightly less precise without necessarily changing the overall appearance.
Section weight matters as well as visual symmetry. If one section feels much lighter or contains considerably less hair than its neighbour, the resulting braid may have a noticeably different thickness. Adjust the sections before braiding rather than trying to correct the mismatch afterwards.
Your five-step braid preparation checklist
- Detangle the hair gently and prepare a suitable working surface of hair; deliverable: a tangle-free starting section.
- Draw the intended part lines with a tail comb; deliverable: clearly visible rows before braiding.
- Check the crown, both areas behind the ears and the nape; deliverable: an angle-check list with all four viewpoints inspected.
- Compare neighbouring sections by feel and appearance, then adjust obvious differences; deliverable: sections of reasonably consistent size.
- Apply only the amount of styling product needed for manageability and begin without pulling painfully; deliverable: a prepared, comfortable base for the braid.
Once the sections are clean, the braid pattern becomes the next decision. French and Dutch braids can both look polished, but their different structures make them behave differently as the days pass.
French Braid or Dutch Braid: Which One Feels Tighter Without Slipping?
A Dutch braid is often a practical choice when straight or fine hair tends to slip, because the crossed-under technique creates a raised braid that stands out from the scalp. A French braid lies flatter and can offer a more understated finish. Neither is universally tighter or guaranteed to last longer: comfort, hair texture, section size and technique determine how secure the result feels.
In a French braid, sections are crossed over one another as new hair is incorporated from the sides. The braid gradually merges into the hair rather than sitting prominently above it. This can make a French braid a good choice for thick hair, blunt cuts or anyone who prefers a flatter profile.
A Dutch braid uses an under-crossing technique, creating a more pronounced ridge. That visible structure can make it easier to retain a defined braid pattern when the hair is prone to slipping. However, a raised ridge may also make escaping short layers more obvious.
The practical differences are worth considering over a three-day period.
| Consideration | French braid | Dutch braid |
|---|---|---|
| Appearance | Flatter, integrated pattern | Raised, more defined ridge |
| When hair slips | May loosen gradually and look softer | May show a more noticeable change in the raised ridge |
| Short layers | Escaped hairs can blend into the flatter pattern | Escaped hairs may stand out against the raised structure |
| Best reason to choose it | A subtle finish and a softer-looking style as it ages | A prominent braid pattern and added structure for slippery hair |
Both styles need even sections and controlled tension. Pulling harder is not a reliable way to make either one last longer, and a braid that feels comfortable at installation should remain comfortable throughout wear.
For active days, consider where the braid will sit against a jacket, gym top or backpack strap. Repeated rubbing at the same point can loosen either pattern, regardless of the crossing technique. Securing the tail neatly and protecting the style overnight help reduce unnecessary friction.
If a style still looks messy because it hurts or pulls, changing the technique is more important than extending its lifespan. Comfort is the next essential part of a three-day braid routine.
The Too-Tight Braid Mistake That Can Trigger Scalp Tenderness for Days
A braid should feel secure without causing pain, stinging or persistent pulling at the hairline. Excessive tension can irritate the scalp and place repeated stress on hair follicles. Making a braid tighter is therefore not a safe shortcut to three-day wear. If a style is painful, loosen it or remove it instead of tolerating the discomfort in the hope that it will last longer.
The hairline and temples deserve particular care because they can experience repeated tension from tight braids, ponytails and other pulled hairstyles. Over time, sustained traction can contribute to traction alopecia, a form of hair loss associated with tension on the hair follicles.
The American Academy of Dermatology guidance on hairstyles that pull recommends loosening braids, especially around the hairline. Pain, stinging and other signs of scalp stress should not be treated as normal parts of styling.
There is an important trade-off here: a slightly softer braid may develop a few flyaways by day three, but those can sometimes be smoothed or tucked away. A painfully tight braid cannot be made safe simply by adding a product over the surface.
If you notice discomfort while braiding, stop and reduce the tension before continuing. If the braid is already installed and painful, loosen or undo it rather than attempting to preserve the style. Oil or scalp massage should not be relied on to make an excessively tight braid safe.
Pay attention to repeated patterns, too. If the same areas become tender after each installation, change the placement, technique or style. Persistent pain, visible hairline changes or scalp irritation warrant advice from a qualified healthcare professional.
The goal is a braid that can move naturally with your head without pulling on the roots. A neat finish is only useful if your scalp and hair remain comfortable.
After the tension is right, the next decision is when to braid. Hair that is freshly washed, damp or fully dry can behave differently, so timing should be based on texture and root condition rather than a universal rule.
When Is the Best Time to Braid Hair After Washing If You Want Maximum Grip?
There is no single best time after washing for every hair type. Fine, straight hair often benefits from being braided when dry or nearly dry, while curly and coily hair may be easier to shape when slightly damp. The practical priority is manageable hair with enough structure to hold the chosen style, without leaving the scalp wet overnight or relying on heavy product to compensate for poor preparation.
Freshly washed hair can feel exceptionally smooth, but that does not automatically mean it will hold a braid poorly. The result depends on the hair’s natural texture, the products used and how thoroughly it has dried. Some hair needs a little texture for easier handling; other hair benefits from conditioning and careful detangling.
For fine or straight hair, try braiding when the hair is dry and free from excess oil or heavy residue. If flyaways are a problem, test a small amount of lightweight styling product on a section first. The aim is control without a coated or greasy finish.
Curly and coily hair can be easier to section and shape when damp, especially when the natural curl pattern is being incorporated into the braid. Use a suitable leave-in product if it improves manageability, and avoid excessive tension while detangling. The product should support handling rather than weigh down the finished style.
Product timing also matters. Applying a small amount shortly before styling makes it easier to judge how the hair responds during installation. Applying multiple heavy creams at wash time and again before braiding may leave unwanted buildup.
Wet hair needs particular care. According to Cleveland Clinic advice on sleeping with wet hair, damp strands are more vulnerable to stretching and breakage. Avoid going to bed with wet hair or a persistently damp scalp, and allow the style to dry adequately before sleep.
A simple approach is to assess the roots, lengths and ends separately. If the roots are oily, washing or adjusting the preparation may help more than adding product. If the lengths are dry or prone to tangling, gentle conditioning may be more useful than trying to create extra grip.
Once the braid or twist is installed, the challenge shifts from preparation to maintenance. For people who prefer twists, the distinction between a scalp-anchored style and free-hanging twists can make a noticeable difference during everyday movement.
Two-Strand Twists or Flat Twists: Which One Lasts Longer Under a Hood?
Flat twists are generally the more practical option when the priority is keeping a twist pattern anchored to the scalp under a hood. Two-strand twists are quicker to install individually and easier to redo one at a time, but their free-hanging lengths can move and rub against each other. The better choice depends on whether you value an anchored pattern or straightforward maintenance over three days.
Flat twists are created by incorporating hair progressively along a part line, keeping the twist close to the scalp. Because each row follows the head, the pattern can remain more consistent when a hood or covering presses against the style. The result also tends to look more uniform at the roots.
Two-strand twists are formed by winding two sections around one another. They can be a convenient option when you want defined individual sections and the flexibility to redo a single twist without disturbing the rest. Their independent movement, however, can contribute to surface frizz and loosening, particularly around the ends.
The hood itself changes the conditions. A hood worn during commuting or exercise may rub against the style, while a hooded dryer exposes the hair to warmth and moving air. These are different situations, so the result also depends on the type of hood, the duration of wear and the condition of the hair.
For two-strand twists, pay attention to the ends before putting on a hood. If the ends tend to unravel, secure them using a method suitable for the hair texture and desired finish. Avoid pulling the ends so tightly that the hair becomes uncomfortable.
Flat twists are not automatically more durable in every circumstance. Their neatness still depends on consistent sections, suitable styling products and careful installation. A poorly anchored flat twist can loosen, while well-prepared two-strand twists may remain tidy for several days.
For a busy routine, choose the structure that best matches the expected friction. A scalp-anchored pattern may suit repeated hood use, while individual twists can be more convenient when quick repairs matter more than maintaining perfectly uniform rows.
Whichever twist pattern you choose, the first night is an important opportunity to limit friction. A protective covering helps only when it stays in place and feels comfortable enough to wear consistently.
Key takeaways before choosing your finish
- Match the structure to the main challenge: slipping, movement under a hood or visible frizz at the roots.
- Keep the scalp comfortable and avoid using tension as a substitute for proper sectioning and technique.
- Protect the style overnight with a smooth, well-fitting covering or pillowcase that suits your sleeping habits.
Silk or Satin: Which Fabric Protects Hair Better Overnight Without Slipping Off?
Silk and satin can both help reduce friction between braids and bedding, but the label alone does not determine which option works better. Silk is a natural fibre, whereas satin describes a weave that can be made from silk or synthetic fibres such as polyester. For three-day braid maintenance, the most practical choice is a smooth covering or pillowcase that fits securely and stays in place throughout the night.
A silk scarf may suit someone who wants a fabric that wraps closely around the head. A satin bonnet can be convenient for covering the whole style without tying a scarf, provided the elastic is comfortable and the bonnet does not slide off. The quality, fit and construction of an individual item matter, so neither option is automatically superior.
The slipping problem is particularly important. A covering that falls off during the night cannot consistently reduce contact between the braids and the pillow. Choose a size that accommodates the full style without compressing the hair, and avoid tying a scarf so tightly that it creates tension along the hairline.
If you dislike wearing a bonnet or scarf, a smooth silk or satin pillowcase is a practical alternative. It does not need to be tied or secured, although it cannot prevent all movement or guarantee that every braid stays in place. Choose the option you are most likely to use consistently.
The first night is a useful point to establish the routine. Before sleeping, check that the braid tails are secured, the scalp feels comfortable and the covering is not pulling at the roots. If your hair is still wet or the scalp is damp, allow it to dry appropriately before bed.
In the morning, remove the covering gently rather than pulling it across the hairline. Inspect the roots, braid body and ends separately. Smooth only the areas that need attention, using a small amount of a suitable product if necessary, instead of coating the entire style.
With friction reduced overnight, the final step is to choose how you want twists to look. Definition and visible length can be balanced through preparation, tension and drying, without forcing the natural curl pattern to disappear.
How Do You Make Twists Look Defined Without Shrinking Up Too Much?
To make twists look defined without excessive visible shrinkage, decide first whether you want a stretched finish or a compact natural shape. Prepare the hair accordingly, use light and even tension, apply a modest amount of styling product and allow the twists to dry fully before separating them. The best method depends on your curl pattern, the length you want to show and how much heat or manipulation your hair tolerates.
Shrinkage is the visible shortening that occurs as curly and coily hair returns towards its natural pattern. It is not automatically a sign that the twists have failed. Some people prefer a compact, full appearance; others want more visible length while retaining definition.
If length is the priority, consider stretching the hair gently before twisting. Options include banding, low-tension stretching or working with damp hair that has already been stretched. Any heat-based method should use an appropriate low setting and care suited to the hair’s condition. Avoid forcing the hair straight or pulling hard at the roots.
During installation, keep the tension light and consistent. Twisting with excessive force can stress the hair and scalp, while uneven tension can make the finished sections look inconsistent. Allow the natural curl pattern to shape the ends rather than pulling the entire strand tightly to control shrinkage.
Product quantity is another important factor. Too little hold may leave the surface fuzzy, but too much cream or gel can make twists look clumped, heavy or greasy. Apply a small amount section by section and assess the finish as you work. A light oil after drying may be suitable for some hair types, but it is not essential for everyone.
Drying is particularly important for maintaining definition. Twists that are separated or manipulated while still damp may lose some of their definition as they dry. Allow them to dry completely before separating or fluffing them, and avoid going to bed with wet hair.
For a three-day style, keep the finished twists protected overnight and handle them gently in the morning. If a few sections loosen, retwist those sections individually instead of redoing the entire head. This preserves the rest of the style and reduces unnecessary manipulation.
For your next styling session, start by choosing the finish you want, then match the preparation, twist structure and overnight protection to your hair. A comfortable style with a few manageable flyaways is a better three-day result than a painful or heavily coated finish.
Which braid is best for keeping hair neat for three days?
A Dutch braid is a useful option when straight or fine hair tends to slip, while a French braid offers a flatter finish that can look softer as it loosens. Neither guarantees three days of perfect neatness. Hair texture, sectioning, comfort and overnight protection all influence the result.
Should you braid hair wet or dry for longer-lasting results?
Dry or nearly dry hair is often a practical starting point for fine or straight hair. Curly and coily hair may be easier to shape when slightly damp. The ideal condition depends on your texture and technique. Avoid sleeping with wet hair, as damp strands are more vulnerable to mechanical damage.
How can you refresh braids on day two without redoing them?
Inspect the roots, braid surface and ends separately. Smooth minor surface flyaways with a small amount of a suitable styling product, secure loose ends if necessary and redo only sections that have genuinely loosened. Avoid applying excessive product or pulling the braid tighter to restore its appearance.
Can tight braids help a style last longer?
Excessive tightness is not a safe durability strategy. Painful braids can stress the scalp and hair follicles, and repeated traction can contribute to hair loss. A braid should feel secure without pain or persistent pulling. Loosen or remove a painful style rather than trying to keep it in for longer.
Is a satin bonnet necessary to protect braids overnight?
No. A well-fitting satin bonnet, a silk or satin scarf, or a smooth silk or satin pillowcase can help reduce friction. The best option is one that feels comfortable, fits your hairstyle and stays in place. None of these methods guarantees that every braid will remain unchanged overnight.