
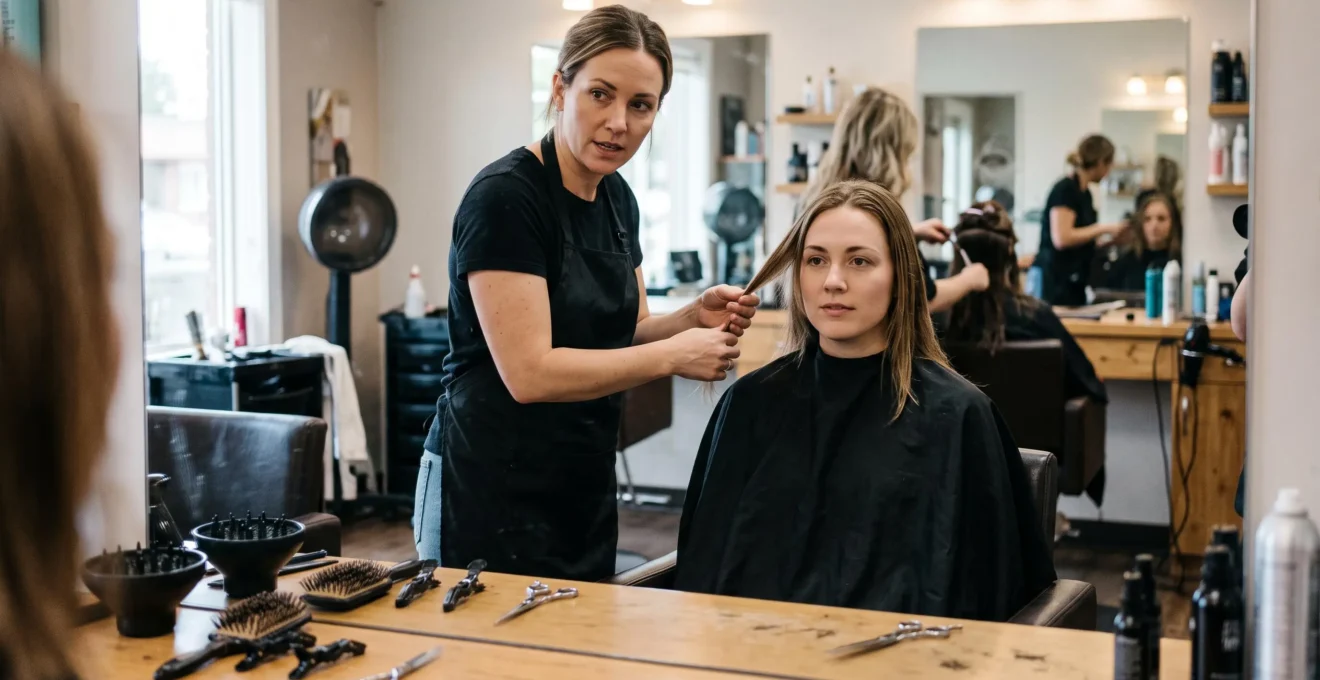
A haircut can change how your face appears in photographs without changing your facial features at all. The difference often comes down to where the hair creates width, where the shortest layers end, and how the fringe directs attention across the forehead and cheekbones.
If a recent haircut seems to make your face look longer, wider or more angular, the answer is not necessarily to grow everything out. Adjusting the position of the volume, softening a horizontal edge or changing the direction of face-framing pieces may produce the balance you prefer.
Face-shape analysis is useful as a styling tool, not a set of rules about what someone should look like. Your natural hair texture, density, growth patterns and willingness to style matter just as much as whether your face resembles an oval, round, square or heart shape.
The most practical approach combines three things: identifying your proportions, assessing the actual geometry of a haircut, and testing how it appears under consistent photographic conditions. Makeup placement can support the result, but it does not need to compensate for a haircut that feels uncomfortable or difficult to maintain.
How to choose a better-balanced haircut
- Follow the placement of volume: hair that expands at cheek or jaw level can emphasise width, while carefully positioned height or movement can change the overall silhouette.
- Choose for your natural texture: a soft, blended fringe or layered cut may grow out more comfortably than a sharply defined shape, depending on how your hair falls.
- Check the result beyond selfies: compare photographs taken from a consistent distance and ask your stylist where the weight line and shortest face-framing pieces will sit.
- Why Does Your Face Look Wider in Photos After a Shorter Haircut?
- How Do You Measure Your Face Shape at Home Using 3 Quick Landmarks?
- Curtain Fringe or Blunt Fringe: Which One Works If You Hate Daily Styling?
- The Celebrity Haircut Mistake That Makes Your Features Look Unbalanced
- When Should You Adjust Face-Framing Pieces So They Don’t Sit at the Awkward Length?
- How Do You Ask for a Professional Cut in 2 Minutes Without Getting the Wrong Shape?
- Why Does Your Face Look Flat on Camera Even When It Looks Fine in the Mirror?
- Which Professional Cut Still Looks Good After 8 Weeks Without Constant Styling?
Why Does Your Face Look Wider in Photos After a Shorter Haircut?
A shorter haircut may make your face appear wider when removing length concentrates the hair’s visual weight around your cheeks or jaw. A blunt edge can create a horizontal boundary, while fuller sides expand the overall silhouette. Close-range photographs can exaggerate certain facial proportions too, making the change seem greater than it looks in person.
Hair creates an outline around the face. When longer sections fall below the shoulders, their vertical direction may draw attention downwards. Cutting those sections to jaw level can change where the eye encounters the widest part of the hairstyle.
That distinction matters: the apparent width of the hairstyle is not the anatomical width of the face. A jaw-length bob with substantial side volume may frame the cheeks differently from a similarly short cut with lighter sides and more movement through the crown.
Three cutting details are particularly worth discussing with a stylist:
- Jaw-level blunt edges: a strong horizontal perimeter can draw attention to the area where it finishes.
- Uniform one-length shapes: these create a compact outline that may feel wider when the ends naturally turn outwards.
- Volume at the upper sides: fullness around the parietal ridge, above the temples, can broaden the hairstyle’s visible silhouette.
These are styling tendencies, not universal effects. A defined bob may provide welcome structure for one person and an unwanted horizontal emphasis for another.
Photographic perspective adds another complication. The facial photography standardization research in the Australasian Journal of Plastic Surgery explains how camera distance, viewpoint and perspective affect apparent facial proportions. Its authors recommend photographing from at least 1.2 metres, preferably around 1.5 metres, in their clinical context.
Try a comparison: take one photograph with your phone held at arm’s length, then another from approximately 1.5 metres, keeping your head position and lighting as consistent as possible. Crop the second image to a similar composition. If the apparent width changes substantially, camera perspective may be contributing to your concern.
For makeup, consider how placement interacts with the haircut. If the hair already creates a horizontal frame at cheek level, a broad horizontal sweep of blush can reinforce that direction. A softly blended placement slightly higher on the cheeks, or a restrained contour that follows your natural structure, may create a different impression. These are visual styling options rather than scientifically established corrections.
Once you separate the haircut’s outline from photographic perspective, it becomes easier to identify which adjustment is worth making. The next step is understanding your proportions without relying on a potentially misleading selfie.
How Do You Measure Your Face Shape at Home Using 3 Quick Landmarks?
You can estimate your face shape by comparing forehead width, cheekbone width and jaw dimensions, then checking those measurements against face length. Use a flexible measuring tape, keep your hair flat and measure in front of an eye-level mirror. The aim is to identify your dominant proportions, not force your face into a perfectly defined category.
Start with clean, dry or comfortably secured hair, pulling any fringe away from the forehead. Keep your head upright, your expression relaxed and the measuring tape level wherever the measurement requires a horizontal line.
- Forehead: measure across its widest visible area, generally between the temples, without including hair volume.
- Cheekbones: measure across the most prominent part of the cheekbone area, typically beneath the outer corners of the eyes.
- Jaw: measure along one side from the jaw angle below the ear towards the chin, following the contour rather than treating it as a straight horizontal width. Repeat on the other side if necessary.
- Face length: measure from the central hairline to the bottom of the chin, using the same relaxed head position.
Write down the numbers in centimetres. The jaw measurement follows a different path from the forehead and cheekbone widths, so avoid treating the values as perfectly equivalent dimensions. Use them together with the visible outline and jaw angle.
Traditional hairstyle guides describe several common categories. The University of Kentucky’s Face Shape and Hair Care publication identifies oval, round, rectangular, pear, heart, diamond and square shapes. It also encourages considering texture, lifestyle and styling time rather than selecting a haircut from facial proportions alone.
| Proportional tendency | What to look for | Styling direction to consider |
|---|---|---|
| Round | Face length and width appear relatively similar, with softer contours. | Consider controlled side volume and some height or vertical movement. |
| Square | Forehead and jaw appear similarly broad, with a more defined jaw angle. | Try soft face-framing movement if you prefer to reduce the emphasis on angular lines. |
| Rectangular or long | Face length is notably greater than its width. | Consider a fringe or carefully placed side volume to change the apparent proportions. |
| Heart | Upper face looks broader relative to a narrower chin. | Explore movement or fullness closer to the lower face. |
| Diamond | Cheekbones appear broader than the forehead and jaw. | Consider softening the cheekbone-level silhouette or balancing volume above and below it. |
| Pear | Jaw appears broader than the upper face. | Try adding visual interest or fullness towards the temples. |
| Oval | Face appears longer than wide, with relatively balanced upper and lower proportions. | Choose primarily according to texture, preferred silhouette and maintenance. |
This is a guide to conventional visual styling, not a validated diagnostic measurement system. Many faces combine characteristics from more than one category.
For additional verification, trace your visible facial outline on a straight-on printed photograph or use a washable marker on a mirror while keeping your head still. Notice whether the forehead, cheekbones or jaw dominate visually, and whether the sides look rounded, straight or tapered.
Avoid using a close wide-angle selfie for the outline. Hair standing away from the temples, a tilted camera or a chin raised towards the lens can alter the shape you perceive.
Keep the measurements as a starting point rather than a verdict. Fringe length, natural parting and the way your hair dries will determine how those proportions translate into an everyday hairstyle.
Curtain Fringe or Blunt Fringe: Which One Works If You Hate Daily Styling?
A longer curtain fringe is often the more forgiving choice for someone who dislikes daily styling because it can blend into surrounding layers as it grows. A blunt fringe creates a stronger horizontal line and may change the apparent length of the face more noticeably, but its shape generally needs closer attention. Hair texture and growth patterns can reverse either advantage.
A curtain fringe typically opens around the centre of the forehead and becomes longer towards the sides. Its angled outline can frame the temples and cheekbones without creating one uninterrupted edge across the face.
By contrast, a blunt fringe makes the forehead boundary more obvious. That can be appealing when someone wants a shorter-looking facial silhouette, particularly with a longer face shape. It can also strengthen the geometric appearance of an already angular haircut.
According to Allure’s hairstylist advice on curtain bangs, longer curtain fringes can gradually blend into surrounding hair, although their styling and maintenance needs vary by texture, growth pattern and the desired result.
The main trade-off is how the fringe behaves between washes and appointments.
| Consideration | Curtain fringe | Blunt fringe |
|---|---|---|
| Rounder or wider face | Angled sections can create a narrower-looking frame around the temples. | A strong horizontal line may emphasise width, depending on length and overall cut. |
| Longer face | Can soften the forehead while preserving some visible length. | Can create a more pronounced impression of reduced face length. |
| Square or angular jaw | Soft movement can contrast with a defined jawline. | A geometric fringe can reinforce an intentionally structured appearance. |
| Natural waves or cowlicks | May need direction-setting or occasional heat styling. | May require frequent smoothing to retain a straight edge. |
| Growing out | Longer sections may integrate into face-framing layers. | The changing line is often more noticeable and may require reshaping. |
Neither fringe is automatically low-maintenance. Naturally straight hair that falls consistently across the forehead may make a blunt fringe straightforward to manage. A curtain fringe with a strong central cowlick might take more effort than expected.
Curly hair introduces another consideration: the fringe may sit higher when dry because of shrinkage. Its final length should be assessed in the natural texture, not only when wet or stretched.
If you are unsure, consider a longer split fringe that reaches towards the cheekbones and connects gradually into face-framing layers. This provides more flexibility for tucking or changing the parting while you decide whether a shorter fringe fits your routine.
The most successful fringe is one that behaves predictably on your hair. That same principle explains why copying a photograph of a celebrity’s haircut can produce an unexpectedly different result.
The Celebrity Haircut Mistake That Makes Your Features Look Unbalanced
The main mistake when copying a celebrity haircut is reproducing its outline without considering the styling that creates the photographed result. Professional lighting, carefully directed volume, extensions or finishing products can change how a cut appears. Even when the shape is reproduced accurately, different hair density, texture and facial proportions may make it behave differently in everyday life.
A reference photograph contains more information than a haircut name. A softly curved bob may depend on a round-brush finish. A fringe that looks effortless may have been dried in a precise direction. What appears to be naturally full hair may have been styled to create lift in selected areas.
When only the cutting outline is copied, the relationship between volume and face shape changes.
Imagine a hypothetical example: someone with naturally fine, straight hair brings a photograph of a textured, high-volume celebrity bob. The stylist cuts the same length, but the hair lies close to the head at the crown and expands slightly at the jaw. Instead of recreating the reference’s height and movement, the cut creates a different silhouette.
The problem is not that either person has the wrong facial features. The inspiration image and the everyday result simply have different structures.
A better approach is to evaluate inspiration photographs in this order:
- Find examples featuring hair with a similar natural texture, density and curl pattern.
- Compare where the hairstyle is widest relative to the forehead, cheekbones and jaw.
- Identify the element you actually like: crown height, fringe direction, movement or perimeter length.
- Ask whether that element can be reproduced without daily styling that exceeds your available time.
Adapt the balancing element rather than copying the entire silhouette. For example, a stylist may preserve the reference’s longer front sections but use a different layering structure to accommodate your natural texture.
This also prevents unnecessary reliance on corrective makeup. If a haircut creates a stronger horizontal frame than intended, adding progressively heavier contour may not solve the underlying issue. First revisit the volume placement, weight line and shortest layers.
A small structural change can be more consistent than trying to recreate professional photographic lighting every morning.
Once the desired effect is separated from the reference photograph, the next decision is where the shortest face-framing pieces should finish, both immediately and as they grow.
When Should You Adjust Face-Framing Pieces So They Don’t Sit at the Awkward Length?
Adjust face-framing pieces when their ends begin falling at a position that changes the silhouette in a way you dislike, especially around the jaw’s turning point. The right moment depends on growth, texture and how the sections move when dry. Sometimes a small reshape helps; other times allowing them to grow past that position is the better choice.
The awkward length is not a fixed measurement in centimetres. It describes the point where a shorter piece no longer frames the cheekbone as intended but has not yet become long enough to integrate smoothly into the rest of the haircut.
For some people, that occurs when the ends reach the lower cheek or jaw angle. The hair may turn inward towards the cheek, flick outward or repeatedly separate from the longer layers.
Look for practical signs rather than waiting for a predetermined number of weeks:
- The shortest section now stops at a different facial landmark from the original cut.
- It falls into the cheek or eye unless repeatedly repositioned.
- It curls inwards or outwards at the jaw in a way that alters the intended frame.
- It no longer blends when the rest of the hair is air-dried.
- Tucking it behind the ear creates an awkward bend or gap.
There are two different approaches, and they serve different goals.
Trimming the piece shorter can restore the original face-framing effect, particularly when the intention is to keep a defined cheekbone-level layer. The trade-off is losing some length and potentially extending the time required to grow out the cut.
Blending it into longer layers can reduce the distinction between the shortest piece and the surrounding hair. This is often preferable when the overall goal is a softer outline or continued growth.
Neither option guarantees the same result on straight, wavy and curly textures. Ask the stylist to assess the section when dry, including its natural bend and shrinkage.
Waiting can be sensible too. Once a face-framing layer moves beyond the jaw and towards the collarbone, it may fall into a more vertical line. During the transition, try changing the parting, tucking the section or using a discreet clip rather than automatically cutting it again.
These choices become easier when they are discussed before the haircut starts. A short but precise salon consultation can prevent many misunderstandings about length and shape.
How Do You Ask for a Professional Cut in 2 Minutes Without Getting the Wrong Shape?
Ask for a haircut by describing where you want volume, where the shortest pieces should finish and how much styling you can realistically do. Mention your main concern in photographs, then ask the stylist to show the proposed weight line and face-framing length before cutting. These details communicate more than simply requesting a bob or layers.
Haircut names can describe several substantially different structures. A blunt bob has a clearly defined perimeter, a graduated bob builds weight differently towards the back, and an angled bob may retain more length towards the front.
For a practical illustration of that variety, Allure’s comparison of nine bob haircut styles describes layered, sharp, A-line and textured versions, alongside the importance of natural texture and styling preferences.
Prepare two reference images if possible: one showing the outline you like, and another illustrating the finish you would realistically maintain. They do not need to show the same person or identical haircuts.
Then use a consultation script such as:
“My face looks a little wider around the cheeks in close-up photos, and I’d prefer a softer frame. My hair naturally sits quite flat on top, and I usually air-dry it. I’d like to keep the shortest pieces below my cheekbones. Where would you place the weight line, and how will it look without a blow-dry?”
This is a sample script, not a professional quotation. Replace the details with your actual proportions, hair behaviour and preferences.
Ask two particularly useful questions: Where will the weight line sit relative to my jaw? And what will this shape look like when air-dried?
Before the stylist cuts, request a dry-section demonstration. Holding the front hair at its proposed final length provides a physical reference that is more reliable than interpreting the words “short layers” differently.
Your five-step haircut consultation checklist
- Record your proportions: write one sentence identifying your widest facial area and whether your jaw or forehead is more prominent.
- Select two reference images: save one image for the outline and one for the everyday finish, labelling what you like in each.
- Set your styling limit: write down whether you air-dry, use a diffuser or are willing to blow-dry regularly.
- Confirm the cutting geometry: ask the stylist to demonstrate the proposed weight line and shortest face-framing length using dry sections.
- Agree on the grow-out plan: leave with a clear explanation of how the cut should fall naturally and which areas may need reshaping first.
The checklist gives both you and the stylist something concrete to verify. It also makes clear when a particular reference look requires more styling than you want to undertake.
A successful consultation should produce a cut that makes sense outside the salon. Comparing the result under realistic photographic conditions is the next useful check.
Why Does Your Face Look Flat on Camera Even When It Looks Fine in the Mirror?
Your face may look flatter in a photograph because the image reduces some depth and movement cues that are easy to perceive in a live mirror view. Camera distance, lighting and head position also affect apparent proportions. A haircut that looks dimensional in person may appear more uniform in a single photograph, particularly when its volume is symmetrical.
A mirror offers a continuous, familiar view that changes as you move. A photograph records one instant, from one viewpoint, with one particular lighting arrangement. The familiar mirror image is also reversed relative to many photographs, which can make normal asymmetries feel more noticeable.
The haircut can influence how much dimension survives that transition. Three adjustable features are worth examining:
- Layer direction: subtle differences in how layers fall can create movement and gentle shadow variation.
- Crown and root volume: controlled lift can change the hairstyle’s vertical outline without increasing its width at cheek level.
- Parting position: a slightly off-centre part can introduce a diagonal line into an otherwise symmetrical silhouette.
These are styling possibilities, not requirements. A sleek central part and minimal layers can look excellent on camera when that is the preferred aesthetic.
Makeup also responds differently to light and image processing. Diffused blush and subtle contour may be less noticeable under flat, bright illumination, whereas directional lighting can make even gentle contour appear pronounced.
Rather than automatically applying more makeup for photographs, test the placement first. A slightly more defined blush boundary, gradual shading beneath the cheekbones or a small change in highlight position may provide the dimension you want. Keep the result blended and assess it under the actual lighting conditions.
Importantly, focal length alone does not determine facial perspective. With the same camera-to-subject distance, changing focal length and cropping to equivalent framing does not independently change perspective. Distance and viewpoint are the primary variables to control.
For a useful test, position the camera approximately at upper-chest to eye height, set it farther away than a typical close selfie, and face diffuse daylight from a window. Use a timer or tripod where possible. Keep your distance, head angle, lighting and facial expression consistent while comparing a central part, a slight side part and a little root lift.
Then compare the photographs at similar framing. This helps isolate the effect of the hairstyle rather than mistaking a change in camera angle for a change in facial balance.
Once you know which shape works in normal lighting and from a sensible distance, the final question is whether it will remain practical as the hair grows.
Key takeaways before choosing your cut
- Choose a silhouette that works with your natural texture rather than depending on a precise salon finish.
- Discuss how the weight line, fringe and shortest layers will change as the hair grows.
- Prefer manageable adjustments that preserve the balance you like without creating unnecessary daily styling.
Which Professional Cut Still Looks Good After 8 Weeks Without Constant Styling?
A softly layered cut with well-blended face-framing pieces is often a practical option for maintaining a balanced silhouette over eight weeks, especially when it follows the hair’s natural movement. Precision bobs and sharply defined fringes may need more attention as their edges grow. The best choice depends on texture, growth patterns and how much styling you are comfortable doing.
The important distinction is between a haircut whose visual effect depends on exact lines and one whose shape can accommodate some length change.
A sharp, chin-length bob may look particularly defined immediately after cutting. As the ends extend below their original position, the perimeter can sit differently relative to the jaw, changing the intended silhouette.
Blended layers create a more gradual transition between lengths. When well executed for the hair’s texture, their movement may remain visually cohesive as the hair grows, although the distribution of weight will still change.
There is no guarantee that a layered cut will look better than a precision cut after eight weeks. Hair growth, density, styling habits and the quality of the original cut all influence the result.
| Your preference or proportions | Cutting approach to consider | Grow-out consideration |
|---|---|---|
| Want less side width around the cheeks | Soft layers with controlled volume at cheek level and movement through the crown. | Check whether the side layers become fuller as they lengthen. |
| Want to reduce the appearance of facial length | A fringe or fuller side shape that creates a horizontal visual element. | A defined fringe may need attention before the rest of the haircut. |
| Want a softer frame around an angular jaw | Blended face-framing sections or a softly textured bob. | Check where the shortest pieces will sit as they approach the jaw. |
| Prefer air-drying with natural waves | A textured shape designed around the existing wave pattern. | Movement may accommodate growth, but weight can gradually reduce lift. |
| Prefer a precise geometric finish | A blunt or sharply structured bob. | Expect the defined perimeter to become less exact as it grows. |
Before committing, ask the stylist to describe how the proposed cut is likely to sit after four and eight weeks on your hair texture. Request examples of their work during the growing-out phase, if available, rather than relying exclusively on photographs taken immediately after an appointment.
A low-maintenance haircut is not necessarily a no-maintenance haircut. Moving the parting slightly, lifting the roots with your fingers or directing face-framing pieces as they dry may be enough to preserve the preferred outline on some hair types.
Other textures may require more deliberate maintenance, particularly where shrinkage, strong growth patterns or fringe separation affect the shape.
The most useful measure of a successful cut is not how little effort it requires in theory, but whether the effort matches your normal routine.
For your next salon appointment, choose one realistic reference photograph, identify the facial area you want the cut to frame, and agree on where the shortest pieces will finish. Ask to see that length on dry hair and discuss how the style should behave as it grows. A haircut that suits both your preferences and your routine is a more useful goal than following a rigid face-shape rule.
Can a haircut make your face look wider without changing your actual proportions?
Yes. Hair volume, perimeter length and the direction of layers influence the outline surrounding the face. A shorter cut with fuller sides may create a wider-looking silhouette than longer hair that falls vertically. This is a matter of visual framing, not a change in bone structure or facial dimensions.
Should you avoid short hair if you have a round or square face?
No. Short hair can work with round, square and other facial proportions. The more useful questions concern where the cut creates volume, how its perimeter relates to the jaw and whether the natural texture supports the desired shape. Face-shape guidance provides optional aesthetic directions rather than restrictions.
Is it better to choose a haircut from a mirror or a photograph?
Use both, but give more weight to how the haircut behaves in everyday life. A mirror shows movement and changing angles, while a photograph helps assess a particular outline. For photo comparisons, keep the camera distance, viewpoint and lighting consistent instead of relying on close-range selfies.
Can you make a haircut look softer without cutting it again?
Sometimes. Changing the parting, directing the ends away from the jaw, reducing volume at the sides or introducing gentle movement can change the apparent frame. Makeup placement may also influence the overall impression. If the haircut’s weight line itself is causing the unwanted effect, however, a professional adjustment may be more dependable.
How do you know whether a haircut will still suit you after eight weeks?
Ask your stylist how the weight line, fringe and shortest layers are expected to shift as they grow. A cut with blended transitions may retain its intended movement more easily than one relying on an exact edge, but results vary by texture and individual growth. There is no universal eight-week guarantee.