
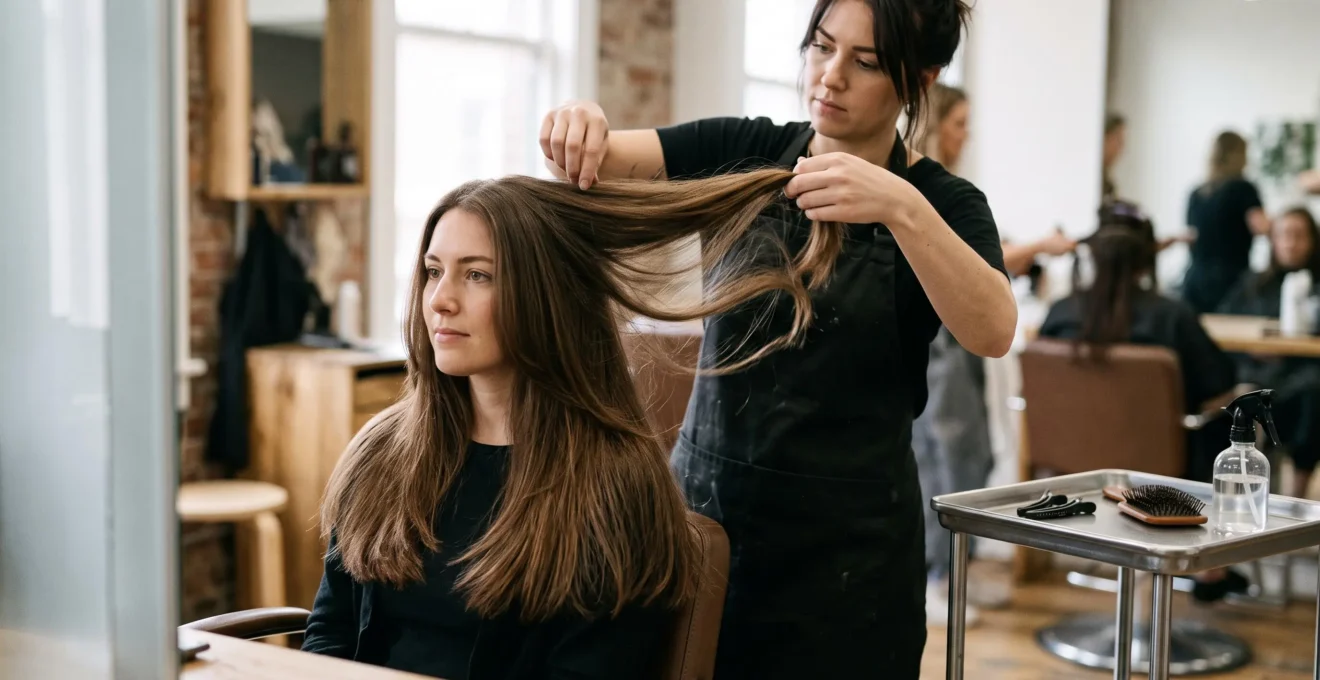
Hair that moves beautifully doesn’t necessarily have lots of layers. It has the right distribution of weight. When the internal shape allows sections to fall independently, hair can look lighter and more fluid without sacrificing the fullness of its ends.
The challenge is knowing where to create that movement. Remove too much weight, and fine hair may look stringy. Cut short layers into naturally expansive hair, and the silhouette may become wider rather than softer. Even a well-designed haircut can appear stiff when styling products accumulate or a straightener leaves sharp bends.
The most reliable approach is to preserve enough weight around the perimeter, introduce controlled variation where the hair needs direction, and finish it according to its natural texture. Whether you’re growing out a blunt bob, considering a razor cut or trying to reduce everyday styling, the goal is the same: movement without losing the appearance of density or encouraging unnecessary frizz.
Movement without frizz: the essentials
- Keep the perimeter substantial and introduce carefully blended layers where movement is needed, rather than automatically thinning the ends.
- Use smooth, continuous styling movements and suitable conditioning products to manage flyaways without creating rigid-looking sections.
- Choose layering and cutting techniques according to your natural texture, styling habits and desired grow-out, not simply the amount of movement you want.
- Why Does Hair Still Look Heavy After You Ask for “More Movement”?
- How Do You Style Movement With a Straightener Without Making Ends Look Bent?
- Razor Cut or Point Cut: Which One Adds Movement Without Increasing Frizz?
- The Over-Texturising Mistake That Makes Hair Look Thinner at the Ends
- When Should You Add Movement Layers If You’re Growing Out a Blunt Cut?
- Internal Layers or Face-Framing Layers: Which One Stops Hair Puffing Out?
- Long Layers or Shag Layers: Which One Air-Dries Better With Minimal Fuss?
- How Do You Tell if a Haircut Will Grow Out Awkwardly After 6 Weeks?
Why Does Hair Still Look Heavy After You Ask for “More Movement”?
Hair can still look heavy after a movement-focused haircut because the stylist may have softened the ends without changing how weight is distributed through the interior. If most strands continue to fall together at one level, the overall shape remains solid. Movement requires controlled separation between lengths, not simply less hair.
Imagine hair falling from the crown like a thick curtain. When most sections reach the same lower edge, they reinforce one another visually. The shape can appear rectangular, especially on straight hair. Carefully positioned internal graduation changes where sections overlap, allowing light to catch different surfaces and giving the silhouette more variation.
That doesn’t make dense hair a problem. Density describes how much hair grows on the scalp; weight distribution describes how the haircut behaves. A full head of healthy hair can look heavy because of its shape rather than excessive bulk. Removing substantial amounts of hair with thinning shears may reduce fullness without creating the direction the client originally wanted.
Try a simple visual check after washing and drying your hair in its usual way. Comb it down, then gently move the lengths from side to side. Does the entire shape swing as one solid panel, or do sections settle independently? This is a useful observation, although natural texture, product use and drying technique also influence the result.
Before booking another cut, consider residue. Styling creams, sprays and serums can accumulate. Cleveland Clinic‘s advice on hair washing and product buildup notes that cleansing needs vary by hair type and suggests occasional clarifying shampoo when substantial styling-product buildup is present. A suitable cleansing reset may help you judge the haircut more accurately before removing more length.
The salon conversation should focus on the cut’s architecture rather than the vague instruction to make it lighter.
| Ask your stylist | What the answer should clarify |
|---|---|
| Will you create internal layers or only soften the perimeter? | Whether the overall silhouette will change or just the texture of the ends. |
| Where will the shortest layer begin? | How much shape will be introduced and which areas may gain volume. |
| How will you finish the ends? | Whether the result should look feathered, defined or deliberately full. |
These questions are especially useful if previous appointments left your hair looking thinner but no more dynamic.
Once the haircut has enough variation to move, the next challenge is styling that movement without leaving obvious bends or separated-looking tips.
How Do You Style Movement With a Straightener Without Making Ends Look Bent?
To create soft movement with a straightener, work in manageable sections, maintain gentle and even pressure, and introduce a gradual curve as the tool travels through the lower part of the hair. Keep the straightener moving until it clears the ends. Sudden twisting, stopping or releasing can create the sharp hinge you’re trying to avoid.
Start with completely dry, detangled hair and a heat protectant suitable for your hair type. Choose an appropriate temperature and avoid repeatedly passing over the same section. The aim is to redirect the strand, not force it into a tight curl.
For a relaxed finish, begin with the straightener in a neutral position, following the natural fall of the hair. As you approach the area where you want the movement to appear, gently rotate your wrist. Maintain a smooth glide through the ends rather than clamping tightly and turning the plates abruptly halfway down the strand.
Think of the intended shape as a broad curve rather than an angle. The narrower the section and the more pronounced the wrist rotation, the easier it is to create a visible bend instead of a loose wave.
A common finishing error is releasing pressure suddenly just before the tips. Another is stopping the plates while rotating the wrist. Either can leave a distinct change in direction. A continuous pass and lighter tension help create a more fluid finish, although the tool’s shape and the hair’s response to heat also matter.
For fine, fragile or heavily processed hair, consider starting without a straightener. A large-barrel round brush can give the mid-lengths a gentle curve during blow-drying. Finish with a cool shot to help the hair settle, then use the straightener only if a small area still needs refinement. This can reduce the amount of direct plate contact, provided blow-drying is also done with controlled heat.
Blunt cuts need particular attention. Strongly bent ends can make sections look chunky, while overworked tips may appear separated. Once the hair has cooled, gently brush through the shape. A small amount of lightweight finishing cream or leave-in conditioner may smooth flyaways without eliminating movement.
The American Academy of Dermatology‘s leave-in conditioner recommendations explain that suitable products can reduce frizz, static and flyaway strands. However, only certain leave-in formulations also offer heat protection, so the product label matters.
Styling can enhance the cut’s movement, but it cannot fully compensate for an end structure that has been excessively thinned or poorly matched to the hair’s texture.
Razor Cut or Point Cut: Which One Adds Movement Without Increasing Frizz?
Both razor cutting and point cutting can add movement, but they create different finishes. Razor cutting produces softer, more tapered edges, while point cutting uses scissors to selectively soften a line. For hair prone to frizz or sparse-looking ends, controlled point cutting may offer a more conservative starting point, although neither technique is automatically better for every texture.
A razor moves along the hair to create a feathered finish. When the technique is appropriate, this can make a solid haircut feel lighter and more fluid without the appearance of obvious, separate layers. The amount removed, the angle of the blade and the stylist’s control all affect the result.
Point cutting approaches the ends differently. Instead of slicing along the lengths, the stylist uses the scissor tips to make small cuts into the edge of a section. This can break up a hard cutting line while leaving substantial weight nearby.
Neither technique necessarily reduces frizz. Hair condition, natural curl pattern, tool condition, moisture and finishing methods can all influence how the ends behave.
Professional experience is useful here. Allure‘s interviews with hairstylists about razors and thinning shears describe razor work as a way to produce soft, feathered edges and point cutting as a method of introducing movement while managing weight. The techniques can also be combined. These observations are professional guidance, not controlled evidence that one method prevents frizz better than the other.
The practical decision depends on texture and the desired finish. The following distinctions are useful consultation starting points rather than fixed rules.
| Hair characteristics | Possible starting approach | Main consideration |
|---|---|---|
| Straight, medium-to-fine hair | Light razor work or restrained point cutting | Avoid removing so much weight that the perimeter looks wispy. |
| Thick, coarse or frizz-prone hair | Controlled point cutting may be preferable | Preserve enough weight for the natural texture to settle. |
| Very curly or tightly coiled hair | Consider dry, curl-by-curl shaping | Assess shrinkage and the shape of individual curls before selecting a cutting tool. |
| Fine hair with visibly delicate ends | Minimal texturising and a more defined perimeter | Prioritise end fullness over a heavily feathered appearance. |
Grow-out also deserves discussion. A feathered edge may change its appearance as the hair grows, while a more defined edge can make the perimeter easier to recognise between appointments. But there is no reliable universal rule that razor cuts will flip out after a certain number of weeks or that point cuts always maintain their shape longer.
If you’re considering razor cutting, ask how the stylist chooses the blade, maintains its sharpness and decides how much hair to remove. An unsuitable or poorly maintained tool can affect the cut quality. Frizz after a razor cut should not automatically be blamed on the technique itself.
The bigger risk often comes from excessive texturising rather than the choice between razor and scissors. Removing too much internal weight can undermine the very fullness that makes a moving haircut look healthy.
The Over-Texturising Mistake That Makes Hair Look Thinner at the Ends
Over-texturising happens when too much hair is removed from the internal lengths or perimeter, leaving insufficient weight to support a full-looking finish. The result can be short, disconnected pieces above visibly sparse ends. Instead of making the haircut move more naturally, excessive texturising can create uneven separation and a thinner-looking silhouette.
This is particularly frustrating when the original request was to make thick hair feel lighter. Removing bulk may initially make the cut feel less substantial, but the shape can lose cohesion if too much weight disappears from the same areas.
On fine hair, the effect may be more obvious. Since the individual strands already offer limited visual coverage, extensive layering can make the ends appear almost transparent, especially against contrasting clothing.
Movement and thinning are not interchangeable. A haircut can have several lengths while retaining a substantial perimeter. Conversely, hair can be heavily thinned yet still lack a flattering overall shape.
One useful check is to gather the hair gently into a low ponytail and examine its width from the hair tie towards the tips. Some tapering is entirely normal, particularly with natural growth cycles, breakage or existing layers. However, a sudden reduction in fullness near the lower lengths, especially when paired with numerous short pieces, may suggest the cut has too little weight at the ends.
Compare that observation with photographs taken before the appointment. This can help distinguish a new cutting issue from an existing pattern of naturally finer ends.
Five checks before requesting corrective texturising
- Photograph the natural fall: Take one front and one back photograph after your usual wash-and-dry routine. Keep both as a visual record of the current silhouette.
- Check end fullness: Gather the lengths into a loose low ponytail and note where the tail starts looking noticeably narrower. Record the approximate location.
- Identify unwanted short pieces: Gently separate the surface and interior hair. Make a note of any areas that look disconnected rather than softly blended.
- Define what must stay: Choose a reference photograph showing the perimeter fullness you want to preserve. Bring it to the consultation.
- Agree on the next cut: Ask the stylist to identify which lengths will be retained, which ends may need tidying and whether the proposed shape supports your grow-out goal. Leave with a clear cutting plan.
Correcting excessive texturising takes patience because removed hair cannot be reattached. If overall length is the priority, gradual trims can help the shorter sections catch up over time. If visual fullness matters more immediately, a stylist may suggest a slightly shorter, more substantial perimeter while keeping internal layers restrained.
One or two appointments may improve the appearance of the shape, but complete correction depends on the difference between the shortest and longest sections and how much length you’re willing to lose. There is no guaranteed number of trims.
When discussing future layers, use a specific reference point rather than requesting plenty of texture. For some styles, keeping the shortest visible layers around or below the cheekbone or chin can help limit dramatic separation, but the right placement depends on hair length, texture, face shape and the desired silhouette.
A conservative approach is especially valuable when you’re growing out a blunt haircut, because every new layer needs to work with the length you’re trying to retain.
When Should You Add Movement Layers If You’re Growing Out a Blunt Cut?
Add movement layers to a growing blunt cut when the hair has enough length to accommodate shorter internal sections without compromising your target shape. Rather than introducing deep layers immediately, start with modest, strategically placed softening. Preserve the perimeter until you’re closer to the desired length, then decide whether more pronounced layering is necessary.
A blunt bob or lob often looks intentional when the ends sit at a precise point. As it grows, that same strong line can begin to feel less structured. The temptation is to ask for layers immediately, but introducing short sections can change the proportions of the cut and complicate the grow-out.
The better approach is to separate the goals of maintaining length and improving movement. You don’t always need to pursue both through a substantial haircut at the same appointment.
Consider a two-phase plan.
- During the early grow-out: Keep the external line relatively full. If the shape genuinely needs softening, discuss limited internal or face-adjacent adjustments rather than comprehensive layering.
- Closer to your target length: Reassess the natural fall of the hair and introduce longer, blended layers if they will improve the final silhouette.
The awkward middle stage deserves particular care. Hair may no longer look like a sharp bob, yet still be too short for the flowing layers you want. That doesn’t automatically mean the haircut needs rebuilding.
Temporary styling can create direction during this period. A gentle round-brush finish, a soft curve from a straightener or a different parting can make the same cut appear less rigid without removing additional length.
Another option is to tidy the perimeter while leaving most of the interior untouched. That can help the haircut look more deliberate while retaining the material needed for future layers.
Be explicit about the fringe and front sections. Short face-framing pieces may create movement around the cheeks, but if you’re growing those pieces out too, cutting them again can prolong the transition. Discuss whether they genuinely need reshaping or simply blending into the longer lengths.
Preserving the perimeter is often the safest starting point when the main objective is length retention, although some textures and existing shapes may require a different approach.
The next consideration is location: if your hair tends to expand sideways, the difference between internal and face-framing layers becomes more important than the number of layers requested.
Internal Layers or Face-Framing Layers: Which One Stops Hair Puffing Out?
Internal layers are generally considered when unwanted volume affects the sides or back of the hairstyle, while face-framing layers mainly change the shape around the face. Neither automatically stops puffiness. The right choice depends on where the hair expands, its natural texture and whether removing or redistributing weight will make the silhouette more controlled.
Internal layers sit within the haircut and are intended to influence how the surrounding lengths fall. Depending on their placement, they can encourage separation and reduce the appearance of a solid shape without making the outer layers look dramatically shorter.
Face-framing layers are more visible. They create shorter sections around the forehead, cheekbones or jaw, drawing attention towards the face and changing the front outline of the haircut.
That difference matters when the problem is unwanted width. If the hair looks broad through the sides and back, adding shorter strands around the cheeks alone may do very little to change the overall shape. If the sides fall comfortably but the front feels heavy, face-framing may be enough.
However, the idea that all hair needs shorter interior pieces to lie closer to the head is misleading. On some textures, shorter layers lose the weight that previously helped them fall downwards, causing them to spring up or expand. This is particularly relevant for hair with strong curl, wave or natural volume.
Try assessing the pattern when the hair is dry and relatively free of heavy styling products. Gently smooth the sides and front, release them, and notice where volume returns. The result isn’t a definitive diagnostic test, but it can help you describe the problem more precisely.
| What you notice | What to discuss | What to avoid |
|---|---|---|
| Width throughout the sides and back | Carefully planned internal shaping that respects natural texture | Assuming more short layers will always reduce volume |
| Heaviness concentrated around the face | Soft, blended face-framing layers | Cutting the front too short without accounting for natural lift |
| A full perimeter with little movement | Long internal layers with the outer line preserved | Removing weight indiscriminately from the ends |
| Short pieces already puffing out | Reshaping or growing out the existing layers | Adding more short pieces to the same area |
Combining internal and face-framing layers can work beautifully when the transitions are balanced. The risk comes from doing both too aggressively, especially on fine hair or hair that expands when its supporting weight is removed.
A conservative first appointment allows the stylist to observe the result before introducing further layers. Once the weight has been cut away, adjusting the shape may require waiting for regrowth.
Layer placement also determines how much work the haircut needs at home. A shape that looks excellent after a professional blow-dry may behave very differently when left to air-dry.
Long Layers or Shag Layers: Which One Air-Dries Better With Minimal Fuss?
Long layers are often the more manageable option for people who want a soft, understated shape with minimal styling, while shag layers tend to emphasise texture, lift and separation. Naturally wavy hair may suit a shag particularly well, but the outcome depends on curl pattern, density and how the hair dries without assistance.
Long layers create gradual differences in length. When they are well blended, the hair can retain a recognisable outline even without deliberate styling. This makes them appealing if you prefer a smoother finish or want to preserve fullness through the lower lengths.
A shag is constructed around more pronounced variation, often with shorter layers through the crown and around the face. These sections are intended to create a textured, sometimes deliberately undone appearance.
On naturally wavy hair, shorter pieces may encourage visible separation and help the existing wave pattern become more apparent. On very straight hair, those same pieces may need styling to create the intended shape. Fine hair can also look more separated when too much weight is removed.
Thick hair may support a shag’s pronounced shape, but shorter crown layers can increase visible lift. That may be welcome if you want volume at the top, or frustrating if you’re trying to keep the silhouette compact.
| Consideration | Long layers | Shag layers |
|---|---|---|
| Typical silhouette | Soft, blended and comparatively continuous | Textured, separated and more pronounced at the crown |
| Fine, straight hair | Often easier to keep full-looking with restrained layering | May need styling to prevent a flat or separated finish |
| Naturally wavy hair | Can support soft movement without major reshaping | Can bring out existing wave and textured definition |
| Thick hair | Can retain substantial weight and a controlled outline | May create more crown volume if shorter pieces spring outward |
| Daily product routine | May need little additional styling | May benefit from texture-enhancing or curl-defining products |
| Grow-out appearance | Often offers gradual transitions between lengths | Shorter crown and front sections may become more noticeable as proportions change |
The phrase « wash-and-go » needs a little honesty. Even a haircut intended for natural drying may behave differently depending on whether you comb it wet, scrunch it, touch it while drying or apply styling products.
For a useful assessment, try leaving the hair to air-dry in a consistent way for several washes. Observe how the shape settles without adding extra styling. Then test one adjustment at a time, such as gentle scrunching or a lightweight leave-in product.
This makes it easier to distinguish the haircut’s natural behaviour from what your routine is producing. A shag that needs a little product isn’t necessarily high-maintenance, but it may not be the right choice for someone who wants to use nothing at all.
The best choice is the cut that behaves acceptably on an ordinary morning, not just the one that photographs beautifully immediately after a salon appointment.
Daily maintenance is only part of the decision. A haircut also needs to keep a workable shape as different sections grow, particularly if you prefer not to book frequent reshaping appointments.
What to decide before your next haircut
- Agree on which sections should remain full and which can be softened, so movement doesn’t come at the expense of the ends.
- Judge the hairstyle in its natural dried state, not only after a smooth salon finish.
- Ask how the shortest layers and outer perimeter are expected to behave between appointments, especially around the chin and shoulders.
How Do You Tell if a Haircut Will Grow Out Awkwardly After 6 Weeks?
A haircut is more likely to feel awkward after six weeks when its appearance relies on a very precise outline or a strong contrast between short and long sections. Softly blended transitions often offer more flexibility, but the result depends on natural texture, growth and styling habits. Ask the stylist how the shape is expected to change before leaving the salon.
Six weeks isn’t a guaranteed turning point. Some cuts retain their intended silhouette beyond that stage, while others need earlier reshaping. The important question is whether changes in length will alter the balance of the hairstyle in a way you dislike.
Consider a sharply defined blunt cut. Its impact often comes from the clean perimeter and the position of that line against the neck or shoulders. As the hair lengthens, the ends may begin interacting differently with the shoulders, changing their direction or the apparent width of the shape.
Similarly, very short face-framing pieces can create a clear contrast with much longer hair at the back. As they grow, the overall relationship between sections may feel less intentional, particularly if the shortest layers sit at an awkward point around the face.
Neither detail makes a haircut inherently unsuitable. They simply mean that the cut’s appearance depends more strongly on maintaining its proportions.
Softly blended, graduated shapes can sometimes accommodate length changes more naturally because the differences between sections are less visually abrupt. However, excessive layering can create its own grow-out challenges, particularly when short interior sections lose definition or sit differently as they gain length.
Before leaving the salon, ask three practical questions:
- Which section is likely to reach my chin or shoulders next, and could that change how the hair sits?
- Will the shortest layers still blend into the rest of the cut as they grow?
- If the shape becomes awkward, can a small maintenance trim restore its outline without sacrificing my length goal?
These questions help you plan for the haircut beyond the first styling session. They’re particularly important when growing out a bob, managing a fringe or transitioning away from a heavily layered style.
Watch for features that may need attention: a very strong perimeter with no internal variation, notably short front layers against much longer back sections, or ends that have been extensively thinned while the upper lengths remain heavy.
These are warning signs to discuss, not proof that the cut will look bad at a particular date.
It is also worth deciding on a contingency plan before the next appointment. If the silhouette starts looking uneven, a small shape-preserving trim may be enough. If the issue is simply how the ends sit against clothing or shoulders, changing the drying direction or using a gentle styling curve may provide a temporary solution.
Regular photographs taken in similar lighting can make subtle changes easier to assess. Compare the overall shape rather than focusing only on the length gained.
At your next consultation, bring a photograph of how your hair looks after an ordinary wash and specify three priorities: the length you want to keep, the areas where you want movement and the fullness you don’t want to lose. That gives the stylist a clearer basis for designing a shape that looks good now and remains manageable as it grows.
Can you create movement in hair without cutting layers?
Yes. Round-brush blow-drying, gentle straightener curves and changes in parting can create temporary movement without altering the haircut. The result depends on hair texture and length. If the silhouette remains very solid despite styling, carefully placed layers may offer a longer-lasting structural change.
Will layers make naturally frizzy hair worse?
Not necessarily. Layers can help shape naturally textured hair, but sections cut too short or thinned too aggressively may expand or separate in ways you dislike. The stylist should account for curl pattern, density and shrinkage. Suitable leave-in conditioning products may also help manage frizz and flyaways.
Should you ask for thinning shears if your hair feels too heavy?
Not automatically. Heavy-looking hair may need better weight distribution rather than substantial thinning. Ask whether the stylist is trying to reduce bulk, change the silhouette or soften the ends. Thinning shears can be useful when applied selectively, but excessive removal can leave the lower lengths looking sparse.
What can reduce flyaways without making moving hair look flat?
Start with appropriate conditioning and gentle handling. A lightweight leave-in conditioner or small amount of finishing cream can help smooth flyaways while preserving the separation created by the cut. Apply conservatively, particularly on fine hair, and avoid overloading the roots or mid-lengths with multiple styling products.
Can over-texturised ends be made full again without losing length?
Styling can temporarily make separated ends look smoother, but it cannot replace hair that has been cut away. Gradual trims and regrowth can improve fullness over time while preserving as much overall length as possible. A more immediate change may require trimming the perimeter to create a stronger, more substantial line.